Jump to content
SAU Community

Recommended Posts

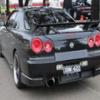
Hey Guys i just got this photo of my Car and im in love with it, except the fact that the car was dirty, is it possible that anyone could remove the dirt from my Car and keep it the same good looking picture?? If you can Then i would be very Grateful!!

post-60999-1252937673_thumb.jpg

post-60999-1252937795_thumb.jpg

Edited by Zaver
Link to comment
https://www.sau.com.au/forums/topic/287998-photoshop-the-dirt-off-my-car/
Share on other sites

I haven't contributed to the Computer art section for a while, take a look and let me know what you think of my 30mins work

the file on its own after being re-touched

post-40562-1253079191_thumb.jpg

and a comparison before and after

post-40562-1253079175_thumb.jpg

Hey Turk,

For this job, i created a duplicate layer and hid the original (just so i don't ruin the original in case i need to start over).

I used the Clone stamp tool as opposed to the healing brush, and sampled cleaner areas of the car that had similar color to the area that i was using it on.

I adjusted the Flow down until i got a level that wasn't sampling too much of the other parts of the car, but enough for the darker clean black to show up and just dotted the dirty areas slowly, some more than others.

Once i was done sampling, some of the lines between the panels (ie: skirt to door, front quarter to door) were very difficult to make out, on a new layer i used the brush tool, set to 100% flow, using pure black color and a very fine point(maybe 3px or so but with feathered edges) and drew in the lines for the creases that seemed to have been sampled over or were just hard to see, i then duplicated the layer, changed the lightness of the layer to +100 in the hue and saturation menu to make it white, and moved it one pixel right/left/up or down depending on the direction of the light.

Then just used the eraser on a large size (something like 50px with a feathered edge and flow down around 16% to rub away at the white and black lines i had drawn until they blended in enough to look like the actual lines of the car should.

Finally i merged all of those layers once i was happy with it and duplicated the resulting layer, set the layer style to multiply to bring out the dark tones, decreased the opacity of that layer until i got a nice smooth black that wasn't too dark (just looking at the paint and not the rest of the image).

Then used the eraser again on quite a large size, around 70px or so with a feathered edge, and on 100% flow to remove the majority of the out side of the image leaving just the car (keep in mind the original merged layer is still back there).

And to finish, i decreased the eraser size to a few different sizes using around 30% flow, depending on the area i wanted to erase, and started rubbing the paint sections back where there were reflections, as well as through the window and on the driver, the rims, headlights, tail lights, just anywhere that should be shiny.

And that is is for the most part, i probably made some alterations here and there, i think i added a gradient down the bottom to create the shadow you would see going under the car, but that is the gist of it.

-Steve

Hey Rush, that was actually a really good retouch, I'm guessing you used the healing brush? Mind taking me through how you got it so clean? I tryed to retouch it but had no luck on getting it as clean as you did!
  • 1 month later...
I haven't contributed to the Computer art section for a while, take a look and let me know what you think of my 30mins work

the file on its own after being re-touched

post-40562-1253079191_thumb.jpg

and a comparison before and after

post-40562-1253079175_thumb.jpg

Haha the wonders of photoshop :thumbsup:

And here i was coming into this thread to have a laugh why you wouldnt just clean the car and take more photos. :thumbsup:

They are some good action shots. Some good touch ups as well. Shame im not on my own comp or id have a go as well.

shh, i couldnt b bothered using the pen tool to neaten up those edges, no1 would have noticed if you didnt point it out, damn youuu

Create an account or sign in to comment

You need to be a member in order to leave a comment

Create an account

Sign up for a new account in our community. It's easy!

Register a new account

Sign in

Already have an account? Sign in here.

Sign In Now


  • Similar Content

  • Latest Posts

    • After using a protractor for an actually accurate assessment of what is required,  and by NOT using my uncalibrated eyeball I worked out I need a 25° silicone bend from the TB ro the MAF, but, my choice was either a 30° or a 23° (23° is a weird spec), so I grabbed the 23° one from Raceworks I also grabbed 1mtr of 3" straight from Just Jap, I needed 350mm, but they only had 300mm, or 1mtr lengths....meh Also ordered a 1/2" hose bulkhead fitting from fleabay, this has a smoothish mushroom looking head (they are designed for below the water line of boats) that will fit inside the bend, the hose bit and threaded bit looks to long, but nothing that a hacksaw cannot fix if required, the hose will then just get jamed on the threaded bit up to the retaining nut Fingers crossed and the unsightly amount of hose clamps will be reduced down to 4 once all the parts arrive 
    • Oil change does not trigger code 21. Code 21 is for coilpacks primary side connection. You can try to clear the code with a battery disconnect, hold down the brake pedal to drain capacitors through the brake lights with the ignition on for 10-15 seconds before you reconnect the battery. I have seen R35 coil conversion permanently cause this code with no ill effects so it might be the resistance it wants to see isn't quite right on one or more coilpacks. Could be inside the ECU, could be the harness, could be a coil. You can test it all if you want or just ignore until the car actually starts misfiring.
    • I forgot you have a Nistune ECU. Use Nistune to do all the tests I mentioned instead of faffing with 30+ year old electrical connectors. You can read MAF volts off that too, there are reference values in the service manual to tell you roughly what it should be in different conditions.
    • No. I think it might be the AFM. Hence the use of the terms "swaptronics", which implies the use of swapping out electronics for the purpose of diagnosis. It's about the only way to prove that a small/niggling/whatever problem with an AFM or a CAS or similar is actually caused by that AFM/CAS/whatever. A known good item swapped in that still gives the same problem is likely to be caused somewhere else. They're all the same. Spraying AFMs with cleaner is an each way bet between cleaning it and f**king it.
    • Oh wow! This might actually work amazingly. Do you know the ratio of the diff? I was told the only thing you need to make sure of is if the front & rear diff ratios are the same. Ours is a 4.083 Thanks!
×
×
  • Create New...