Jump to content
SAU Community

Recommended Posts

Hi all,

A couple of weeks ago I had he joy of being car no. 6 in a 7 car pile up on the F3 :D unfortunatley the front end of the car was pushed back enough for the insurance company to deem it as a write off. I am now selling the whole car as is, and before you start asking for specific parts I would prefer to try and sell it as a whole first. This car was my pride and joy and anyone who knew it knows how well it was kept, inside & out, aswell as meticulously serviced! Before this fateful day the car was making 272kw at the wheels.

I'm asking for $7000, which sounds significant, but when you consider the parts that are in it, aswell as the condition of many of the standard parts/interior/panels, its worth it. They could be sold seperately for a higher total value, however I really need the money available to me sooner!

Ok, so heres what was in it that WASN'T standard and is still undamaged:

Turbosmart E-Boost2

GT30R Turbo with actuator and associated piping to suit R33 S2

SARD Fuel pressure regulator

550 injectors (cant' remember the brand sorry)

Bosch 040 fuel pump

Exedy clutch, not brass button, 5puk from memory, still plenty of bite!

K&N Pod filter

Z32 AFM

Greddy BOV

Greddy oil catch can

Front and rear strut braces

3.5inch turbo back exhaust (xforce)

Kenwood double din touchscreen DVD player with 4x Kenwood 6inch speakers

QFM A1RM Brake pads front and rear (only 2weeks old!)

The Standard parts that are still good!

All seats

Original charcoal floor mats

Front left quarter panel

BOTH doors

Side skirts

Boot

Rear tail lights

Many more things I should probably list, but aren't coming to mind! Please feel free to request more/specific information and further pictures can be provided of any part of the car upon request.

**PLEASE NOTE**

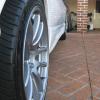
The wheels shown on the car in the pictures are NOT for sale, as I have put them on my new car. It comes with standard 300ZX wheels with 75% tread on them. (225/50/16)

Link to comment
https://www.sau.com.au/forums/topic/334466-wrecking-r33-gts-t-series-ii/
Share on other sites

Post prices for items, or this will be locked.

Forum rules are clear and simple

Trying to sell the car as a whole for $7000 ono (willing to negotiate, considering towing costs etc)

I'm not posting prices for individual items yet as I'm hoping I can sell the car as a whole. If I decide to part the car out a full list of prices will be provided, however I'm holding off on having to pull it all apart!

also willing to reduce the price by excluding 1 or 2 items (such as the sound system or brake setup) as I can use them on my new car. Minus these items i would accept 6k.

DVD system is a Kenwood DDX 7032, works perfectly, comes with box, manual, USB cable, RCA cables etc.

Not willing to seperate with the turbo atm, still hoping to sell the car as a whole.

I do, however I'm going to wait just a couple more weeks to see if anyone will buy the car whole. if not, i will inform you when I start parting it out.

regards.

  • 3 weeks later...

if I don't have a buyer for the car by the weekend (waiting to hear back from someone) I will begin parting the car out. In which case, I will give those who have already asked for parts priority and price the parts they have requested. I will update the prices of items as i manage to get them off the car, however feel free to ask for parts and prices!

Regards,

Sam.

*********UPDATE******************

ALL the running gear from the car and front brakes have been sold as a complete package.

This means that all other parts are now up for grabs, here is a short list of parts already pulled off the car ready to go, more parts and prices to come as I take them off the car, but feel free to make requests!

- Front left fog light assembly - $40

- Windscreen washer nozzles - $20

- Factory R33 Sideskirts - $150

- Genuine Nissan Dark Charcoal floormats, all very well maintained, in excellent condition - $80

- Genuine Nissan clearside indicators - $50

pics of specific parts to come!

Create an account or sign in to comment

You need to be a member in order to leave a comment

Create an account

Sign up for a new account in our community. It's easy!

Register a new account

Sign in

Already have an account? Sign in here.

Sign In Now


  • Similar Content

  • Latest Posts

    • Hi, is the HKS  Tower Bar still available ? negotiable ? 🤔
    • From there, it is really just test and assemble. Plug the adapter cables from the unit into the back of the screen, then the other side to the car harness. Don't forget all the other plugs too! Run the cables behind the unit and screw it back into place (4 screws) and you should now have 3 cables to run from the top screen to the android unit. I ran them along the DS of the other AV units in the gap between their backets and the console, and used some corrugated tubing on the sharp edges of the bracket so the wires were safe. Plug the centre console and lower screen in temporarily and turn the car to ACC, the AV should fire up as normal. Hold the back button for 3 sec and Android should appear on the top screen. You need to set the input to Aux for audio (more on that later). I put the unit under the AC duct in the centre console, with the wifi antenna on top of the AC duct near the shifter, the bluetooth antenna on the AC duct under the centre console The GPS unit on top of the DS to AC duct; they all seem to work OK there are are out of the way. Neat cable routing is a pain. For the drive recorder I mounted it near the rear view mirror and run the cable in the headlining, across the a pillar and then down the inside of the a pillar seal to the DS lower dash. From there it goes across and to one USB input for the unit. The second USB input is attached to the ECUtec OBD dongle and the 3rd goes to the USB bulkhead connected I added in the centre console. This is how the centre console looks "tidied" up Note I didn't install the provided speaker, didn't use the 2.5mm IPod in line or the piggyback loom for the Ipod or change any DIP switches; they seem to only be required if you need to use the Ipod input rather than the AUX input. That's it, install done, I'll follow up with a separate post on how the unit works, but in summary it retains all factory functions and inputs (so I still use my phone to the car for calls), reverse still works like factory etc.
    • Place the new daughterboard in the case and mount it using the 3 small black rivets provided, and reconnect the 3 factory ribbon cables to the new board Then, use the 3 piggyback cables from the daughterboard into the factory board on top (there are stand offs in the case to keep them apart. and remember to reconnect the antenna and rear cover fan wires. 1 screw to hold the motherboard in place. Before closing the case, make a hole in the sticker covering a hole in the case and run the cable for the android unit into the plug there. The video forgot this step, so did I, so will you probably. Then redo the 4 screws on back, 2 each top and bottom, 3 each side and put the 2 brackets back on.....all ready to go and not that tricky really.      
    • Onto the android unit. You need to remove the top screen because there is a daughterboard to put inside the case. Each side vent pops out from clips; start at the bottom and carefully remove upwards (use a trim remover tool to avoid breaking anything). Then the lower screen and controls come out, 4 screws, a couple of clips (including 3 flimsy ones at the top) and 3 plugs on the rear. Then the upper screen, 4 screws and a bunch of plugs and she is out. From there, remove the mounting brackets (2 screws each), 4 screws on the rear, 2 screws top and bottom and 3 screws holding in the small plates on each side. When you remove the back cover (tight fit), watch out for the power cable for the fan, I removed it so I could put the back aside. The mainboard is held in by 1 screw in the middle, 1 aerial at the top and 3 ribbon cables. If you've ever done any laptop stuff the ribbon cables are OK to work with, just pop up the retainer and they slide out. If you are not familiar just grab a 12 year old from an iphone factory, they will know how it works The case should now look like this:
    • Switching the console was tricky. First there were 6 screws to remove, and also the little adapter loom and its screws had to come out. Also don't forget to remove the 2 screws holding the central locking receiver. Then there are 4 clips on either side....these were very tight in this case and needed careful persuading with a long flat screw driver....some force required but not enough to break them...this was probably the fiddliest part of the whole job. In my case I needed both the wiring loom and the central locking receiver module to swap across to the new one. That was it for the console, so "assembly is the reverse of disassembly"
×
×
  • Create New...