Jump to content
SAU Community

Recommended Posts

Well as I'm about to sell this car I thought I'd share it's journey over the last 2 years with everyone so it doesn't just get trashed and forgotten forever. I'll just give the story of how it came to be followed by a crapload of pics if I can find them all but the cars been completed for a year and a half now so its not really an ongoing diary but an already completed project. While I say that this got way out of hand and we shouldn't have gone this far with a shitter it's turned out to be an awesome learning experience for me and Jack and will transfer onto our good cars which we are both slowly doing up so in the end it was worth it.

I bought the car a bit over 2 years ago when I was in between cars it was on the side of the road just out the front of someones house and I finally got sick of driving past it every day and wondering so I eventually went in search of an owner. Turns out it was the first house I knocked on and the lady was even selling it! I took it for a test drive and called my mate Jack (Mr.Untouchable) as he was a bit more in the know and he came down to have a look at ti with me. It was a bit of a no brainer anywayas the car was only $500 and soon I had handed the cash over and gave the keys to Jack to drive it upto my brothers palce to leave the car I was borrowing there. Long story short after doing a few single spinners on the way there I arrived to hear him limping the car up the road with a monstorous ticking coming from under the bonnet.

Turns out after about the third roundabout the oil pressure dropped and the oil light came on not good. I left the car at my brothers and got some oil flush and new filter and did an oil change with some thick as treacle oil which gained a bit of pressure but still had that lifter noise. I drove it for a few weeks until it became unbearable and I decided to do an engine swap. My boss had a VL motor under work so I drove it under the workshop one night and started to pull it apart.

post-58307-0-48946900-1311851898_thumb.jpg The only photo I have of the car as I bought it minus the mag.

post-58307-0-21570200-1311851906_thumb.jpg post-58307-0-88328000-1311851912_thumb.jpg

It started off so simple just pull the old one out and put the new one in but then I thought maybe I should paint the engine bay just incase I want to tidy the car up later on. I also managed to source a VL 5speed and all the gear to do a manual conversion.

post-58307-0-05893500-1311851915_thumb.jpg post-58307-0-47879400-1311851924_thumb.jpg post-58307-0-75029800-1311851927_thumb.jpg post-58307-0-20337600-1311851930_thumb.jpg post-58307-0-00443800-1311851932_thumb.jpg post-58307-0-47579600-1311851892_thumb.jpg

post-58307-0-11514600-1311852374_thumb.jpg post-58307-0-21586400-1311852361_thumb.jpg post-58307-0-84934100-1311852417_thumb.jpg

While the car was under work I convinced myself I may as well start doing the bodywork and it all went down hill from there... Now me being an enthusiastic 2nd year painting apprentice I thought I could change the world turns out I needed a bit of help and as he was a 2nd year panel beating apprentice I managed to convince my mate Jack that had helped put the car in its current state to come and give me a hand. At first I was keen as and Jack barely wanted anything to do with the car but after the first few panels had been repaired and primed he started to come round to the idea that we could do a pretty damn good job. so each repair got better and better and the nights got longer and longer and thats how we spent every weekend of winter 2009, freezing to death in 2 degree weather working all day til 2am sunday mornings trying to get this car done before summer.

post-58307-0-71203900-1311853198_thumb.jpg post-58307-0-35961500-1311853205_thumb.jpg post-58307-0-13976400-1311853200_thumb.jpg post-58307-0-45241900-1311853203_thumb.jpg post-58307-0-59757900-1311853212_thumb.jpg post-58307-0-65377100-1311853214_thumb.jpg post-58307-0-44457500-1311853208_thumb.jpg post-58307-0-76225100-1311853210_thumb.jpg

We did a fair bit of custom work on the car we removed the aeriel, boot lock all the dodgy door moulds and smoothed up those sections of the doors and guards. I plastic welded the rear Bumper into a one piece and got a series 3 bumper and had to cut the side sections 18mm shorter and re join the so I could use the series 2 filler panel. We also decided to remove the Ti driving lights and fit a pintara grille and the whole effect reminded us alot of an oldschool boxy r34 front.

post-58307-0-14961200-1311853588_thumb.jpg post-58307-0-19317400-1311853590_thumb.jpg post-58307-0-75070600-1311853592_thumb.jpg post-58307-0-94308500-1311853614_thumb.jpg post-58307-0-36714200-1311853619_thumb.jpg post-58307-0-10161200-1311853621_thumb.jpg post-58307-0-30124100-1311853622_thumb.jpg post-58307-0-11032200-1311853625_thumb.jpg post-58307-0-77491800-1311853585_thumb.jpg

post-58307-0-67800500-1311853848_thumb.jpg post-58307-0-71841700-1311853884_thumb.jpg post-58307-0-35304100-1311853895_thumb.jpg post-58307-0-34992400-1311853898_thumb.jpg post-58307-0-36547900-1311853904_thumb.jpg post-58307-0-54738200-1311853906_thumb.jpg post-58307-0-96155300-1311853910_thumb.jpg post-58307-0-76212800-1311853846_thumb.jpg

Anyway shit thats a massive post lol. I'll have to search for a few more of the photo's of when I was painting it.

Link to comment
https://www.sau.com.au/forums/topic/372364-my-500-r31-ti-daily-love-the-box/
Share on other sites

I found a few of when I did the first few bits and pieces to test out the paint. The others must be on my laptop. I decided to go with Honda's Phantom Grey/Super Green Pearl in Debeer basecoat with Debeer High Solid clear, its the colour that came out on the Accords but it turned out to be a bit darker in Debeer than Dupont which was what I had done the engine bay in but I didn't mind once I had seen the colour in the full sunlight.

post-58307-0-16100200-1311856255_thumb.jpg post-58307-0-65944200-1311856257_thumb.jpg post-58307-0-67742900-1311856260_thumb.jpg post-58307-0-67501000-1311856279_thumb.jpg post-58307-0-50884700-1311856249_thumb.jpg post-58307-0-31907300-1311856284_thumb.jpg

Edited by trustr32

My baby lol. bout time it got a build thread.

some serious man hours went into this, really have to see the car in the flesh to appreciate how damn straight it is and how well the paint is done.

custom cam and modded ecu and mini spool makes for some cheap thrills too. 109kw's of box love.

while most other young men are out chasing tail and pissing up their pay, we sad souls are dragging old unloved nissans out of the sticks and giving them makeovers lol.

hurry up with pics brodie, typical slow ass painter :nyaanyaa:

Still needs a nistune and a 75hp shot gas!

yeah when it was on the rollers summers said he could do quite a bit with it if he nistuned it.

and yeah, with a 75 shot it would love life!

but the man has a GTR half built. half built GTR means fully broke lol

My baby lol. bout time it got a build thread.

some serious man hours went into this, really have to see the car in the flesh to appreciate how damn straight it is and how well the paint is done.

custom cam and modded ecu and mini spool makes for some cheap thrills too. 109kw's of box love.

while most other young men are out chasing tail and pissing up their pay, we sad souls are dragging old unloved nissans out of the sticks and giving them makeovers lol.

hurry up with pics brodie, typical slow ass painter :nyaanyaa:

I'll give you typical slow ass painter when the GTR's running ya bastard at least I'm still trying to make a living as a painter......Well maybe making a living is a bad choice of words think of it as more of slowly contributing to my imminent death by lung disease.......... Na ok I really want to quit lol. Well I got a few more pics off my old phone as said laptop has shat itself and now my phone wont give up the last few always has to be something difficult in everything I do! Well as promised here's a few of when I painted it.

post-58307-0-27163100-1311940092_thumb.jpg post-58307-0-17762500-1311940101_thumb.jpg post-58307-0-24319700-1311940113_thumb.jpg post-58307-0-12849300-1311940126_thumb.jpg post-58307-0-06526400-1311940137_thumb.jpg post-58307-0-55641300-1311940151_thumb.jpg post-58307-0-61352800-1311940164_thumb.jpg post-58307-0-13821900-1311940179_thumb.jpg post-58307-0-45507900-1311940080_thumb.jpg post-58307-0-46205300-1311940517_thumb.jpg post-58307-0-48548400-1311940531_thumb.jpg post-58307-0-39440600-1311940545_thumb.jpg post-58307-0-05835300-1311940556_thumb.jpg post-58307-0-40464500-1311940563_thumb.jpg post-58307-0-02098000-1311940572_thumb.jpg post-58307-0-20666400-1311940578_thumb.jpg post-58307-0-43820800-1311940583_thumb.jpg post-58307-0-25976900-1311940504_thumb.jpg post-58307-0-03357600-1311940664_thumb.jpg post-58307-0-86867500-1311940678_thumb.jpg post-58307-0-54115900-1311940690_thumb.jpg post-58307-0-14975100-1311940705_thumb.jpg post-58307-0-68368200-1311940713_thumb.jpg post-58307-0-37652900-1311940727_thumb.jpg post-58307-0-79399300-1311940739_thumb.jpg post-58307-0-97856400-1311940750_thumb.jpg post-58307-0-23341300-1311940649_thumb.jpg

Alright thats when the car was painted and first came out of the oven then around at my brothers shed where it awaited the bonnet and front bar to be finished. It wasn't all smooth sailing though when i got the car painted and all the engine/gearbox in and running I noticed it was leaking coolant from under the extractors bloody welsh plugs! So wheile it was still in the shed I replaced all the plugs I could reach on the block and geez was it fun... Not!

So now it was painted I also decided to paint the chrome mouldings around the windows and the wheels. For the wheels I was thinking bronze/gold but eventually went for black which I'm glad I did as it looks tough. I also bought new monroe GT shocks and Kings Ultra low springs but it wasn't low enough so after much careful planning We chopped out 2 coils on the front and about 2.5 on the rear just to get that perfect "tucked" look.

Just a few pics of it when first put together

post-58307-0-61194800-1311941507_thumb.jpg post-58307-0-74994400-1311941532_thumb.jpg post-58307-0-70733300-1311941489_thumb.jpg

And on her first ever outing

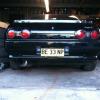
post-58307-0-56224100-1311941602_thumb.jpg post-58307-0-53774900-1311941619_thumb.jpg post-58307-0-64908200-1311941634_thumb.jpg post-58307-0-22284500-1311941651_thumb.jpg post-58307-0-32684300-1311941670_thumb.jpg post-58307-0-39169900-1311941587_thumb.jpg

I've got a video on my computer of Jack reversing it out of the shed before I got the exhaust done with just the extractors going to the cat and dumping straight out under the car and it sounds bloody tough I'll have to work out how to upload it somehow. Originally the plan was to run a sidepipe out infront of the lefthand wheel but mocking it up showed that there would be a max clearance of about 1inch under it so plans were thus abandoned.

post-58307-0-96486100-1311942060_thumb.jpg post-58307-0-38477500-1311942078_thumb.jpg post-58307-0-85522400-1311942090_thumb.jpg post-58307-0-86636700-1311942103_thumb.jpg post-58307-0-79304400-1311942118_thumb.jpg post-58307-0-98150800-1311942131_thumb.jpg post-58307-0-05343500-1311942149_thumb.jpg post-58307-0-98095000-1311942044_thumb.jpg post-58307-0-44902600-1311942166_thumb.jpg

Once everything was pretty well back together the car looked like this and stayed like it for about 8 months until one night Jack and I spent about 3 hours trying to track down a missfire that was occuring at about 4800-6000 when the inevitible happened....... it overheated and cracked the head :(

So off the road it came and the head got sent in to my mate Jaymie at Tas Engine Reco. who fixed up the crack gave the head a full overhaul and tidy up. While it was in there I decided to get a bit of cam work done so I talked to Matt about it saying I wanted the most aggressive N/A cam regrind he could organize and that's exactly what I got. Crow Cams did a custom cam for it and while it was in there Jaymie did a 5 angle valve job on it on the D/L for me :thumbsup:

Jaymie and Jack came down and helped me put the head back on along with a new water pump and timing belt and we fired it up. Good feeling and man the car pulled alot harder. Where the car used to lean off about 4500-5000 and stop making power it seemed that it got a new lease of life. Seemed like normal till about 4500 then just pulls like a 14 year old all the way to limiter. I got a crappy Ebay chip for it and got it put in another computer which we put in and improved things even more.

I still maintain to this day that the best mod I ever did to this car was install a mini spool. Acceleration improved by 15-20% and predictability when cornering is an even bigger and dare I say it "safer" bonus. I don't know why people would complain about them there not very noisy and MAN they cut a nut lol.

this photo does not do the car justice, and it has been refined a little since then.

still, not bad as what started as a 500 smackaroo daily.

Typical panelbeater bloody impatient! Couldn't wait for the finished photo's hey?

All up the car made 109rwkw on GT garages dyno at a dyno day so not that bad for a N/A abnger really. I had to get a new centre bearing in the tailshaft after a few months as the spool chopped what was left of the old one out completely. I also got the windows tinted to finish the look of it. Oh I had the old nissan rocker cover and a few spare hours one day so I tidied it uo a bit.

post-58307-0-16632100-1311943482_thumb.jpg post-58307-0-13595600-1311943497_thumb.jpg post-58307-0-18056900-1311943512_thumb.jpg post-58307-0-39556800-1311943526_thumb.jpg post-58307-0-87077100-1311943538_thumb.jpg post-58307-0-39016900-1311943553_thumb.jpg post-58307-0-64804800-1311943569_thumb.jpg post-58307-0-66027800-1311943468_thumb.jpg

The car got defected for being to low about 5 months ago so when I swapped the suspension over I did all the rear bushes and front swaybar bushes with nolothane bushes stiffened the back up nicely before it used to twist the car when you'd floor it then back off complements of that spool again I guess.

post-58307-0-61239400-1311943838_thumb.jpg Before

post-58307-0-90842300-1311943864_thumb.jpg post-58307-0-31275800-1311943853_thumb.jpg And after uughhh

post-58307-0-09459500-1311943892_thumb.jpg post-58307-0-87106200-1311943904_thumb.jpg post-58307-0-69723800-1311943920_thumb.jpg post-58307-0-18508100-1311943814_thumb.jpg

Back to normal

post-58307-0-41612300-1311944119_thumb.jpg post-58307-0-68629900-1311944133_thumb.jpg post-58307-0-94255900-1311944149_thumb.jpg post-58307-0-60578100-1311944165_thumb.jpg post-58307-0-44895100-1311944179_thumb.jpg post-58307-0-53964400-1311944194_thumb.jpg post-58307-0-52472400-1311944210_thumb.jpg post-58307-0-04435800-1311944227_thumb.jpg post-58307-0-25733600-1311944104_thumb.jpg

As it sits now I just need to paint a new front bumper as the one on it has hit 2x wallabies and 2x utes the utes not my fault I was stationary at an intersection and the utes collided in front of me and spun around to land on the front of my car lol no biggie. I decided to stick with a standard length series 3 front bar and just modify the filler panel to hide the bolts on top but I'll post up pics of that when it's done.

Create an account or sign in to comment

You need to be a member in order to leave a comment

Create an account

Sign up for a new account in our community. It's easy!

Register a new account

Sign in

Already have an account? Sign in here.

Sign In Now


  • Similar Content

  • Latest Posts

    • Good luck on the weekend mate
    • Must have been an absolute nightmare to drive when the power steer was out, the rack ratio/wheel size/caster is all set up for power assistance
    • Welcome to SAU, what are you looking at buying?
    • I checked the injectors again (1 and 2, since they’re easiest to access) to make sure they weren’t clogged. Even though the entire fuel system had been cleaned, I wanted to be certain. Everything looked clean, so I reinstalled and connected everything. When I started the car to confirm everything was okay, it immediately revved up high, so I shut it off straight away. I checked to see if I’d missed a vacuum hose or something, but everything was connected. On the second attempt, the car ran without the high idle, but I noticed a distinct “compressed air” sound coming from the engine bay. Tracing the sound, I pushed injector #6 forward slightly and the noise stopped — it turned out it wasn’t seated properly, despite the fuel rail being bolted down. While holding it in place, the car idled steadily without stalling and ran for over 5 minutes. At this point, I pulled all six injectors out just in case I hadn’t seated them correctly or dirt had gotten onto the O-rings. Unfortunately, I discovered that I had damaged 3 out of 6 injectors (the OEM 270cc ones) during installation. So yes, this was my fault. Since only the pintle caps were damaged, I’ve ordered a Fuel Injector Service Kit from NZEFI to refurbish them. In the meantime, I reinstalled my new injectors – the car now idles fine for over 15 minutes without stalling. I have not attempted to drive it so far. It’s not perfect yet, as it hesitates when the throttle is pressed, but it’s a big improvement. Unplugging the IACV with the new injectors idles at around 800rpm, even with the IACV screw tightened fully. But this is probably due to tune.
    • I wanted to try and preserve the front bumper as long as possible, they're not cheap and are made to order in Japan. Taking inspiration from my previous K11 Micra build where I made an undertray for the Impul bumper, I did the same for this BN Sports bumper but a little slimmed down.  This time round I only made a 'skid plate' (if that's the correct wording/term) for just the bumper surface area, the Micra version covered the gap like an undertray. Starting off with a sheet of mild steel approx. 0.9mm thick 4ft x 2ft in size. I traced around the bumper, cut it out and cleaned the edges. Luckily I was able to get two halves from one piece of metal In the video I installed it as is, but I've since then I've removed it to spray and add a rubber edging trim. The rubber trim is suitable for 1-2mm and it's a really nice tight fit. The bolts had to be loosened due to the plates being too tight against the bumper, the trim wouldn't push on I used some stainless M6 flat headed bolts for a flusher finish (rather than hex heads poking down), I believe this style fastener is used for furniture too incase you struggle to source some. The corner's are a little wider, but this may be an advantage incase I get close to bumping it  The front grill got some attention, finally getting round to repairing it. Upon removal one fixing pulled itself out of the plastic frame, one side is M8 that fixes inside of the frame, where as the other side is M5. Not knowing I could get replacements, I cut down an M8 bolt, threaded it inside the frame along with a decent amount of JB Weld.  The mesh was replaced to match the bumper. One hole on the bonnet/hood had to be drilled out to 8mm to accommodate the new stud, once the glue had set it could be refitted. I think the reason the grill was double meshed was to hide the horn/bonnet latch (which makes sense) but I much prefer it matching the bumper Bumper refitted and it's looking much better IMO The Youtube video can be seen here: https://www.youtube.com/watch?v=bVZP35io9MA
×
×
  • Create New...