Jump to content
SAU Community

Recommended Posts

Hey guys,

Had a guy off the forums come down and buy my catback exhaust that was for sale..

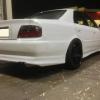
Whilst we were chatting about our cars he brought up the grill on the front of his, after going around and taking a look i was surprised. I had never seen nothing like it before but at the same time it looks amazing!!

Can anyone identify this grill and maybe link me to somewhere where i may be able to purchase one from.

Thanks and looking forward to everyone's replys.

post-75494-0-89889600-1322028393_thumb.jpg

Link to comment
https://www.sau.com.au/forums/topic/383851-what-is-this-grill/
Share on other sites

Used to have the N.A series 2 grill as shown in my gallery but makes me look like a old fella driving the car lol so i swapped it for the dolphin grill.

You can pickup next to new condition N/A series 2 grills on ebay for under $75, To my understanding the dolphin grill still holds it's value..

Im still puzzled as to what aftermarket manufacturer makes this item... lots of views on the topic but nobody seems to have any idea on who may make it.

Reckon you could post a better photo?

It's a bit hard to tell if it's any good when it's not in context.

need one of the whole front of the car.

Hey chef

I actually own a series 2 and previously had the na grill but swapped it for the dolphin grill.

Both identical but i beloeve the na series 2 grill is alot rarer to find as opposed to the turbo grill.

  • 2 weeks later...

Look wicked in context I've been searching yahoo japan auctions, I only found a front bumper that sort of resembles the grille, But before that i thought it may have been a takero's variant.. Which it was not.

But will let you know if i ever manage to stumble across one.

Look wicked in context I've been searching yahoo japan auctions, I only found a front bumper that sort of resembles the grille, But before that i thought it may have been a takero's variant.. Which it was not.

But will let you know if i ever manage to stumble across one.

Found this Badboy. :thumbsup:

http://www.nengun.com/auction/item/m88615965

Doesn't have that line through the middle of it or the mesh behind it either. but I'm sure if you know a good body shop they might be able to add those bits in!

Found this Badboy. :thumbsup:

http://www.nengun.co.../item/m88615965

Doesn't have that line through the middle of it or the mesh behind it either. but I'm sure if you know a good body shop they might be able to add those bits in!

And by a "Good" Body shop, I meant yourself, with a fiberglass kit and a carton :laugh:

Create an account or sign in to comment

You need to be a member in order to leave a comment

Create an account

Sign up for a new account in our community. It's easy!

Register a new account

Sign in

Already have an account? Sign in here.

Sign In Now


  • Similar Content

  • Latest Posts

    • Power is fed to the ECU when the ignition switch is switched to IGN, at terminal 58. That same wire also connects to the ECCS relay to provide both the coil power and the contact side. When the ECU sees power at 58 it switches 16 to earth, which pulls the ECCS relay on, which feeds main power into the ECU and also to a bunch of other things. None of this is directly involved in the fuel pump - it just has to happen first. The ECU will pull terminal 18 to earth when it wants the fuel pump to run. This allows the fuel pump relay to pull in, which switches power on into the rest of the fuel pump control equipment. The fuel pump control regulator is controlled from terminal 104 on the ECU and is switched high or low depending on whether the ECU thinks the pump needs to run high or low. (I don't know which way around that is, and it really doesn't matter right now). The fuel pump control reg is really just a resistor that controls how the power through the pump goes to earth. Either straight to earth, or via the resistor. This part doesn't matter much to us today. The power to the fuel pump relay comes from one of the switched wires from the IGN switch and fusebox that is not shown off to the left of this page. That power runs the fuel pump relay coil and a number of other engine peripherals. Those peripherals don't really matter. All that matters is that there should be power available at the relay when the key is in the right position. At least - I think it's switched. If it's not switched, then power will be there all the time. Either way, if you don't have power there when you need it (ie, key on) then it won't work. The input-output switching side of the relay gains its power from a line similar (but not the same as) the one that feeds the ECU. SO I presume that is switched. Again, if there is not power there when you need it, then you have to look upstream. And... the upshot of all that? There is no "ground" at the fuel pump relay. Where you say: and say that pin 1 Black/Pink is ground, that is not true. The ECU trigger is AF73, is black/pink, and is the "ground". When the ECU says it is. The Blue/White wire is the "constant" 12V to power the relay's coil. And when I say "constant", I mean it may well only be on when the key is on. As I said above. So, when the ECU says not to be running the pump (which is any time after about 3s of switching on, with no crank signal or engine speed yet), then you should see 12V at both 1 and 2. Because the 12V will be all the way up to the ECU terminal 18, waiting to be switched to ground. When the ECU switches the fuel pump on, then AF73 should go to ~0V, having been switched to ground and the voltage drop now occurring over the relay coil. 3 & 5 are easy. 5 is the other "constant" 12V, that may or may not be constant but will very much want to be there when the key is on. Same as above. 3 goes to the pump. There should never be 12V visible at 3 unless the relay is pulled in. As to where the immobiliser might have been spliced into all this.... It will either have to be on wire AF70 or AF71, whichever is most accessible near the alarm. Given that all those wires run from the engine bay fusebox or the ECU, via the driver's area to the rear of the car, it could really be either. AF70 will be the same colour from the appropriate fuse all the way to the pump. If it has been cut and is dangling, you should be able to see that  in that area somewhere. Same with AF71.   You really should be able to force the pump to run. Just jump 12V onto AF72 and it should go. That will prove that the pump itself is willing to go along with you when you sort out the upstream. You really should be able to force the fuel pump relay on. Just short AF73 to earth when the key is on. If the pump runs, then the relay is fine, and all the power up to both inputs on the relay is fine. If it doesn't run (and given that you checked the relay itself actually works) then one or both of AF70 and AF71 are not bringing power to the game.
    • @PranK can you elaborate further on the Colorlock Dye? The website has a lot of options. I'm sure you've done all the research. I have old genuine leather seats that I have bought various refurbing creams and such, but never a dye. Any info on how long it lasts? Does it wash out? Is it a hassle? What product do I actually need? Am I just buying this kit and following the steps the page advises or something else? https://www.colourlockaustralia.com.au/colourlock-leather-repair-kit-dye.html
    • These going to fit over the big brakes? I'd be reeeeeeeeaaaall hesitant to believe so.
    • The leather work properly stunned me. Again, I am thankful that the leather was in such good condition. I'm not sure what the indent is at the top of the passenger seat. Like somebody was sitting in it with a golf ball between their shoulders. The wheels are more grey than silver now and missing a lot of gloss.  Here's one with nice silver wheels.
    • It's amazing how well the works on the leather seats. Looks mint. Looking forward to see how you go with the wheels. They do suit the car! Gutter rash is easy to fix, but I'm curious about getting the colour done.
×
×
  • Create New...