Jump to content
SAU Community

Recommended Posts

Ok guys been che king out some other builds on here so thought id have a go at making one.

Car is a 92 r32gts-t. I picked it up just over a year ago with panel, paint and rb25 motor and box conversion completed already. The interior is pretty much stripped. Has no rear seats, just a sub and amp. Car is fully caged, just a bolt in job for now welded job to come later. Got driver and passenger velo fixed back bucket seats with Mona harnesses. Seats look awesome but god dam they are uncomfortable for someone my size lol.

I picked the car up a week before powercruise last year in bris so the only mod in that week was a set of 20's just to raise the height of it a bit. I gave it a quick fluids change then off to powercruise it was.

The main aim was to have some fun. First session friday morning the standard rb25 turbo gave up on me in a big way. The only replacement I could find was a standard rb20 item. So then it was down to 7psi for the rest of weekend. Still managed to have some fun and win some races just had to be a bit picky who I raced lol. Went in the burn out comp on Saturday night for a bit of fun but that's where my weekend stopped. Turns out 196hp on a sticky pad wasn't enough power to comfortably turn the rear wheels and my clutch had other thoughts on the matter. Weekend over.

So wat to do with a broken r32 now. A few ideas were tossed about but we decided to do let's do it once and do it properly. Quick budget was made up and looked reasonable enough. Its amazing how quick budgets get blown out of the water.

Motor is a 26/30 which I bought off a mate who unfortunately had his gtr written off by his ex gf. This motor came with approx 35000 in receipts and it has the best of the best in it. I picked it up substansially cheaper than that tho. Quick case of removing the sump to convert ro rear while drive use and check out the bearings and it was all systems go. It was only a short motor so had to fund my own bolt ons. Stole wat I could off the 25 then hitnebay, big mistake. Remember that budget, its gone.

With a complete motor sitting there and a car to go into for some reason the project just stopped. It stayed that way for a few months until we realized powercruise was only a few months away. In a day we got the motor sitting in the engine bqy and the box bolted up. It didn't see, right tho the motor was to high and to far forward. The ppl who had done the last conversion had made a mess of everything which only became obvious now. We had to cut and shut all engine mounts and move the move the gearbox back 50mm. Ok motor in and sitting right, new problem. Cheap ebay manifold was sitting way to high to close the bonnet. Enter 6boost manifold.

Working in wa made life difficult web the car was I. Queensland. Enter good mate and mechanic matt to finish off wat I had started. First things first he cleaned up any un-nessacary lines from the engine bay then called me and cursed me. Once the yelling was done he started wiring up the haltech and brand new loom. Fully heat shrinking every wire and fitting. Wiring complete it was time to sort out oil coolers and lines and intercooler piping. Brand new 2000cc injectors replaced the old 1000cc hks items and 2 brand new in tank walbros were installed in the boot.

Car has made it first run on the dyno now and achieved a impressive 648@whp on 22psi but started pushing oil cos for some reason the baffles had been removed from the tapper covers. We have installed new baffles and now just waiting on new valve springs and retainers to arrive before putting it back on the dyno. Was on full boost by4900rpm and from wat I have been told very nice torque.

Im sure I have missed details out if there is anything u would like to know more about let me know. I'll upload some pics I hope they come out in order.

Thanks guys and thanks to everyone else who has helped along the way

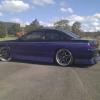
Pic 1 is how I got the car

Pic 2 first mod, new wheels

Pic 3 replacing broken turbo at powercruise

pic 4 new motor ready to go, prior to having 6boost manifold

Pic 5 car ready for transplant

pic 6 hks t51r sitting on 6boost manifold

Pic 7 almost complete

post-78721-0-35357300-1343179127_thumb.jpg

post-78721-0-60194900-1343179208_thumb.jpg

post-78721-0-07290900-1343179240_thumb.jpg

post-78721-0-67015800-1343179279_thumb.jpg

post-78721-0-20053900-1343179326_thumb.jpg

post-78721-0-14175100-1343179360_thumb.jpg

post-78721-0-58757500-1343179381_thumb.jpg

Link to comment
https://www.sau.com.au/forums/topic/405520-project-ooy34/
Share on other sites

New valve springs and retainers have been installed, new heavy duty valve proved to be a bit more painful than first thought but all good now. Tuner is predicti g a power increase on less boost just by the upgraded springs. Hopefully Tuesday I will be able to let u know

Link to comment
https://www.sau.com.au/forums/topic/405520-project-ooy34/#findComment-6463749
Share on other sites

  • 4 weeks later...

Update. As predicted on the same boost the car went 684 and held power all the way through to 8700 with only very minor drop off. Seen a maximum figure around 730bhp but the car was just turning the tyres at 200km/h.

Can't wait to finally drive this thing at powercruise.

Link to comment
https://www.sau.com.au/forums/topic/405520-project-ooy34/#findComment-6494542
Share on other sites

Create an account or sign in to comment

You need to be a member in order to leave a comment

Create an account

Sign up for a new account in our community. It's easy!

Register a new account

Sign in

Already have an account? Sign in here.

Sign In Now


  • Similar Content

  • Latest Posts

    • perhaps i should have mentioned, I plugged the unit in before i handed over to the electronics repair shop to see what damaged had been caused and the unit worked (ac controls, rear demister etc) bar the lights behind the lcd. i would assume that the diode was only to control lighting and didnt harm anything else i got the unit back from the electronics repair shop and all is well (to a point). The lights are back on and ac controls are working. im still paranoid as i beleive the repairer just put in any zener diode he could find and admitted asking chatgpt if its compatible   i do however have another issue... sometimes when i turn the ignition on, the climate control unit now goes through a diagnostics procedure which normally occurs when you disconnect and reconnect but this may be due to the below   to top everything off, and feel free to shoot me as im just about to do it myself anyway, while i was checking the newly repaired board by plugging in the climate control unit bare without the housing, i believe i may have shorted it on the headunit surround. Climate control unit still works but now the keyless entry doesnt work along with the dome light not turning on when you open the door. to add to this tricky situation, when you start the car and remove the key ( i have a turbo timer so car remains on) the keyless entry works. the dome light also works when you switch to the on position. fuses were checked and all ok ive deduced that the short somehow has messed with the smart entry control module as that is what controls the keyless entry and dome light on door opening   you guys wouldnt happen to have any experience with that topic lmao... im only laughing as its all i can do right now my self diagnosed adhd always gets me in a situation as i have no patience and want to get everything done in shortest amount of time as possible often ignoring crucial steps such as disconnecting battery when stuffing around with electronics or even placing a simple rag over the metallic headunit surround when placing a live pcb board on top of it   FML
    • Bit of a pity we don't have good images of the back/front of the PCB ~ that said, I found a YT vid of a teardown to replace dicky clock switches, and got enough of a glimpse to realize this PCB is the front-end to a connected to what I'll call PCBA, and as such this is all digital on this PCB..ergo, battery voltage probably doesn't make an appearance here ; that is, I'd expect them to do something on PCBA wrt power conditioning for the adjustment/display/switch PCB.... ....given what's transpired..ie; some permutation of 12vdc on a 5vdc with or without correct polarity...would explain why the zener said "no" and exploded. The transistor Q5 (M33) is likely to be a digital switching transistor...that is, package has builtin bias resistors to ensure it saturates as soon as base threshold voltage is reached (minimal rise/fall time)....and wrt the question 'what else could've fried?' ....well, I know there's an MCU on this board (display, I/O at a guess), and you hope they isolated it from this scenario...I got my crayons out, it looks a bit like this...   ...not a lot to see, or rather, everything you'd like to see disappears down a via to the other side...base drive for the transistor comes from somewhere else, what this transistor is switching is somewhere else...but the zener circuit is exclusive to all this ~ it's providing a set voltage (current limited by the 1K3 resistor R19)...and disappears somewhere else down the via I marked V out ; if the errant voltage 'jumped' the diode in the millisecond before it exploded, whatever that V out via feeds may have seen a spike... ....I'll just imagine that Q5 was switched off at the time, thus no damage should've been done....but whatever that zener feeds has to be checked... HTH
    • I think Fitmit had some, have a look on there (theyre Australian as well)
    • Hah, fair enough! But if you learn with this one you can drive any other OEM manual. No modern luxury features like auto rev-matching or hillstart assist to give you a false sense of confidence. And a heavy car with not that much torque so it stalls easily. 
×
×
  • Create New...