Jump to content
SAU Community

Recommended Posts

Hahaha Many Kudos to L33SH indeed, as without letting me know the simple term BMW E30, I'd never EVER have thought to search it on ebay, and probably would have spent quite a while searching through more and more topic posts for suggestions to clear indicators.
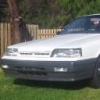
I've ended up finding these two beauties, cheap, and exactly what I'm after! Will probably end up hitting the side ones with a bitta white on the spots that are black/plastic:
http://www.ebay.com.au/itm/BMW-E23-E24-E28-M5-E30-3-5-6-7-Series-M3-Alpina-CLEAR-Side-Indicators-Repeaters-/370680718895?pt=AU_Car_Parts_Accessories&hash=item564e4ae62f&_uhb=1

&

http://www.ebay.com.au/itm/BMW-E30-318is-320i-325i-ALPINA-C1-B6-Clear-Turn-Signals-/370281160610?pt=AU_Car_Parts_Accessories&hash=item56367a1fa2&_uhb=1

Got out in the shed today and did a couple things, garnish is nearly finished, needs a few days to properly cure, perhaps even a week, then a light sand, and cut and polish and will throw her back on. Will get around to "shaving" or de-badging the boot during the week. eventually I'll get a U/V permit and get her to the tyre/exhaust shop too for some new kicks and zorst. Then she'll have a sexy looking rear end i.m.p.o
20130512_122420.jpg
^ In the process of getting rid of all that hidden excess dirt inbetween working on the garnish/paint

20130512_133045.jpg

^ Paints all done, just gotta dry/cure and another half hour or so tending to it for a final finish and she'll be right ;)

Some new toys showed up late this afternoon. Got the door speakers down and out anyway. Will tackle the 6 x 9's next. Had to use 6.5'' Spacers for the door speakers. And will be using 6x9 spacers for the Cadence going in the parcel shelf.
20130516_151821.jpg

^_Kenwood KACM646 500W 2/3/4 Channel Amp with High/Low Pass Filters AU $135.00
Cadence XS694 6 X 9'' 250W Speakers. (Will be amplifying) AU $88.00

Cadence XS652 6.5'' 135W Speakers (Not amplified) AU $69.00
Spacers AU $11.00 & $5.00

20130516_180115.jpg
^_Cadence XS652 6.5's.

Nothing special but just another update/change/mod.
Pulled out the old Numberplate bulbs/lenses and am going to silicone these puppies onto the garnish right before I put it all back together as so I'll have plenty of pure white illumination! Far better than faded yellow!
20130526_134117.jpg

20130526_134045.jpg

So I took apart the whole dash purely to get to my instrument cluster, only to find after being re-assured that I'd bought the right globes for an R31 Dash, that I'd been given the wrong globes... f**king frustration at its finest. So now I'm left with this:
20130527_163850.jpg

Which ultimately isn't too bad, gives me an excuse to put my neons/switch in and also get the headunit done.
On a more positive note; Here is my newly glossed rear garnish and tinted tail lights:

20130527_163906.jpg

20130527_163922.jpg

Here's how I went about mounting the new LED Number plate lights. (Gave it a clean up afterwards too)
Held in place by liquid silicone:
20130527_140757.jpg

END RESULT:
20130527_170000.jpg
20130527_170016.jpg

Simple. Fun & super effective! Highly recommend doing!

A few more goodies turned up today! Stoked!
930fda87-84e7-443a-b5eb-141919fc49ba.jpg
Eagle 8mm Ignition leads
Kicker 12'' Subwoofer
Pioneer Head-unit
Car Seat Covers
& Re-usable K & N Panel Filter.

Edited by GXE23

PURCHASES / WORK DONE / FUTURE PLANS / PRICING:

  • VARIOUS SPRAY PAINTS / GLUES FOR MINOR REPAIRS $25.00
  • CAR COVER XXL $17.00
  • CAR SEAT COVER SET $36.00
  • WHITE LED PARKER LIGHTS $2.50
  • CHROME CHECKERPLATE FLOOR MATS $19.00
  • CANNON/DUMPY MUFFLER $90.00 (Minus Installation Costs)
  • WHITE LED REAR NUMBERPLATE STRIP LIGHTS $16.00
  • WHITE INTERIOR/CABIN LED LIGHTS + SWITCHES/WIRING $20.00
  • PIONEER HEADUNIT $105.00
  • CADENCE 6 X 9'' SPEAKERS $88.00
  • CADENCE 6.5'' SPEAKERS $69.00
  • SPEAKER SPACERS $8.00 + $11.00
  • KICKER 12'' 300W SUBWOOFER $115.00
  • KENWOOD 500W 2/3/4 CHANNEL AMP $135.00
  • WHITE LED INTERIOR MAP LIGHT x2 $12.00
  • WHITE LED SPEEDO/DASH CLUSTER LIGHTS $15.50
  • WHITE FUZZY DICE $1.50
  • NITE SHADED TAIL LIGHTS $15.00
  • K&N AIR FILTER (LIFETIME WARRANTY) $65.00
  • EAGLE 8mm IGNITION LEADS $60.00
  • K&N OIL FILTER $30.00
  • BOSCH FUEL FILTER $25.00
  • NGK SPARK PLUGS $35.00
  • SUPERCHEAPAUTO 4GAUGE AMP WIRING KIT $52.00
  • GREGORY'S R31 SKYLINE WORKSHOP MANUAL $55.00
  • SUPERCHEAPAUTO 14'' SET OF 5 WHEEL COVERS $35.00
  • TURTLE WAX ICE LIQUID WAX $29.00
  • TURTLE WAX ICE SPRAY POLISH $15.00
  • TURTLE WAX COLOUR MAGIC POLISH W/CHIP STICK $19.00
  • BMW E30 SIDE CLEAR INDICATORS $39.00
  • BMW E30 FRONT BUMPER CLEAR INDICATORS $14.00
  • CALIBRE BRAND 10mm OIL CATCH CAN $32.00
  • SHEVRON CHARCOAL DASH-MAT $49.00
  • REMOVED MUD FLAPS
  • RESPRAYED REAR GARNISH GLOSS BLACK
  • RESPRAY FRONT GRILLE MATT WHITE
  • INSTALL ALL NEW STEREO EQUIPMENT
  • INSTALL LED NEONS TO A SWITCH

    GRAND TOTAL SPENT SO FAR:
    $1,354.50

That basically sums up what I've purchased or honestly plan on purchasing as far as "changes" I will be making or "mods" I will be adding to my 1989 R31 Nissan Skyline. Should have all this work done and have her ship shape within the next month or so.

"Spur of the moment thought/online buy" BUT I've opted to stick with 14'' stock wheels/mags instead of scoping out some 17'' 5 spokes.
I'll be throwing these hubcaps on: *Preparing for potential 'burns' here*
Chrome14Covers.jpg
Lame as they may be, I'm just thinking ahead, mainly for hassles/money's sake.

(As every single time I've had rims on any of my vehicles, the police just love to pull me over and take a look at all my treads, and more times than not, argue what the 'Tread-depth indicator' on the tyre or the little Beaurepairs one I keep in my glove-box).

So I'm just going to clean my stockies up, sand/prime them and hit them with a matt black paint a few times over then clear coat them, so hopefully they stay black and consistent over the years. (Will be using heat-proof paint due to potential heat that may come from excessive break use. Pictures will be up in due time, as this was only just decided on within the last 10 minutes hahaha! Cheers!

Mate dont bastardize an r31 with those HEINOUS sex-spec dinner plate contraptions.

My first car was an R31. Ill post some before and after pics.

Before was how I bought it, after was when I sold it. 31s look great low and with nice wide, low offset wheels.

*note you can get the wheels on my after pic for $800 posted man... theyr xxr's. 8" wide and an offset of 0 is perfect fitment front and rear on an r31.

Before:

970f44.jpg

After:

23tkrp3.jpg

Edited by Bennis
  • Like 1

Create an account or sign in to comment

You need to be a member in order to leave a comment

Create an account

Sign up for a new account in our community. It's easy!

Register a new account

Sign in

Already have an account? Sign in here.

Sign In Now


  • Similar Content

  • Latest Posts

    • I guess one thing that might be wrong is the manifold pressure.  It is a constant -5.9 and never moves even under 100% throttle and load.  I would expect it to atleast go to 0 correct?  It's doing this with the OEM MAP as well as the ECU vacuum sensor. When trying to tune the base map under load the crosshairs only climb vertically with RPM, but always in the -5.9 column.
    • AHHHH gotchaa, I'll do that once I am home again. I tried doing the harness with the multimeter but it seems the car needed a jump, there was no power when it was in the "ON" position. Not sure if I should use car battery jump starter or if its because the stuff that has been disconnect the car just does send power.
    • As far as I can tell I have everything properly set in the Haltech software for engine size, injector data, all sensors seem to be reporting proper numbers.  If I change any injector details it doesnt run right.    Changing the base map is having the biggest change in response, im not sure how people are saying it doesnt really matter.  I'm guessing under normal conditions the ECU is able to self adjust and keep everything smooth.   Right now my best performance is happening by lowering the base map just enough to where the ECU us doing short term cut of about 45% to reach the target Lambda of 14.7.  That way when I start putting load on it still has high enough fuel map to not be so lean.  After 2500 rpm I raised the base map to what would be really rich at no load, but still helps with the lean spots on load.  I figure I don't have much reason to be above 2500rpm with no load.  When watching other videos it seems their target is reached much faster than mine.  Mine takes forever to adjust and reach the target. My next few days will be spent making sure timing is good, it was running fine before doing the ECU and DBW swap, but want to verify.  I'll also probably swap in the new injectors I bought as well as a walbro 255 pump.  
    • It would be different if the sealant hadn't started to peel up with gaps in the glue about ~6cm and bigger in some areas. I would much prefer not having to do the work take them off the car . However, the filler the owner put in the roof rack mount cavities has shrunk and begun to crack on the rail delete panels. I cant trust that to hold off moisture ingress especially where I live. Not only that but I have faded paint on as well as on either side of these panels, so they would need to come off to give the roofline a proper respray. My goal is to get in there and put a healthy amount of epoxy instead of panel filler/bog and potentially skin with carbon fiber. I have 2 spare rolls from an old motorcycle fairing project from a few years back and I think it'd be a nice touch on a black stag.  I've seen some threads where people replace their roof rack delete with a welded in sheet metal part. But has anyone re-worked the roof rails themselves? It seems like there is a lot of volume there to add in some threads and maybe a keyway for a quick(er) release roof rack system. Not afraid to mill something out if I have to. It would be cool to have a cross bar only setup. That way I can keep the sleek roofline that would accept a couple bolts to gain back that extra utility  3D print some snazzy covers to hide the threaded section to be thorough and keep things covered when not using the rack. 
    • Probably not. A workshop grade scantool is my go to for proper Consult interrogation. Any workshop grade tool should do it. Just go to a workshop.
×
×
  • Create New...