Jump to content
SAU Community

Recommended Posts

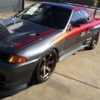
Hey everyone, after years of building and rebuilding my gtr I thought I would finally start a build thread as its currently under another transformation with bc automotive for world time attack open class in October. I've read and followed many threads over the years and thought I'd contribute something back as I have always enjoyed other people's build journeys. So I'll start with a couple photos of photos in its early days as I didn't have any clearer shots on file.

post-19978-0-32990000-1370079082_thumb.jpg

So from standard road car 7 years ago running 270rwkw,power fc, n1 turbos from memory back then, I decided to take it off the road and use it as a dedicated track car. So in went a cage, seats, fire bomb for safety. Back then I had originally wanted to do targa and club sprint days, also thought I would leave it as it was too...yeah that didn't happen.

Photo was at Calder park

post-19978-0-90157600-1370083134_thumb.jpg

Edited by stevena

This photo was taken bout 2 years ago at the front of Bc Automotive and Marine. I had work performed from other workshops over the years, some good, others not so good. I was looking to take this car to a new level of lap times at Phillip Island, my sole goal was to achieve Porsche gt3 cup car lap times. My mate has one and I wanted to beat those times wether I was driving or someone else, as long as it was quicker than his Porsche. Back then they were running around 1.36's at the island. I was told from other workshops that these times weren't possible, even if you had a 3lt, completely stripped car. So hence the move to Bc automotive we're they believed it can be done.

post-19978-0-64256800-1370083597_thumb.jpg

I had a 2.8lt hks engine thrown in, garrett twin turbo set up, standard head except camshafts. And minus the rag thrown in lol. Had dean Lillie from Bc automotive tune it up, 376kw on standard pump fuel, also had it tuned on 109 fuel and it made 419kw at the rears on 22psi I believe, might have to confirm that. Then we hit the island for a shake down, this was march 2012.

post-19978-0-14672500-1370084745_thumb.jpg

Best time achieved was 1.43.3 with dean lillie at the wheel, my times were way to slow to mention. That was running on used 265 Pirelli slicks I bought second hand, 376rwkw with a ppg dogbox with motec shift cut, motec m800 logging and sensors everywhere to see what was happening, and dean and Brett had also installed an adjustable front sway bar in cabin, left of the gear knob. Feedback from Deano was that the car was hard to drive, very snappy and needed some suspension tuning. So back to the workshop again, it had been a year till the next track on march 6th 2013 on Gareth events...

Needed to make it lighter, needed more rear grip, 305 slicks ordered, once again used as I don't have a large budget, needed new te37's, ordered 18x10.5 instead of the 18x9.5 I had..thanks to import monster on the great deal. Some work went into the suspension to make these wheels fit under the standard guards, harder spring rates. Needed aero big time, Brett and dean made up some ply wood front diffuser for testing(worked awesome), aeromotions dynamic wing to balance the front diffuser with a carbon rear boot, I'm obsessed with aero and weight. Carbon lights made up. The car was weighing in at 1320kg with little fuel and no driver. The guys worked hard and smart, only advising me to Spend cash on what was needed even though i didn't listen at times. Back to the island we went to try and get a 1.36. Oh yeah, we tuned it up on E85 fuel making 471rwkw on 26 pound boost

post-19978-0-52405500-1370086619_thumb.jpg

post-19978-0-69445900-1370086622_thumb.jpg

post-19978-0-07592500-1370086858_thumb.jpg

post-19978-0-28515600-1370086995_thumb.jpg

post-19978-0-76501000-1370087883_thumb.jpg

post-19978-0-53878200-1370089316_thumb.jpg

Edited by stevena

It's only just begun, world time attack open class confirmed, BC Automotive once again are tearing it up( literally) to get it ready for October. New engine/ weight loss/rewire/more aero and completion date is July 07th. I'll post all the goodies shortly.

That last track day was cut short as we only had 4 laps, first 2 laps we had a misfire due to spark plugs. We decided to turn the boost down as it was a test day to make sure everything else was working well. Back out for the second session problem sorted with plugs but coming onto the main straight we blew a turbo and cut the day short. The motec data was showing the car came on to the main straight 10km faster than its previous lap, tyres were still getting heat into them so not sure what times would have been achieved. 1.34 possible with more track time? So back to Bc automotive for a chat on what to do next.

This is when the decision to see what the car could do in its full potential, that meant new engine turbo package, and most importantly it has to be reliable. Motec data also showed oil surge in 2 corners at the island, dry sump set up a must for us, Data showed our front diff was reaching 120deg after 2 laps so decision for another cooler to be added. And a rewire to keep things simple all within a budget. Heaps of work required and thankfully for all our sponsors stepping up and helping where they can as without them this project wouldn't be the same, especially Brett and Dean working after work hours and where ever possible to make this project happen.

So out with the old 2.8hks engine

post-19978-0-64816400-1370134082_thumb.jpg

Single set up, precision turbo was decided on. Our previous twin garrett set up would be on full swing by 5300rpm which still did the job but if we could get something to be on full swing under 5000 that would be ideal and precision swear it will be. Soon see.

post-19978-0-36300700-1370134508_thumb.jpg

Decided to use a new 2.8 stroker, we wanted something proven and with local support and and Nitto is the go, big thanks to Andrew from Nitto performance engineering, and shipping it over quickly as we are under a time management program.

Big thanks to Ross for supplying the Ross balancer, photo of a photo attached as both the Nitto package and balancer were sent straight to our engine builder and I didn't get a chance for a quick snap shot.

post-19978-0-76726300-1370135891_thumb.jpg

New n1 block sent to our engine builder stew from cavehill engine services for the build. In need of 450-500rwkw to keep up with the pointy end of time attack cars. Need it to rev high as well, no higher than 9000rpm to keep it safe.

post-19978-0-98142200-1370136264_thumb.jpg

Car needs to be lightened and rewire, we were heavy at 1320. Open class allows us to be 1190kg, this can be achieved but at a high cost. I'm sure in the future it will be closer to this weight but when funds are available. So a more realistic goal would be 1250-1270. So Bc started stripping the car, using only what's needed. Photo of Brett ripping wires out.

post-19978-0-34081400-1370138032_thumb.jpg

post-19978-0-51232600-1370138075_thumb.jpg

post-19978-0-00204000-1370138113_thumb.jpg

While the engine is put together Bc sent the car to Leigh Walker from Pro Race Developments for some additional strength in the front engine bay, there was evidence of flex, so few more Chro Molly bars will fix that issue. Won't need a strut brace now. Big thanks to Leigh for the super turn around time.

post-19978-0-51581500-1370138883_thumb.jpg

post-19978-0-09282100-1370138896_thumb.jpg

post-19978-0-64386500-1370138908_thumb.jpg

Ripped out heaps more weight. Bye bye abs, accumulator, wires dash etc etc. dash weighed 10kg, wiring loom in engine bay and cabin 18kg, probably 2-5kg in boot but hadn't weighed that. Inner quarter panels bout 2kg, all the old computers in car and brackets and bits here and there another 15kg.

post-19978-0-15405400-1370139131_thumb.jpg

post-19978-0-45642000-1370139302_thumb.jpg

post-19978-0-13376700-1370139336_thumb.jpg

Ha ha ha - awesome acrobatics.

Could not believe the mess of excess wiring behind my 32's dash. Fill a large cardboard box to hold it all.

Lol huge mess, there really is to much that can go wrong so a rewire to simplify things had to happen.

Create an account or sign in to comment

You need to be a member in order to leave a comment

Create an account

Sign up for a new account in our community. It's easy!

Register a new account

Sign in

Already have an account? Sign in here.

Sign In Now


  • Similar Content

  • Latest Posts

    • Even more fun, leave all the ADAS stuff plugged in, but in different locations, hopefully avoid any codes!   And honestly, all these new cars with their weird electronics. Pull all the electronics out Duncan, and just shove an aftermarket ECU and if needed a trans controller in, along with a PDM. Make it run basic but race car styled!
    • To follow up a question from earlier too since I had the front bar off again (fking!) This is what is between the bumper and the drivers side wheel And this is the navigator side, only one thing but its a biggy! So basically....no putting coolers in the wheel arches without a lot of moving other stuff. Assuming I move to properly race prepping this car I'll take that job on and see how the computers respond to removing a whole bunch of ADAS modules
    • So I prepped the car for another track day on Wednesday (will be interesting to see coolant temps post flushing out and the larger reservoir, with a forecast of 3-14 being 20o cooler than last time I took it out). Couple of things to mention; since I am just driving the car and not taking a support vehicle, I took the rear seats out and just loaded the back up Team Trackday style. Look at all that space! To cover off removing the rear seat....it is weird (note the hybrid is probably different because it wouldn't have folding rear seats) Basically, you remove the lower seat base, very similar to a r series but it is a clip that pulls forward to release the base rather than it being bolted down. Easy Then, you need to remove the side section of the rear seat on each side. There is a 14mm head nut at the bottom of the side piece, the it slides upwards off a hook at the top to release; you also need to unhook the seatbelt from the loop at the top. Then the centre piece is weird. You need to release/fold the seats forward with the tab in the boot on each side From there, there are 2,x12mm headed bolts holding the rear of each seat to the folding bracket, under the trim between the rear seat and the boot (4x christmas tree clips there, they suck). The seat is out but you can see where the bolts attach to the bracket
    • As discussed in the previous post, the bushes in the 110 needed replacing. I took this opportunity to replace the castor bushes, the front lower control arm, lower the car and get the alignment dialled in with new tyres. I took it down to Alignment Motorsports on the GC to get this work done and also get more out of the Shockworks as I felt like I wasn't getting the full use out of them.  To cut a very long story short, it ended up being the case the passenger side castor arm wouldn't accept the brand new bush as the sleeve had worn badly enough to the point you could push the new bush in by hand and completely through. Trying a pair of TRD bushes didn't fix the issue either (I had originally gone with Hardrace bushes). We needed to urgently source another castor arm, and thankfully this was sourced and the guys at the shop worked on my car until 7pm on a Saturday to get everything done. The car rides a lot nicer now with the suspension dialled in properly. Lowered the car a little as well to suit the lower profile front tyres, and just bring the car down generally. Eternally thankful for the guys down at the shop to get the car sorted, we both pulled big favours from our contacts to get it done on the Saturday.  Also plugged in the new Stedi foglights into the S15, and even from a quick test in the garage I'm keen to see how they look out on the road. I had some concerns about the length of the LED body and whether it'd fit in the foglight housing but it's fine.  I've got a small window coming up next month where I'll likely get a little paint work done on the 110 to remove the rear wing, add a boot wing and roof wing, get the side skirt fixed up and colour match the little panel on the tail lights so that I can install some badges that I've kept in storage. I'm also tempted to put in a new pair of headlights on the 110.  Until then, here's some more pictures from Easter this year. 
    • I would put a fuel pressure gauge between the filter and the fuel rail, see if it's maintaining good fuel pressure at idle going up to the point when it stalls. Do you see any strange behavior in commanded fuel leading up to the point when it stalls? You might have to start going through the service manual and doing a long list of sensor tests if it's not the fuel system for whatever reason.
×
×
  • Create New...