Jump to content
SAU Community

Recommended Posts

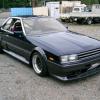
Car used to not start randomly after I bought it but would start eventually...., owner said coilpacks were getting hot.. So about a month ago on this hot day, the car would hardley idle, no power sputtering ect after driving for a while. it was absolute balls unless I let it sit for about 5 mins OFF. Then would start but problem would rrepeat every few kms. Coil packs were black as ash burnt out it seemed, so I put new yellow jackets and and new fuel pump and the coilpack loom from my gtr since the rb20 one was falling apart. And then the new fuel pump wass poping off the fuel filter..... Hose was shit around the edges. So after all this car is sweet started every time no stalls nothing drove nice skidded nice ect

Last week or so coming up to lights the revs will drop to about 500 and run stay there but not stall, when a/c is on its normal 850 ish,

Yesterday car died randomly at about 80km but it turned back on once I pulled overy and cranked it.

Drove to home and now won't start,

I have power

I dont have fuel getting pumped

It cranks but no combustion

I put the older pump in which works( connected it to power) but still nothin

I'm about to change o2 sensor

I'm also sus about the fuel pressure regs one has been changed its a nismo one with the bolt on the end.

I'm stuck Im usually fairly good with cars but this has got me f**ked, I've read some earths ect may be cause but all mine seem fine.

Any help would be much appreciated

Try the cas. it wont fire if the cas plug is off / damaged / not connecting correctly.

Your Ignitor might be stuffed also. if u have a gtr use that one to rule it out.

Could also be the AFM.

Another idea, the fuel pump relay might be getting old and the contacts could be burnt up.

or try and use the fuel pump negative bypass idea. (find the negative for the fuel pump and run it direct to a ground will keep the fuel pump running at constant voltage all the time.)

GL

yea i opened it all up, there is NO power to the pump. it is not getting any signals ect,

Try the cas. it wont fire if the cas plug is off / damaged / not connecting correctly.

Your Ignitor might be stuffed also. if u have a gtr use that one to rule it out.

Could also be the AFM.

Another idea, the fuel pump relay might be getting old and the contacts could be burnt up.

or try and use the fuel pump negative bypass idea. (find the negative for the fuel pump and run it direct to a ground will keep the fuel pump running at constant voltage all the time.)

GL

yea im gona do the ignitor tmoz but i doubt its that, afm was cleaned other week and seems to have had a neat job was done on the wiring :P

why do you have a Z32 on a stock RB20DET motor & ECU?

i go the car like that, also has 33 box, front mount and boost exhaust other stuff but since i been putting back to stock coz was kinda rough.

also i think alot of ppl choose the z32 as a cheaper option than getting rb20 ones


ok, First things first dude:

1. Investigate as to WHY there is NO POWER to the fuel pump!

Fix this problem first BEFORE screwing around with anything else or else you are going to create more dramas!!!!!

Sorry mate but I'm getting frustrated. You started 5 topics - each one has now got theories from others in them with advice.

Listen to the post above re no power to fuel pump/s ^. That will certainly stop your car from running (Fuel, Oxygen, Spark)

It's nice to get advice and maybe there is a quick n easy fix you could do yourself. If you HAVE to DIY then create a list from obvious to not obvious and check it off.

To summarise the possible issues suggested in some of your threads in no particular order but if there is no fuel then START from there.

CAS + connection - Spark

Power to pump - Fuel, Cranks doesn't start

Fuel Relay - "

Fuel Pump - "

Fuel Filter - "

Fuel Reg - "

IC Piping - Pressure (AFM's)

Sparkplugs (fouled). Spark

Earthing - Spark

Coilpacks - Spark

Loom - Spark

Ignitor - Spark

AFM - AF Ratios

ECU - Management

02 (no!)

Then take it to a mechanic, please.

fixed it!!

whole time it was a burnt out pin in a plug, i had to open it up and look at the pins ect to find it other wise it looked fine, it was in the boot over time it had detached/ burnt it self,

and sorry about the posts, i made it on my phone and it must of lagged or something ect, i messaged admins to delete the other posts.

thanks for all your help guys.

Edited by shaunpierre
  • Like 1

Hey guys I have a problem. Replaced a blown rb20det with another. The new motor arrived with the timing out by 4 teeth. We re did the timing and got it running. But it is idleling rough as guts and the motor will die without throttle. If I give the throttle a tap it jumps up but then will go out of control. Up to 3 Grand then slowly comes back down. I have checked afm iac and cold start valve by unplugging them to see if I get a response. Which I do. I have power and signal going to all injectors and coil packs. All cylinders fire. The ecu has a ewad out of 55 which is no faults. Im out of ideas. Will do a boost leak test tomorrow with soapy water. SO CHEAP! Thanks in advance guys

Hey guys I have a problem. Replaced a blown rb20det with another. The new motor arrived with the timing out by 4 teeth. We re did the timing and got it running. But it is idleling rough as guts and the motor will die without throttle. If I give the throttle a tap it jumps up but then will go out of control. Up to 3 Grand then slowly comes back down. I have checked afm iac and cold start valve by unplugging them to see if I get a response. Which I do. I have power and signal going to all injectors and coil packs. All cylinders fire. The ecu has a ewad out of 55 which is no faults. Im out of ideas. Will do a boost leak test tomorrow with soapy water. SO CHEAP! Thanks in advance guys

I would be worried about the 4 teeth out bit. How many teeth can you be out until you hit some valves? Comp test to get an idea what's going on inside. Hopefully it's ok, but I would be concerned.
  • Like 1

Hey Nick. 4 teeth are a worry. Not sure how many teeth it takes for piston to valve contact, but that could be a possibility.......

As for the idling issue, if it's not the AAC, then I reckon you could have an intake leak (as long as the issue above is rectified without being related). Was it a complete engine you bought or just a long engine?

Carrying out timing checks & sweeps on these things can be alittle tricky. Did you follow the guides from the DIY sections?

I would be worried about the 4 teeth out bit. How many teeth can you be out until you hit some valves? Comp test to get an idea what's going on inside. Hopefully it's ok, but I would be concerned.

LOL COPYCAT!

Create an account or sign in to comment

You need to be a member in order to leave a comment

Create an account

Sign up for a new account in our community. It's easy!

Register a new account

Sign in

Already have an account? Sign in here.

Sign In Now


  • Similar Content

  • Latest Posts

    • Did this end up working? Did you take some pictures?
    • And finally, the front lower mount. It was doubly weird. Firstly, the lower mount is held in with a bracket that has 3 bolts (it also acts as the steering lock stop), and then a nut on the shock lower mount itself. So, remove the 3x 14mm head bolts , then the 17mm nut that holds the shock in. From there, you can't actually remove the shock from the lower mount bolt (took me a while to work that out....) Sadly I don't have a pic of the other side, but the swaybar mounts to the same bolt that holds the shock in. You need to push that swaybar mount/bolt back so the shock can be pulled out past the lower control arm.  In this pic you can see the bolt partly pushed back, but it had to go further than that to release the shock. Once the shock is out, putting the new one in is "reverse of disassembly". Put the top of the shock through at least one hole and put a nut on loosely to hold it in place. Put the lower end in place and push the swaybar mount / shock bolt back in place, then loosely attach the other 2 top nuts. Bolt the bracket back in place with the 14mm head bolts and finally put the nut onto the lower bolt. Done....you have new suspension on your v37!
    • And now to the front.  No pics of the 3 nuts holding the front struts on, they are easy to spot. Undo 2 and leave the closest one on loosely. Underneath we have to deal with the wiring again, but this time its worse because the plug is behind the guard liner. You'll have to decide how much of the guard liner to remove, I undid the lower liner's top, inside and lower clips, but didn't pull it full off the guard. Same issue undoing the plug as at the rear, you need to firmly push the release clip from below while equally firmly gripping the plug body and pulling it out of  the socket. I used my fancy electrical disconnect pliers to get in there There is also one clip for the wiring, unlike at the rear I could not get behind it so just had to lever it up and out.....not in great condition to re-use in future.
    • Onto the rear lower shock mount. It's worth starting with a decent degrease to remove 10+ years of road grime, and perhaps also spray a penetrating oil on the shock lower nut. Don't forget to include the shock wiring and plug in the clean.... Deal with the wiring first; you need to release 2 clips where the wiring goes into the bracket (use long nose pliers behind the bracket to compress the clip so you can reuse it), and the rubber mount slides out, then release the plug.  I found it very hard to unplug, from underneath you can compress the tab with a screwdriver or similar, and gently but firmly pull the plug out of the socket (regular pliers may help but don't put too much pressure on the plastic. The lower mount is straightforward, 17mm nut and you can pull the shock out. As I wasn't putting a standard shock back in, I gave the car side wiring socket a generous gob of dialectric grease to keep crap out in the future. Putting the new shock in is straightforward, feed it into at least 1 of the bolt holes at the top and reach around to put a nut on it to hold it up. Then put on the other 2 top nuts loosely and put the shock onto the lower mounting bolt (you may need to lift the hub a little if the new shock is shorter). Tighten the lower nut and 3 upper nuts and you are done. In my case the BC Racing shocks came assembled for the fronts, but the rears needed to re-use the factory strut tops. For that you need spring compressors to take the pressure off the top nut (they are compressed enough when the spring can move between the top and bottom spring seats. Then a 17mm ring spanner to undo the nut while using an 8mm open spanner to stop the shaft turning (or, if you are really lucky you might get it off with a rattle gun).
    • You will now be able to lift the parcel shelf trim enough to get to the shock cover bolts; if you need to full remove the parcel shelf trim for some reason you also remove the escutcheons around the rear seat release and you will have to unplug the high stop light wiring from the boot. Next up is removal of the bracket; 6 nuts and a bolt Good news, you've finally got to the strut top! Remove the dust cover and the 3 shock mount nuts (perhaps leave 1 on lightly for now....) Same on the other side, but easier now you've done it all before
×
×
  • Create New...