Jump to content
SAU Community

Recommended Posts

EOI - I’m thinking of parting out my white 1996 r33 gtst s2 skyline,

this is a EOI at this point as i wanna see how much interest there would be in all my parts before i start parting out the car.
Not unless i have a fair bit of interest in some of the main parts will i start parting out.
i have the car for sale as a whole and would be happy to sell as a whole car but if i get good interest in the parts i will start to part out its just more work and seem a bit of a shame to part out but what ever get the job done.
Here are some of the parts i have
-haltech platinum pnp for rb25det w/boost solenoid $1650
-greddy style forward facing plenium $200
-nismo side feed 740cc injectors in standard fuel rail $300
-Tomei Fuel Pressure Reg $80
-rb25/30 motor had standard rebuild about 5000kms ago
-Block was honed
-new rings, bearings rod & mains, head studs & head gasket
-all genuine nissan parts
-head is a s2 rb25det head
-VCT deleted running rb20 cams
-grub screw the oil feed
-Rb25 oil pump
-new gaskets
-new thermostat
-Motor had perfect compression of 170psi through all cylinders
$2400
-garrett gt3076 .63 rear w/braided oil & water lines good condition $1000
-eBay stainless steel high mount manifold $150
-38mm turbosmart external wastegate $200
-kinuwaga td06-25g turbo v band rear used for only about 1000kms good condition $600
-super spark coilpacks $200
-apexi safc $100
-apexi rsm $100
-front mount with all piping $200
-3inch exhaust from turbo back $300
-profec b type 2 ebc $180
-rb25 carbon coil pack cover $50
-Raditor $100
-rb25det gearbox with nismo short shifter. very tight box no crunching $1200
-carbon style steering column surround $100
-standard steering column surround $50
-r33 twin gauge pillar $40
-universal single gauge pillar $20
-r33 gtr cluster with blue led lights. 62,000kms i think $300
-r33 gtst cluster with 9kms $250
-r33 gtr 3 gauge center din $150
-stock carpet set $160
-r33 genuine gtr spoiler $250
-r33 gtst s2 front bar primed ready to spray $150
-r33 gtst wantannabee coilovers $400
-rear ajustable camber arms $50
-white GTR gear & handbrake boot $80
-r33 gust led tail lights $200
-s2 bonnet ok condition $120
-front guards pair left side good right side has scratch on it $120
-Bootlid $100
-Rear bar $100
-fibreglass GTR style grill $80
-s2 grill $50
-s2 Headlights fair condition pair $300
-climate control unit $80
-r33 gtst front and rear brakes $400
-Catch can $40
Ill take some pics tomorrow if not thursday as ill be away for work till then.
all other body and inteior parts available just ask me for price
If theres any parts that arnt listed then just ask me about them and ill give u a price and let u know condition of the part.
the car is located in canberra but I’m willing to post things at buyers cost.
i guess if any other questions then just pm me and ill get back to you.
i will accept paypal bank deposit or COD as payment method
Pm me for my number if u want.
Thanks regards Viet

post-22213-0-08830200-1417959176_thumb.jpg

post-22213-0-78421700-1417959199_thumb.jpg

post-22213-0-98352500-1417959213_thumb.jpg

Edited by cuong nguyen
Link to comment
https://www.sau.com.au/forums/topic/451491-eoi-parting-out-r33-gust/
Share on other sites

Interested in the haltech (assume by pnp you mean the pro), front mount (brand?), exhaust (brand), rear adjustable camber arms, door locks (mine have been busted by would be thieves), front strut brace?, rear strut brace?,

Is the radiator a bigger aftermarket? Might be interested in it too.

hey sorry about the delay but i think I'm going down the route of parting my car out.

if i have any parts that have multiple interest it will go to the highest offer or who ever has cash.

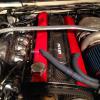
heres pics as promised if there are any parts that i haven't mentioned the price for please just pm me as there are a lot more parts then expected.

parts are all located in canberra but I'm willing to post at buyers expense.

most parts are priced reasonable so please no low ballers.

heres a link to pictures of most the parts any other questions please feel free to pm.

thanks for your time

regards viet

skyline parts

  • 1 month later...

Create an account or sign in to comment

You need to be a member in order to leave a comment

Create an account

Sign up for a new account in our community. It's easy!

Register a new account

Sign in

Already have an account? Sign in here.

Sign In Now


  • Similar Content

  • Latest Posts

    • God damnit. The only option I actually have in the software is the one that is screenshotted. I am glad that I at least got it right... for those two points. Would it actually change anything if I chose/used 80C and 120C as the two points instead? My brain wants to imagine the formula put into HPtuners would be the same equation, otherwise none of this makes sense to me, unless: 1) The formula you put into VCM Scanner/HPTuners is always linear 2) The two points/input pairs are only arbitrary to choose (as the documentation implies) IF the actual scaling of the sensor is linear. then 3) If the scaling is not linear, the two points you choose matter a great deal, because the formula will draw a line between those two points only.
    • Nah, that is hella wrong. If I do a simple linear between 150°C (0.407v) and 50°C (2.98v) I get the formula Temperature = -38.8651*voltage + 165.8181 It is perfectly correct at 50 and 150, but it is as much as 20° out in the region of 110°C, because the actual data is significantly non-linear there. It is no more than 4° out down at the lowest temperatures, but is is seriously shit almost everywhere. I cannot believe that the instruction is to do a 2 point linear fit. I would say the method I used previously would have to be better.
    • When I said "wiring diagram", I meant the car's wiring diagram. You need to understand how and when 12V appears on certain wires/terminals, when 0V is allowed to appear on certain wires/terminals (which is the difference between supply side switching, and earth side switching), for the way that the car is supposed to work without the immobiliser. Then you start looking for those voltages in the appropriate places at the appropriate times (ie, relay terminals, ECU terminals, fuel pump terminals, at different ignition switch positions, and at times such as "immediately after switching to ON" and "say, 5-10s after switching to ON". You will find that you are not getting what you need when and where you need it, and because you understand what you need and when, from working through the wiring diagram, you can then likely work out why you're not getting it. And that will lead you to the mess that has been made of the associated wires around the immobiliser. But seriously, there is no way that we will be able to find or lead you to the fault from here. You will have to do it at the car, because it will be something f**ked up, and there are a near infinite number of ways for it to be f**ked up. The wiring diagram will give you wire colours and pin numbers and so you can do continuity testing and voltage/time probing and start to work out what is right and what is wrong. I can only close my eyes and imagine a rat's nest of wiring under the dash. You can actually see and touch it.
    • So I found this: https://www.efihardware.com/temperature-sensor-voltage-calculator I didn't know what the pullup resistor is. So I thought if I used my table of known values I could estimate it by putting a value into the pullup resistor, and this should line up with the voltages I had measured. Eventually I got this table out of it by using 210ohms as the pullup resistor. 180C 0.232V - Predicted 175C 0.254V - Predicted 170C 0.278V - Predicted 165C 0.305V - Predicted 160C 0.336V - Predicted 155C 0.369V - Predicted 150C 0.407V - Predicted 145C 0.448V - Predicted 140C 0.494V - Predicted 135C 0.545V - Predicted 130C 0.603V - Predicted 125C 0.668V - Predicted 120C 0.740V - Predicted 115C 0.817V - Predicted 110C 0.914V - Predicted 105C 1.023V - Predicted 100C 1.15V 90C 1.42V - Predicted 85C 1.59V 80C 1.74V 75C 1.94V 70C 2.10V 65C 2.33V 60C 2.56V 58C 2.68V 57C 2.70V 56C 2.74V 55C 2.78V 54C 2.80V 50C 2.98V 49C 3.06V 47C 3.18V 45C 3.23V 43C 3.36V 40C 3.51V 37C 3.67V 35C 3.75V 30C 4.00V As before, the formula in HPTuners is here: https://www.hptuners.com/documentation/files/VCM-Scanner/Content/vcm_scanner/defining_a_transform.htm?Highlight=defining a transform Specifically: In my case I used 50C and 150C, given the sensor is supposedly for that. Input 1 = 2.98V Output 1 = 50C Input 2 = 0.407V Output 2 = 150C (0.407-2.98) / (150-50) -2.573/100 = -0.02573 2.98/-0.02573 + 47.045 = 50 So the corresponding formula should be: (Input / -0.02573) + 47.045 = Output.   If someone can confirm my math it'd be great. Supposedly you can pick any two pairs of the data to make this formula.
×
×
  • Create New...