Jump to content
SAU Community

Recommended Posts

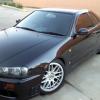
Hi SAU, I need your help. This is a long going issue with my R34GTT that I havent bothered fixing yet, I fitted Bilstein coilovers from another R34 and got new bumpstops n grooves cut in by Sydneykid sometime ago, the pics are old btw.

Issue is all the clanking (esp from the rear strut tops) when hitting mild bumps and imperfections at even 30-40km/h. The fronts also do this, on top of that they creak real loud like a mofo when turning/braking esp on drives, humps etc. At normal speeds you cannot really hear the creaks when turning.

I need to identify which part from my first pic I need to replace, from what I know its the strut mounts or tops but my ones not a single item, rather a series of washers n rubbers>>first pic. So what do I replace and from where, any alternatives or has to be Bilstein? Thanks

post-49401-14238867390831_thumb.jpgpost-49401-14238867568213_thumb.jpg

Well.....only the washers and nuts are Bilstein. Everything else is Skyline.

OK, OK, the bump stops are not OEM, but hell, as if they matter.

They're not really strut tops at either end of the car either, because all they really are is upper spring retainers. There's no bearings in there to make noise. if there's creaking and shit going on, then it's probably in the dampers themselves (or possibly in any one of the other bushes/bearings in the rest of the suspension) and perhaps you should just take it to Gary and get him to have a look.

The noise only started with my Bilsteins- it wasnt there at all with my Cusco coilovers and its definitely coming from the top of the struts both front n rear ( front creaks during turning), so what else could it be- as u said it dorsnt look like these struts have bearings..my suspect is those thick black rubber/plastic washers but please enlighten me

Well, at no time does any part of the damper need to rotate around its axis - there are not "struts"....therefore, any creaking from turning the wheels is either coincidental, or maybe just maybe because the top nuts are loose or something. Otherwise, it's as I said in 1st reply.

The springs are not fully captive if they're banging and clunking, possibly from deteriorated rubber or that the springs are too short for the shock. Creaking from the top hats could be that the rubber has deteriorated and causing the spring edge to rub in its mounting position because it's not completely captive.

Does the spring move at all if you try and jerk it in its mount? Try it on a bench vise.

Sorry guys been pretty busy with stuff, the 'loose spring' is what it probably is because it is not that sprung when captive in the car, I am pretty sure I could turn it on its mounts with a little bit of effort while its still on the car. Will report back later

And loose possibly because I moved it down on Sydneykids standard cut grooves to give the height I want.

I always wondered how people went with the grooves. You could try getting some spacers and placing them inbetween the top hat and lock nut to force the spring captive. But I hold no responsibility if anything happens, as it's just the first idea off the top of my head.

The problem with all this is you are running out of shock travel - note shock travel not spring travel. I don't care how good the shock absorber is if you don't have any stroke for it to work in it wont work.

See here.

http://www.sau.com.au/forums/topic/374385-bilstein-coilover-conversion/page-1

Part of the fix is to replace the strut tops which gets you shock travel back. As an aside replacing all that old stuff will also get rid of your squeeeeeking & clunking.

  • Like 1

Wont the use of spring spacers simply be the same as moving my springs UP on the cut groves- will give more height n shock travel like spacers will. We pinpointed the creaking to the front left strut (not sure if its from the strut tower top or bottom joint) when turning during the LAST 20-30% of full lock and when the car is leaning sideways on that shock during turning. During the last turns close to lock is when the creaks happen even when parked but moreso at low driveway speed.

The rear strut clanking n rattling tops during small bumps is a separate story

  • 2 weeks later...

My R34 GTT has similar symptoms, I had bilsteins fitted and re-used the stock springs at near-stock heights (dropped the rear a little bit via the circlip grooves on the shock to make it sit level.. the front stayed the same). Occasionally clunks a bit when at slow speeds and turning, eg into/out of driveways. I haven't managed to narrow down what's causing it yet.

I seem to have this issue as well. Clanking and clunking when going over speed humps or moderate road imperfections. I'm running Bilstein B6 Dampers and King Springs.

Rather than a dull thud, the car makes more of a 'crashing' sound for lack of a better term, when going over bumps.

  • 2 weeks later...

Rather than a dull thud, the car makes more of a 'crashing' sound for lack of a better term, when going over bumps.

Check how much "droop" you have. By droop I mean measure the centre-of-wheel-to-arch when the car is on the ground and then jack the car up so the wheels are hanging in the air and measure it again. You need at least a few inches of droop or your shocks will 'top out' out on the exit of a bump. Basically, your car goes over the bump, wheels go up, which pushes the car body up a bit. On the exit of the bump the body is higher, wheels extend and BANG the shocks reach the end of their travel, there is no bump stop in this direction and it sounds really ugly (and will destroy the shock).

The workshop who installed my Bilsteins (who SHOULD KNOW BETTER given their proximity to the Bilstein importer) did not remove the spacer inside the shock that limits droop when used with lowered springs. They gave me a car back that had zero droop at the back. If I hadn't seen it with my own eyes I wouldn't have believed it.

Just and update, I remove a front dust boot and reinstalled the strut into the car. On level ground there is about 1cm of travel between the (shortened) bump stop and the shock body. That is with King Spring lows and a 1cm lower slot in the spring perch. So I guess I have been bottoming out on everything larger than a pebble lol. Time for some base-height adjustable coil overs.

Just and update, I remove a front dust boot and reinstalled the strut into the car. On level ground there is about 1cm of travel between the (shortened) bump stop and the shock body. That is with King Spring lows and a 1cm lower slot in the spring perch. So I guess I have been bottoming out on everything larger than a pebble lol. Time for some base-height adjustable coil overs.

No. Time for some new strut tops to allow the reinstatement of shock travel.

These ones.

http://www.isccoilovers.com.au/coilover-spare-parts

Get the ones with the rubber bushes front and rear but you have to ask them for the front ones as they aren't listed.

But read this first to understand you need a couple of other bits to make them fit your Bilsteins - plus they work with 65mm springs not the Kings. If you want to retain the King springs you may need something different. Not sure what that would be.

http://www.sau.com.au/forums/topic/374385-bilstein-coilover-conversion/page-1

Create an account or sign in to comment

You need to be a member in order to leave a comment

Create an account

Sign up for a new account in our community. It's easy!

Register a new account

Sign in

Already have an account? Sign in here.

Sign In Now


  • Similar Content

  • Latest Posts

    • Hi, is the HKS  Tower Bar still available ? negotiable ? 🤔
    • From there, it is really just test and assemble. Plug the adapter cables from the unit into the back of the screen, then the other side to the car harness. Don't forget all the other plugs too! Run the cables behind the unit and screw it back into place (4 screws) and you should now have 3 cables to run from the top screen to the android unit. I ran them along the DS of the other AV units in the gap between their backets and the console, and used some corrugated tubing on the sharp edges of the bracket so the wires were safe. Plug the centre console and lower screen in temporarily and turn the car to ACC, the AV should fire up as normal. Hold the back button for 3 sec and Android should appear on the top screen. You need to set the input to Aux for audio (more on that later). I put the unit under the AC duct in the centre console, with the wifi antenna on top of the AC duct near the shifter, the bluetooth antenna on the AC duct under the centre console The GPS unit on top of the DS to AC duct; they all seem to work OK there are are out of the way. Neat cable routing is a pain. For the drive recorder I mounted it near the rear view mirror and run the cable in the headlining, across the a pillar and then down the inside of the a pillar seal to the DS lower dash. From there it goes across and to one USB input for the unit. The second USB input is attached to the ECUtec OBD dongle and the 3rd goes to the USB bulkhead connected I added in the centre console. This is how the centre console looks "tidied" up Note I didn't install the provided speaker, didn't use the 2.5mm IPod in line or the piggyback loom for the Ipod or change any DIP switches; they seem to only be required if you need to use the Ipod input rather than the AUX input. That's it, install done, I'll follow up with a separate post on how the unit works, but in summary it retains all factory functions and inputs (so I still use my phone to the car for calls), reverse still works like factory etc.
    • Place the new daughterboard in the case and mount it using the 3 small black rivets provided, and reconnect the 3 factory ribbon cables to the new board Then, use the 3 piggyback cables from the daughterboard into the factory board on top (there are stand offs in the case to keep them apart. and remember to reconnect the antenna and rear cover fan wires. 1 screw to hold the motherboard in place. Before closing the case, make a hole in the sticker covering a hole in the case and run the cable for the android unit into the plug there. The video forgot this step, so did I, so will you probably. Then redo the 4 screws on back, 2 each top and bottom, 3 each side and put the 2 brackets back on.....all ready to go and not that tricky really.      
    • Onto the android unit. You need to remove the top screen because there is a daughterboard to put inside the case. Each side vent pops out from clips; start at the bottom and carefully remove upwards (use a trim remover tool to avoid breaking anything). Then the lower screen and controls come out, 4 screws, a couple of clips (including 3 flimsy ones at the top) and 3 plugs on the rear. Then the upper screen, 4 screws and a bunch of plugs and she is out. From there, remove the mounting brackets (2 screws each), 4 screws on the rear, 2 screws top and bottom and 3 screws holding in the small plates on each side. When you remove the back cover (tight fit), watch out for the power cable for the fan, I removed it so I could put the back aside. The mainboard is held in by 1 screw in the middle, 1 aerial at the top and 3 ribbon cables. If you've ever done any laptop stuff the ribbon cables are OK to work with, just pop up the retainer and they slide out. If you are not familiar just grab a 12 year old from an iphone factory, they will know how it works The case should now look like this:
    • Switching the console was tricky. First there were 6 screws to remove, and also the little adapter loom and its screws had to come out. Also don't forget to remove the 2 screws holding the central locking receiver. Then there are 4 clips on either side....these were very tight in this case and needed careful persuading with a long flat screw driver....some force required but not enough to break them...this was probably the fiddliest part of the whole job. In my case I needed both the wiring loom and the central locking receiver module to swap across to the new one. That was it for the console, so "assembly is the reverse of disassembly"
×
×
  • Create New...