

Announcements
-
Similar Content
-
-
Latest Posts
-
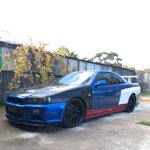 Hey all im wondering if you can help me please I have put a rb20 box in my r34 gtt as my auto packed up and a friend had a spare box I know it’s not ideal but it will get me up and running for now. we have done the conversation and everything is working great but my Speedo we got a s13 speed sensor but my Speedo reads double now and I bought a speed converter but still not having any luck. so I thought I’ll reach out and pick your brains any help would be appreciated please as I wanna drive my car again
 -

By joshuaho96 · Posted
Drain it. I got official Matic D but you can get whatever is listed as Matic D compatible. -
 Thanks guys, Yeah I should at least have them dynoed, at least then I know what I've got as a starting point. The springs on these are hard as rocks. I vaguely remember Russman saying he was going to sell the shocks to me with the rocks fitted, as he was keeping the softer springs for his new setup. I didn't click at the time but of course that was to let me know the shock/spring wouldn't be matched. I also remember pricing up new springs around 2014-15, but, house, money etc. it never happened. So that was another reason to have them rebuilt. I have rebuilt the forks on many motorcycles so I think I could handle the seals on these easily enough, but getting the valving right would be a rabbit hole I cbf exploring. Duncan, interesting to hear RP was tuning these back then. I might give them a call. In the mean time I have been busy fitting sway bars. The Whiteline rear sway bar I purchased 15 years ago finally got fitted, along with the Whiteline front bar that showed up last week. Just waiting on new links for the front sway bar to finish that off. And my spare set of advan AVS VS5's should be back from the powder coaters in a Pearl White finish sometime this week, with a set of Hankook RS4's lined up for fitting. And then I just have all the suspension bushes to do. A comprehensive kit is on the way... Lots to do before the Ararat hill climb. Cheers guys 🍻
 -

By funkymonkey · Posted
Nice car! I’m glad folks in the US have gotten past the FnF and are buying real cool cars like the 260RS I was with a bunch of mates in Portland about a year ago and spotted a green Stagea (just a regular 2.5T AWD) parked about 2 blocks away and they were like “a what?” So I made a bet with them for a round of beers and said “ok one of you run down there and tell me if the steering wheel is on the correct side” 5 mins later the American comes trudging back up the hill and goes “he’s right guys. Ok what beer do you want?” -

By Dose Pipe Sutututu · Posted
Should replace OR drop the tank, give it's good clean. Might be worth replacing that entire fuel level/pump/cradle thing with this: https://frenchysperformancegarage.com/products/fpg-s13-180sx-r32gtst-single-pump-hanger-kit-billet-hat-6-v3-fpg-089?gQT=2
-


Recommended Posts
Create an account or sign in to comment
You need to be a member in order to leave a comment
Create an account
Sign up for a new account in our community. It's easy!
Register a new accountSign in
Already have an account? Sign in here.
Sign In Now