Jump to content
SAU Community

R32 Boost Gauge Install


wilch
 Share

Recommended Posts

Here's a little write up on how to install a boost gauge into the drivers side vent of an R32.

post-10239-1150443012.jpg

*disclaimer: If anything goes wrong or you break anything while following this post it's not my fault.

Items needed:

Phillips head screw driver

Socket Set

Spare vacuum line (the thin stuff that just fits the clear autometer tube inside it)

plastic T piece that fits the above vacuum line

Masking tape

Step 1

IMPORTANT Open the bonnet. It's easier to now than it is later

Remove the dash piece that's above the pedals and below the steering wheel.

- there are 4 screws along the top side

- 2 screws along the bottom side (32 gtst)

- 1 screw at the side (covered by the door when it's closed)

- 2 bolts that also hold in the bonnet release

n.b. Unplug the beeper after you've unscrewed everything (you'll see it when you do it)

Step 2

Once you've removed this piece you'll notice that the vent is attached. Unscrew the two screws holding it in and remove.

Step 3

Now what you'll notice is that you've got a nice little hole where you should be able to fit your gauge. Some fit, but with the autometer boost gauge that we had there was no chance of getting it in.

If this happens you need a Dremel. If you don't know what a Dremel is, maybe you should get someone that does and have them finish the install :P

Ok, now if you check the packaging that came with your autometer gauge you should notice that it came with a circular tube of hard cardboard in which it was placed. Get this tube and use it to see how much of the hole you need to widen.

Now with the autometer gauge I was lucky cause I basically just needed to shave off the clean rounded edge around the hole.

There was a lot to take off regardless. It's just this edge gave me something to work towards so that I kept the hole round, and didn't go too far.

Step 4

Dremel time.

I used this attachment.

post-10239-1150444255.jpg

Now here's where I wish I had taken more photos.

I didn't use this attachment to cut into the hole, I used it kinda like you would sand paper. Shaving away this inside of the hole slowly. TAKE YOUR TIME. Do NOT hack away at the hole, just shave the edges down slowly, moving around the hole till it's bigger.

Eventually it'll be big enough. Keep checking.

Step 5

Insert the gauge.

post-10239-1150443245.jpg

Here you can see the snug fit. It was actually so snug I couldn't get it back out again. So make sure you've lined it up properly before you push it all the way in.

Step 6

How the hell do you get the vacuum feed from the engine to the gauge??

Have a look in the engine bay.

post-10239-1150443392.jpg

The vacuum line highlighted by the red arrow is what we need to cut.

It currently feeds the stock boost gauge controller (the little box on the left).

Now look to the left a bit more and you'll see a hole.

post-10239-1150443315.jpg

This is your entrance into the cars cabin.

Here's the other side of that hole.

post-10239-1150443100.jpg

...and a bit closer. (Note I've already pushed the clear autometer tubing through the hole)

post-10239-1150443173.jpg

Step 7

Feeding the line.

- Grab an old coat hanger.

- Unwind it.

- Grab the clear autometer tubing.

- Line up the end of the tubing with one of the ends of the coat hanger wire.

- Tape around the end of the tubing and the wire tightly... make the end smooth and one piece basically.

- Get in the car.

- You see this rubber stuff?

post-10239-1150443173.jpg

- Poke a hole through it, then shove the coat hanger plus tube (taped end first) in through here.

- Now go and have a look in the engine bay.

- You should see the coat hanger and the tube in here.

post-10239-1150443315.jpg

- Grab it and pull it through.

Now that wasn't hard was it? Few mins and your done. So many people told me this step would take forever and was a bitch... sif.

Step 8

Attaching the Tpiece.

Cut the vacuum line pictured.

post-10239-1150443392.jpg

And attach the Tpiece.

Then cut the clear tube to size....

post-10239-1150443464.jpg

All done for the engine bay.

Step 9

Connecting the vacuum line to the gauge.

N.b. Ensure you leave enough slack in the vacuum line to get the gauge plus dash piece out again once installed.

Basically follow the instructions for you gauge at this point.

With autometer gauges, be careful not to twist or bend the clear tubing when screwing the attachment onto the gauge.

Step 10

Making it light up.

Grab the 12v feed from your cigarette lighter. It's the easiest 12v wire that goes "hot" when the headlights are turned on to find.

post-10239-1150443529.jpg

Wire this up as you would anything else. If you don't know how to do this, you shouldn't be installing the gauge.

Step 11

Admire your work.

post-10239-1150442922.jpg

post-10239-1150443012.jpg

thats a nice write up and a good idea

Link to comment
Share on other sites

  • 6 months later...
  • 3 weeks later...

hey guys im taking my boost gauge out (for regency) and need to plug up the t-piece so i can unplug it and re-install boost guage after. anyone know of a piece or 'plug' to do this?

thanks in advance

Also interested in a response to this question...Shogun did you have any luck?

Link to comment
Share on other sites

  • 2 weeks later...
  • 7 months later...
  • 2 months later...

Hi guys, I got a question regarding this install

My car's standard boost gauge does not work properly, on the stock gauge the boost starts at -7 rather than 0 and once on boost it goes up to 0 (rather than +7). Any ideas of what the problem could be?

Nonetheless, i am looking at installing a new boost gauge anyway and locating it at the driver's side vent as shown in this tutorial. Only one problem... My car doesn't have a cigarette lighter (a large pockets sits there instead), so i'm just asking if there are any other places i could wire up the boost gauge apart from the lighter?

Cheers

Link to comment
Share on other sites

  • 4 months later...
  • 1 month later...

I did mine today, my gauge was smaller. Small enough to fit snuggly in the swivel-ball when I cut out the fins. Haha

I need to trim a little chunk out of the rear shroud to make it flush. You're tut is great and easy to follow. :-)

post-94192-0-46498300-1341068578_thumb.jpg

Link to comment
Share on other sites

  • 1 year later...

Did the same thing on the weekend..

To make my gauge fit, I used a lighter to heat up and expand the hole on the panel with a screw driver.

Looks more better then my old set up.

VE7nJyU.jpg

bZKQIiW.jpg

Edited by danbevsta
Link to comment
Share on other sites

  • 2 weeks later...
  • 2 years later...

"Grab the 12v feed from your cigarette lighter. It's the easiest 12v wire that goes "hot" when the headlights are turned on to find."

I'm confused. What do you mean by "hot when the headlights are turned on"? Isn't the cigarette lighter power always on with ignition?

Link to comment
Share on other sites

There should be 3 wires, 12v ignition/power, Earth and illumination/light wire (the small light around the cigarette lighter, turns on with the headlights) you would wire them correctly for the gauge to light up when headlights are active.

Link to comment
Share on other sites

Create an account or sign in to comment

You need to be a member in order to leave a comment

Create an account

Sign up for a new account in our community. It's easy!

Register a new account

Sign in

Already have an account? Sign in here.

Sign In Now
 Share


  • Similar Content

  • Latest Posts

    • I mean nah, lets be honest it's significantly worse. BMW's are absolutely not the same age, replacements are not the same level of robustness. Most would say an E36 is more solid than an E90X and I would still say an E36 is a little more rickety than your equivalent R chassis over time. BMW pretty much have a huge void between E36 and anything with a B58/ZF onward. I kinda get the appeal if they work, but they just don't. I get that the vibe is "do a track day in executive comfort" but in all seriousness, a VE Commodore is as comfortable and certainly more solid* around a track, and they are hardly up there in the high list of "Excellent track cars". See also: Barra Turbo with coilovers or _something_. I mean a great deal of these cars/choices are always irrational, but I at least try to stay rational, or at least have some rational argument why I did X and not Y :D. My pet peeve is irrational badge snobbery. There is no reason to buy a Luxury SUV when anything from Kia will do the job better, and cheaper. I know someone who has a twin turbo diesel X5 making 400kw or whatever and as soon as he opens his mouth I say nothing but "You are an idiot who has wasted your money" and tell him to buy a Tesla Model X/Y as it is superior to anything he will do with that car. (he does not like this, but he deserves it, just trust me..) But Prank seems like a nice guy. I want him to sell this 335i before sadness kicks in more and buy something far happier at the track, like an 86, or a Megane RS, or an Evo, or even save the money on mods and buy a 440i/240i/etc and bypass the painful years between 1997 and 2015 for BMW.
    • Haha most are for LHD though!  
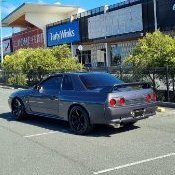
    • Honestly, can't be worse than Skyline ownership which is also a mess considering the age of these things. The 335i at least you can still get parts easily.
    • Looks nice Shan. Every time you post its about a different car! 
    • Nice one! You wont know the old girl when all that's installed. My alignment was absolutely horrid when I did my front end. The car just wanted to go in circles and it was so heavy to straighten up. I totally thought I'd stuffed it. 
×
×
  • Create New...