
Announcements
-
Similar Content
-
-
Latest Posts
-
 Yep. In the E39 it's slightly different than the others. Honestly I'd just leave it but every time I drive the car it tells me oil is low and that just makes me check the dipstick. It is a BMW Afterall and it tries to expel it's own oil regularly. Thankfully it's not like my E90 that has no dipstick at all so you just gotta trust it.
 -
 Was that also a typo? $350?! Just typing "BMW oil level sensor" and prices start out a lot more sanely than $350. I'm guessing it's a sensor used in one low volume model only or something?
 -
They kept the product number the same, so we "didn't pick it up when packing your order". If you packed the order, you clearly saw the box wasn't Hella...
-
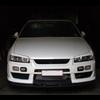
 Actually, the equivalent skyline part is both cheaper and simpler, maybe you should come back from the dark side?
 -
 And we are full
-


Recommended Posts