Jump to content
SAU Community

Recommended Posts

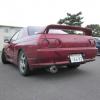
Okay, this is seriously a newbie question, but I have just put my new stock R33 GTS-T through a dyno to measure the initial power before any mods were done to it.

Why is the max power only at 132kw instead of the 180kw which it was supposedly able to do in the official R33 specifications?

No wonder it felt kinda slow. Kinda dissapointed and can't wait to fit some mods. :laugh:

p1010633largedx7.th.jpg

Link to comment
https://www.sau.com.au/forums/topic/139745-power-output-in-stock-r33-gts-t/
Share on other sites

all figures in magzines, flyers, brochers, dealers etc are all flywheel

ie: at the engine / clutch system and not at the rear wheels.

a stock gtst in 4th will make around 130 to 140rwkw.

all the hsv's that have the 250kw badging and "figures" are all the flywheel

so they would make around 200rwkw. a 200rkw skyline would smoke it no worries

The R33's come with a dual stage boost control solenoid that switches from low to high boost mode at roughly 4500rpm (about the same time the variable inlet cam kicks to advanced setting). It's mounted in front of the passenger side strut tower with 1 hose going off to the intake before the turbo, then another with a t-piece splitting off to go to the wastegate actuator & the intake after the turbo.

Why nissan set them up with the dual stage control like this I have no idea, makes the car a lot peakier to drive though. When you get another boost controller you can set it up for the same boost at lower revs. Far more Torquey

Edited by JazzaR33

Mate, my R33 was on the dyno at Mercury a bit over a week ago and it made 149.4rwkw, again on a completely stock car. If you compare the graphs you'll see that i'm making around 20kws more through most of the rev range, but more importantly you'll see the difference in boost. I've grounded the wire going to the boost controller so it's in high boost all the time, but yours should still get there in the end. I'd be looking at your boost controller first, maybe read the thread on staying constantly in high boost mode and give that a shot.

dyno.jpg

My RB20 made 196.4kw with some small mods. I think the R34 Turbo made a big difference. Dyno Results are on my Signature. Shoebox I suggest you get rid of the Dual Stage boost and just run a constant 8-10psi. >_<

:P

Edited by r32matt

well I had 145rwkw completely stock and when i got an exhaust it went to 170rwkw. how do i do the adjustment to get hi boost from stock controller all the time??? havent heard of that yet. Thanks!!

and it should be at 5psi before that. i'd say you have a split hose of something causeing a boost leak.

okay, i'll ask him about it tomorrow. split hose!?! don't scare me! =_=

but i really doubt that it's a mechanical fault, as i sent this car down for a pre-purchase inspection a few weeks ago, and it cleared except for an oil leak from the tappet covers, castor bushes which are about to split and spark plugs which are one heat range lower than they're supposed to be.

Create an account or sign in to comment

You need to be a member in order to leave a comment

Create an account

Sign up for a new account in our community. It's easy!

Register a new account

Sign in

Already have an account? Sign in here.

Sign In Now


  • Similar Content

  • Latest Posts

    • @dbm7 and @GTSBoy thank you both very much! will give that a shot!
    • Sounds good. Provided the panel is flat/level I'd be happy to start the painting process.  While you are learning, for sure you could do this. Its only paint, you can always sand it all back and start again. Its only your time and money on materials, but while you're learning, really its time and money spent on your education.  Once you know how to do this bodywork and painting, you won't want to waste your time and money on frivolous activities lol. 
    • Yep I will use a guide coat after putting filler, I will do it on the whole panel as I'm a beginner so chances I've made quite a few errors. In that photo, I think that was a low spot, I just for example said to pretend it's flat but I will put filler + guide coat after to assess where I'm at. Yep with that picture, the panel is wet as it rained when I took the photo. But all those scratches are completely smooth, I went over it with 240 grit and can't feel it, even with my nail digging into it. I was legit thinking to buy a 2k can and spray primer to see how it turns out but then thought to myself it's going to be a mess doing it haha. Good mention there. Thanks for all that info I think I know what to do next.
    • Prior to laying down the primer, you need to make sure the surface is completely level. For example, based on this picture, I strongly suspect that the areas marked in blue are higher then the area marked in green.  If you spray primer over this entire area, then paint and clear it, the finished result will 100% show the low area. It will stick out like dogs balls. Unfortunately the paint won't magically level out the low areas as you lay it down.  Without seeing it in person, I expect that the green area will need to be filled, then use a guide coat and check that the entire repair area is level with a large sanding block.  With this picture, are you saying that even though you can see the scratches, the panel is in fact completely smooth and flat? If this is the case sure you could prep and paint it as it is.     The picture with the paint you described as blistering, it's hard for me to comment on from the photo alone. It looks like the panel is wet? Dunno, looks strange. Does the panel feel as smooth as glass when you run your hand over it? **** Going back to your question again, generally you would only sand the primer if you made a mistake while laying down the primer.  If the panel is prepped properly and you lay the primer down properly, you should not need to sand the primer.  This wouldn't work - Don't prep the panel. Spray primer and see how it turns out. Sand the areas where the issues appear. Spray more primer and see how it turns out. Sand the areas....... Yeah you'd go round and round in circles getting no where. 
×
×
  • Create New...