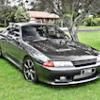
Abflug Carbon Fibre Front Lip/diffuser For R32 Gt-r!
Announcements
-
Similar Content
-
Latest Posts
-
By Murray_Calavera · Posted
Did you panel beat the dents or have you tried to repair this only using filler? Is your sanding block soft/flexible and is following the shape of the panel rather then just knocking down the high points? -
I haven't knocked them down yet. I think I made the repair more complex than it should have been. I had rock chips combined with waviness and dents and I tackled it all in one because it was near each other and just end up wasting a bunch of bog lol. I'll knock down those areas and see how I go. And yep what you are saying at the end is correct. I think I might be sanding the top of a steep hill then my sanding block falls into the dent and gets rid of the guidecoat if that makes sense. Though shouldnt unless I'm covering too big of an area with not a long enough block. I'll try something new and provide some updates. Getting there though! Thanks as always.
-
By Murray_Calavera · Posted
Yeah makes sense, hard to comment on your situation without seeing what your doing. I was talking generally before, I would not be looking to randomly create low spots with a hammer to then have to fill them. It's hard without seeing what your doing, it sounds like you are using the guide coat to identify low spots, as you're saying the panel is still wavy. I don't see how you're not ending up with patches of guide coat remaining in a wavy panel? Once the high spots are knocked down to the correct level, surely to have a wavy panel you need low spots. And those low spots would have guide coat still in them? -
So I'll put filler past the repair area a bit to make sure I don't miss anything. Then I'll block it until it's almost level, put the guidecoat, then keep blocking until it's gone. Then it's still wavy. In regards to hitting the panel, I saw this video might give more context - Skip to 0:47 he knocks it down. But yeah I'm sanding until the guidecoat is gone then checking because otherwise my filler is still well above the bodyline. Unless what you're saying is I should put guidecoat around it early, surrounding the filler then stip once it's gone?
-
By GabsReDeal · Posted
I refreshed the OEM injectors with the kit and connected it up. It now ideals okay even with the IACV removed. Driving still has the same cutoff issue like the 550cc injectors so the issue is somewhere else. I bought FPG's Fuel Pump Hanger. I will be installing it next, but it is not as straightforward as I thought it was with my limited wiring knowledge and no instruction on the specific model I purchased (FPG-089). I also got the incorrect billet clamp as I could not find info on the OEM sizing.
-


Recommended Posts
Create an account or sign in to comment
You need to be a member in order to leave a comment
Create an account
Sign up for a new account in our community. It's easy!
Register a new accountSign in
Already have an account? Sign in here.
Sign In Now