Jump to content
SAU Community

Recommended Posts

Hi guys,

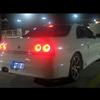
finally got around to installing HIDs on my car, its something I been wanting to do for ages. I got the kit off ebay. Took me three hours, most of it mucking around reading the manual, trialling and figuring out what wire plugs where. There was some drilling involved, I bolted one ballast on my washer bottle (don't laugh, I bolted it at the top so it wont leak) and I riveted the other on my pod heat shield.

Anyway I'm really happy with the results and recommend it to anyone. Installed it tonight and just got back from a drive. The light is pure white and it lights up road signs and reflective road markings amazingly well. I havn't adjusted it yet but it seems pretty level and is pointing at the ground. I might adjust it downwards more so I don't blind anyone

Its the 6000K one so I'm hoping it has hints of blue from far away, but up close its just white. What do you guys think?

imgp0890mb3.jpg

imgp0895gc6.jpg

imgp0896zq5.jpg

imgp0906hz5.jpg

Link to comment
https://www.sau.com.au/forums/topic/161617-installed-hids-on-my-r33/
Share on other sites

  • Replies 65
  • Created
  • Last Reply

Top Posters In This Topic

Thanks guys. I just finished adjusting it, got it to point more to the ground as my mate said it was a little blinding when I was behind him but all good now.

I had to buy an 8mm socket and an extra small socket wrench because that nut is a bitch to get to on the washer bottle side

I love the s2k ones too when you look directly at it, it twinkles blue and violet and not dazzling to the eyes at all

S2000 look good because they are projectors, and hence, will "twinkle"

these kits however, will not. All they'll do will blind on-coming traffic.

Could you take a pic of your car pointing at a garage door/wall etc?

S2000 look good because they are projectors, and hence, will "twinkle"

these kits however, will not. All they'll do will blind on-coming traffic.

Could you take a pic of your car pointing at a garage door/wall etc?

yup, can you take a pic facing the wall...

Looks pretty crap looking at the pictures of the light itself - heaps of glare.

Looking at the picture on the garage wall, there isn't a very clear cut off. There is a lot of glare coming up.

There are also major hotspots. lighting is supposed to be as uniform as possible in the area that the light shines. OEM hid is quite uniform in its distribution.

Although it doesn't look very bright above where the main part of the light is, I bet if you put your head there, and looked at it for 10 seconds, you'll be seeing white spots when you look around.

When you drive around, I bet all the streets signs have gone fluoro. This means it's glaring people.

Overall, I'm not a big fan at all.

I'd also like to add, that as the light has been hotspotted, as you have more light in that area than you did previously, you have less light in other places.

The net effect is more glare for oncoming traffic, less useable light for you. You end up pointing the light done, so you get less distance, and once again, crappier less useful light. You also have a good chance of getting defected. If you have an accident at night, the other driver is quite rightly entitled to blame you saying that your headlights caused them to be dazzled (even if that may not have happened). The police will be called, and there's a good chance your insurance will be voided.

No offense intended here but here goes...

You can see in the photos you have glaring and hot spots- these are bad and you don't want these, infact looking at the photos again they look really really bad.

The light might be brighter, but it's not going in the right spots. Look at your front bar, it's illuminated (it shouldn't be directly illuminated). This happens because the optics in the headlight isn't suitable for the lumens and the light dispersion/characteristics of the HID bulbs. Same as the glowing clouds of glare you can see in and around your headlight source and also the hot spots you can see at the bottom of your pot plants/door in the last photo.

In short you can take it or leave it (people do far worse things to/with their cars) but I wouldn't recommend an install of those HID kits into r33 headlights. You can just scrape through with r32/s13/a31 projectors with minimal glaring/hot spots but r33 headlights are NOT at all suitable for these kits.

If you are enterprising - for the ultimate HID lights I'd recommend hitting up http://hidplanet.com/forums for how people have done their proper retrofits!

Hey CC/manwhore,

yeah I've taken it on board. I had a quick squiz at that HID site, I didnt know people were so passionate with lights and so against kits. I was worried about blinding ppl when I bought it too. I've only driven my car on Friday and Saturday nights so far with the kit and I've had no one flash me.. yet. I'm going to trial it for a few weeks and see if I get flashed and if I do, as much as I like the lights I'll remove it.

I have gotten out of my car at night and looked at it from about 20 feet and honestly it doesnt look that bad, its not that much different than looking directly at any other factory HID. In the day time its even less noticable. I've got it adjusted to as low as it will go which shines directly on the ground about 15 feet in front of the car.

But yeah you're right if it annoys people and I get flashes from other drivers its coming off

I keep posting up how bad HID kits are when people ask about them first, but most people don't seem to listen to me. Others don't ask and then go ahead and get sucked in by the marketing bling bling on the hid kit pictures.

SAU really does need a lighting section, with a FAQ. So many other forums have these, with pictures of proper hid, and pictures of shit hid.

I have a sI and sII r33 headlight here on my test bench and have pictures of the crappy light cut off, hot spots etc. Also have a few other different lights too. It's ridiculous how people are able to sell that absolute crap. It's misrepresentation and misleading and deceptive conduct.

cc, that is a good thing for him to read. CC, I see I may have finally convinced you at last that those hid kits are not all that they're made out to be.

May I also suggest Gengis, that you google daniel stern lighting - he's got a very nice summary of the dos and don'ts for lighting.

So gengis, in effect, you have installed something that is more glary (trust me, it is, wait till you drive on coming to someone with a ricer kit installed too), and it in fact has less useable light, since it's pointed closer than what your halogens were. That's not very good is it!

PS: I don't mean anything bad, just providing information about light (one of my interests).

Edited by MANWHORE

hey there buddy.. I was hoping you mention what is a good HID kit (and hopefully mention some brand names) but u didn't..

If I am unable to get the OEM xenons back on.. which route should I take?

cheers mate =)

I keep posting up how bad HID kits are when people ask about them first, but most people don't seem to listen to me. Others don't ask and then go ahead and get sucked in by the marketing bling bling on the hid kit pictures.

SAU really does need a lighting section, with a FAQ. So many other forums have these, with pictures of proper hid, and pictures of shit hid.

I have a sI and sII r33 headlight here on my test bench and have pictures of the crappy light cut off, hot spots etc. Also have a few other different lights too. It's ridiculous how people are able to sell that absolute crap. It's misrepresentation and misleading and deceptive conduct.

There is no such thing as a good kit period. Halogen housings have different optics to xenon housings, so they cannot focus the light properly. End of story. The only option is a retrofit of oem hid into the housing.

I'm guessing that you hvae an r34 gtt? with the xenons that have been converted from compliance?

I forgot the blokes name, but there's someone with a black r34 on here who put a kit converted headlights. The light output was crap, because the kit puts the focal point of the bulb in the wrong spot.

Go oem. r34 headlights aren't that expensive. I've seen them go for $600 for the pair in perfect nic.

Hey CC/manwhore,

yeah I've taken it on board. I had a quick squiz at that HID site, I didnt know people were so passionate with lights and so against kits. I was worried about blinding ppl when I bought it too. I've only driven my car on Friday and Saturday nights so far with the kit and I've had no one flash me.. yet. I'm going to trial it for a few weeks and see if I get flashed and if I do, as much as I like the lights I'll remove it.

I have gotten out of my car at night and looked at it from about 20 feet and honestly it doesnt look that bad, its not that much different than looking directly at any other factory HID. In the day time its even less noticable. I've got it adjusted to as low as it will go which shines directly on the ground about 15 feet in front of the car.

But yeah you're right if it annoys people and I get flashes from other drivers its coming off

ive been using HID in my r33 for 2 years now and in c class for 7 months or so, and i NEVER get flashed. almost every night i drive my car to my gf's house or to my mate's house in the city(i live in chads area).

well each to their own i guess. if you dont like it then leave it. im sick hearing ppl say this crap that crap etc... no offense.

Edited by BiAsA

Create an account or sign in to comment

You need to be a member in order to leave a comment

Create an account

Sign up for a new account in our community. It's easy!

Register a new account

Sign in

Already have an account? Sign in here.

Sign In Now


  • Similar Content

  • Latest Posts

    • Well, after the full circus this week (new gearbag, 14 psi actuator on, injectors and AFM upgraded, and.....turbo repair) the diagnosis on the wastegate is in. It was broken. It was broken in a really strange way. The weld that holds the lever arm onto the wastegate flapper shaft broke. Broke completely, but broke in such a way that it could go back together in the "correct" position, or it could rearrange itself somewhere else along the fracture plane and sit with the flapper not parallel to the lever. So, who knows how and when exactly what happened? No-one will ever know. Was it broken like this the first time it spat the circlip and wedged itself deep into the dump? Or was it only broken when I tried to pry it back into place? (I didn't try that hard, but who knows?). Or did it break first? Or did it break between the first and second event of wierdness? Meh. It doesn't matter now. It is welded back together. And it is now held closed by a 14 psi actuator, so...the car has been tuned with the supporting mods (and the order of operations there is that the supporting mods and dyno needed to be able to be done first before adding boost, because it was pinging on <<14 psi with the new turbo with only a 6 psi actuator). And then tuned up a bit, and with the boost controller turned off throughout that process. So it was only running WG pressure and so only hit about 15-16 psi. The turbo is still ever so slightly lazier than might be preferred - like it is still a bit on the big side for the engine. I haven't tested it on the road properly in any way - just driven it around in traffic for a half hour or so. But it is like chalk and cheese compared to what it was. Between dyno numbers and driving feedback: It makes 100 kW at 3k rpm, which is OK, could be better. That's stock 2JZ territory, or RB20 with G series 550. It actually starts building boost from 2k, which is certainly better than it did recently (with all the WG flapper bullshit). Although it's hard to remember what it was like prior to all that - it certainly seems much, much better. And that makes sense, given the WG was probably starting to blow open at anything above about 3 psi anyway (with the 6 psi actuator). It doesn't really get to "full boost" (say 16 psi) until >>4k rpm. I am hopeful that this is a feature of the lack of boost controller keeping boost pressure off the actuator, because it was turned off for the dyno and off for the drives afterward. There's more to be found here, I'm sure. It made 230 rwkW at not a lot more than 6k and held it to over 7k, so there seems to be plenty of potential to get it up to 250-260rwkW with 18 psi or so, which would be a decent effort, considering the stock sized turbo inlet pipework and AFM, and the return flow cooler. According to Tao, those things should definitely put a bit of a limit on it by that sort of number. I must stress that I have not opened the throttle 100% on the road yet - well, at least not 100% and allowed it to wind all the way up. It'll have to wait until some reasonable opportunity. I'm quite looking forward to that - it feels massively better than it has in a loooong time. It's back to its old self, plus about 20% extra powers over the best it ever did before. I'm going to get the boost controller set up to maximise spool and settle at no more than ~17 psi (for now) and then go back on the dyno to see what we can squeeze out of it. There is other interesting news too. I put together a replacement tube to fit the R35 AFM in the stock location. This is the first time the tuner has worked with one, because anyone else he has tuned for has gone from Z32 territory to aftermarket ECU. No-one has ever wanted to stay Nistuned and do what I've done. Anyway, his feedback is that the R35 AFM is super super super responsive. Tiny little changes in throttle position or load turn up immediately as a cell change on the maps. Way, way more responsive than any of the old skool AFMs. Makes it quite diffifult to tune as you have to stay right on top of that so you don't wander off the cell you wanted to tune. But it certainly seems to help with real world throttle response. That's hard to separate from all the other things that changed, but the "pedal feel" is certainly crisp.
    • I'm a bit confused by this post, so I'll address the bit I understand lol.  Use an air compressor and blow away the guide coat sanding residue. All the better if you have a moisture trap for your compressor. You'd want to do this a few times as you sand the area, you wouldn't for example sand the entire area till you think its perfect and then 'confirm' that is it by blowing away the guide coat residue.  Sand the area, blow away the guide coat residue, inspect the panel, back to sanding... rinse and repeat. 
    • The detail level is about right for the money they charge for the full kit... AU$21.00 each issue, 110 issues for a total of $2,300 (I mentioned $2.2K in the first post when the exchange rate was better). $20/week is doable... 😐
    • If planning on joining us for the day(s) please indicate by filling in this form. https://forms.gle/Ma8Nn4DzYVA8uDHg7
×
×
  • Create New...