Jump to content
SAU Community

Recommended Posts

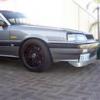
coilovers arrived friday, and fitted them to kylies car yesterday.

they feel firmer, but not uncomfortable, corners without feeling like its going to barrel roll off the road, but best of all its not lift kit spec anymore... it now scrapes on speed bumps, etc!

just be careful though, if you order some, specify they have a 90mm PCD rear top hat, as we got sent the wrong top hats, and i had to modify the top hats from the stock shocks onto them. (surely we dont have the first RS4 stagea with G4's??)

all up, for the smoother ride, lowered height, and better handling, it was well worth the $1399 they cost.

pics to follow shortly. :P

Link to comment
https://www.sau.com.au/forums/topic/190093-stagea-g4-coilovers/
Share on other sites

tryin to figure what suspension is on my new stag before it gets here.. got 2 piks where u can see a bit

that looks like Ohlins adjustable Suspension!!! great suspension, i had it on my R32.

post-11019-1192955984_thumb.jpg

post-11019-1192956146_thumb.jpg

Edited by -NismoR32-
that looks like Ohlins adjustable Suspension!!! great suspension, i had it on my R32.

definatley looks the same, are they serviceable? not shure what condition there going to be in. im guessing their full adjustable? how do they rate in comparison to other brands

looks very pimpin now Kylie with it lowered, definately noticed when i installed my bilsteins the handling is absolutely incredibile and i couldnt believe a big heavy wagon could handle like it does :D

you better be making an appearance at the next WA cruise with Mitchy so we can check it out

looks fantastic.

seems a good price - is that for adjustable shocks and springs ?

Im happy with my Bilsteins though.... very smooth ride using stnd springs

For the Ohlins suspension, jippa, IMO the brand is the best in the world when it comes to adjustable shocks. definately servicable for sure. get em regassed and enjoy the ride.

:) thanks Brad..

I'll cruise along if its still here :( otherwise it may be in a supra ;)

If you sell it, make sure the new owner comes along in ur absence.

with you in a supra, and mitchy in a

madeyalook!

it will be a whole family of traiterous rocko bogans!

fronts can be lowered another 30mm, and the rears about 200mm lower :pimpin:

And Dale I will make sure I bring my ACDC album just for you :thanks:

Fuzzy it handles really well. Alot tighter around the bends. If I still have the car in a few weeks I'll give you an update. If you do get them, just make sure you check the top hat dimensions in the rear. Mine is 90mm and its oval shaped. but apparently round will fit.

Jippa I have fallen in love with her again, but I'm kinda looking forward to a two door where I can reach the roof to wash her without standing on the rims or a bucket :banana:

Edited by StageaGirl
fronts can be lowered another 30mm, and the rears about 200mm lower :pimpin:

And Dale I will make sure I bring my ACDC album just for you :thanks:

Fuzzy it handles really well. Alot tighter around the bends. If I still have the car in a few weeks I'll give you an update. If you do get them, just make sure you check the top hat dimensions in the rear. Mine is 90mm and its oval shaped. but apparently round will fit.

Jippa I have fallen in love with her again, but I'm kinda looking forward to a two door where I can reach the roof to wash her without standing on the rims or a bucket :banana:

haah Kylie buy a gto if u wanna reach the roof easy, its about level with my stomach and im only a short arse as u know haha :laughing-smiley-014:

when i got my rig the first time it was sitting at 355mm from the center of the hib to the guard. After i swap over to the TEIN HA coilovers i raised it all 4 wheels to 360mm and its perfect for me. Not too low ETC. And the ride is exceptinally good for it . Liked it very much. O would assume that the blisteind from SK will have a better ride though. I dont know about the G4s. Should ask how many chambers and valve they have in the shock absobers for the G4 and how many valve. The more chamber and valving you have the better the ride is. Firm but not hard when you have more chambers and valves. Less chanbers and valve will have a rougher ride. Thus the blistein will have better peformance.

I have a 4wd lancruiser 100 series and i swapped it over to the blisteinf from the original Toyota shock and alot of improvement in the ride and handling qualities.

I bought the blistein from our company's spare parts supploer and he said in his 25 years experience in his field not 1 person have asked for blistein shock absober until he met me!!

Create an account or sign in to comment

You need to be a member in order to leave a comment

Create an account

Sign up for a new account in our community. It's easy!

Register a new account

Sign in

Already have an account? Sign in here.

Sign In Now


  • Similar Content

  • Latest Posts

    • Can I suggest you try EBC directly again and link them to as many competitor catalogues as you can to show their listing is incorrect, eg https://dba.com.au/product/front-4000-series-hd-brake-rotor-dba42304/ If you have access to an R33 GTST VIN and your VIN, you could also use a Nissan Parts lookup like Amayama to show them the part number is different between 33 GTST and 34 GTT which may get their attention
    • So i got reply from EBC and they just this site where you can clearly see those 296mm fronts on R34 GTT. I send them photos and "quotes" that 296mm are not for 34 GTT and they are too small. But it will be very hard to return them cuz nobody here knows 100% and they just copy those EBC catalogue :-D https://ebcbrakesdirect.com/automotive/nissan/skyline-r34
    • Hi, is the HKS  Tower Bar still available ? negotiable ? 🤔
    • From there, it is really just test and assemble. Plug the adapter cables from the unit into the back of the screen, then the other side to the car harness. Don't forget all the other plugs too! Run the cables behind the unit and screw it back into place (4 screws) and you should now have 3 cables to run from the top screen to the android unit. I ran them along the DS of the other AV units in the gap between their backets and the console, and used some corrugated tubing on the sharp edges of the bracket so the wires were safe. Plug the centre console and lower screen in temporarily and turn the car to ACC, the AV should fire up as normal. Hold the back button for 3 sec and Android should appear on the top screen. You need to set the input to Aux for audio (more on that later). I put the unit under the AC duct in the centre console, with the wifi antenna on top of the AC duct near the shifter, the bluetooth antenna on the AC duct under the centre console The GPS unit on top of the DS to AC duct; they all seem to work OK there are are out of the way. Neat cable routing is a pain. For the drive recorder I mounted it near the rear view mirror and run the cable in the headlining, across the a pillar and then down the inside of the a pillar seal to the DS lower dash. From there it goes across and to one USB input for the unit. The second USB input is attached to the ECUtec OBD dongle and the 3rd goes to the USB bulkhead connected I added in the centre console. This is how the centre console looks "tidied" up Note I didn't install the provided speaker, didn't use the 2.5mm IPod in line or the piggyback loom for the Ipod or change any DIP switches; they seem to only be required if you need to use the Ipod input rather than the AUX input. That's it, install done, I'll follow up with a separate post on how the unit works, but in summary it retains all factory functions and inputs (so I still use my phone to the car for calls), reverse still works like factory etc.
    • Place the new daughterboard in the case and mount it using the 3 small black rivets provided, and reconnect the 3 factory ribbon cables to the new board Then, use the 3 piggyback cables from the daughterboard into the factory board on top (there are stand offs in the case to keep them apart. and remember to reconnect the antenna and rear cover fan wires. 1 screw to hold the motherboard in place. Before closing the case, make a hole in the sticker covering a hole in the case and run the cable for the android unit into the plug there. The video forgot this step, so did I, so will you probably. Then redo the 4 screws on back, 2 each top and bottom, 3 each side and put the 2 brackets back on.....all ready to go and not that tricky really.      
×
×
  • Create New...