Jump to content
SAU Community

Recommended Posts

thats so bad that they can just pull you up in another suburb and get you to follow them there, what if you had to be somewhere, i mean fair enough if you drive past and they pull you in, or pull you over on the road and defect you or sumtin. are they allowed to pull you up and just say follow me through a few suburbs so we can look at your car, sounds like harrasment or somthing

  • Replies 55
  • Created
  • Last Reply

Top Posters In This Topic

Sure can. Happed a fair bit last year. Even cars like 4GIVME got done in this way - was seen by other cars in same empty factories and such. I think they had one going off parra rd too.

The one in castle hill was a showground or something. Next to council building. Very dodgey.

thats farked, id be seriously pissed if that happened to me, its just wasting your farkin time, like at least an hour of it if you have to drive somwhere else, then what if your car passes, they've just wasted your time, what if you had somwhere important you had to be.

i heard about a guy today who was getting done by the EPA At brighton he got fined $15,000 Man id be killing myself right about now....

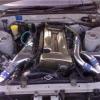
I ended up fitting a standard airbox it wasnt a GTR One but was one were my chrome pipinmg can get into.... went to the guy again at Granville He wouldnt pass it Because there wasnt Air flowing from the top of it through the filter into the turbos... This guy Man i swear is doing my head in..I cant wait until this is all over....

can you go to another guy, and also is this guy an old or young guy just out of curiosity?

probably in his 40s

this guy's own son's commonwhore (what else) was louder than my exhaust.....most of the car in his workshop is louder when they were moving them around....but i had to get mine passed !

he didnt even pass me when i rocked up with a full oem gtr exhaust! i ended up wasting $250 for parts and labour + $100 for him to pass the car with his fees (everytime you get tested you get charged!) and a couple of days off from work

one of the biggest rorts around i reckon....especially when there are only 2 workshops to choose from....this one or the one at Campbelltown.

what if you got smaller piping or anything like that between the turbos and intercooler, that will fit or that you can manage to bend around the stock box, then just find a way to disengage the turbos, so the pipes wont even need to run anything, drive it there and back, and your done.

BTW if you change the box is he gonna make you do another emmisions and noise test??

haha now u understand what i went through, but i got off lucky,

all this drama for a Fcukn Pod!

na na ive already passed the emissions test doesnt matter... I will have to do a noise test again because i am going cambeltown but i will pass beacuse ive put a stock box on now rather then the aluminium one which means less noise corect ?? well i hope so ???

Thats the dillemma i have the guy at granville only have to pass my filter box but the guy is a big d** head so im gona go striaght to cambeltown hopefully i get treated better there...

Edited by MRGTR911

If by "the guy at Campbelltown" you are referring to the Defect Notice Clearance Inspection Station, then i can shed some light for you. To me he appeared quite reasonable and approachable. I had been pulled over on Parramatta Rd and escorted to one of these make shift inspection stations in a industrial factory complex, at which point the examiner was overcome by the quantity of mods before him, Larger turbo's, pods, ebc, cams, cam gears (visible), larger FMIC, ecu, etc, so much so that he generalized the defect to read "all engine mods to comply with relevant ADR's & exhaust noise check".

I took my vehicle to TIC and had it engineered, covered the pods with an aluminium housing (painted black), stuffed a restrictor in the exhaust and generally hid the things i didn't want seen.

Went to the Campbelltown Guy, he took the engineers word for all on the report, no follow-up noise check, no probs with the enclosed pods, passed first go, defect cleared.

BTW every time i'm RBT'd i get asked to pop the bonnet, i produce the Engineers Report, engine bay checks ok, get hassled re noise (have since fitted HKS Silent Hi Power 95db), i assure them it gets quieter with rpm, rev engine to oblige and have thus far been allowed on my way.

Sorry for your pain, it annoyed the hell out of me at the time, i can only imagine what your going through.

  • 2 weeks later...

Create an account or sign in to comment

You need to be a member in order to leave a comment

Create an account

Sign up for a new account in our community. It's easy!

Register a new account

Sign in

Already have an account? Sign in here.

Sign In Now


  • Similar Content

  • Latest Posts

    • Hi, is the HKS  Tower Bar still available ? negotiable ? 🤔
    • From there, it is really just test and assemble. Plug the adapter cables from the unit into the back of the screen, then the other side to the car harness. Don't forget all the other plugs too! Run the cables behind the unit and screw it back into place (4 screws) and you should now have 3 cables to run from the top screen to the android unit. I ran them along the DS of the other AV units in the gap between their backets and the console, and used some corrugated tubing on the sharp edges of the bracket so the wires were safe. Plug the centre console and lower screen in temporarily and turn the car to ACC, the AV should fire up as normal. Hold the back button for 3 sec and Android should appear on the top screen. You need to set the input to Aux for audio (more on that later). I put the unit under the AC duct in the centre console, with the wifi antenna on top of the AC duct near the shifter, the bluetooth antenna on the AC duct under the centre console The GPS unit on top of the DS to AC duct; they all seem to work OK there are are out of the way. Neat cable routing is a pain. For the drive recorder I mounted it near the rear view mirror and run the cable in the headlining, across the a pillar and then down the inside of the a pillar seal to the DS lower dash. From there it goes across and to one USB input for the unit. The second USB input is attached to the ECUtec OBD dongle and the 3rd goes to the USB bulkhead connected I added in the centre console. This is how the centre console looks "tidied" up Note I didn't install the provided speaker, didn't use the 2.5mm IPod in line or the piggyback loom for the Ipod or change any DIP switches; they seem to only be required if you need to use the Ipod input rather than the AUX input. That's it, install done, I'll follow up with a separate post on how the unit works, but in summary it retains all factory functions and inputs (so I still use my phone to the car for calls), reverse still works like factory etc.
    • Place the new daughterboard in the case and mount it using the 3 small black rivets provided, and reconnect the 3 factory ribbon cables to the new board Then, use the 3 piggyback cables from the daughterboard into the factory board on top (there are stand offs in the case to keep them apart. and remember to reconnect the antenna and rear cover fan wires. 1 screw to hold the motherboard in place. Before closing the case, make a hole in the sticker covering a hole in the case and run the cable for the android unit into the plug there. The video forgot this step, so did I, so will you probably. Then redo the 4 screws on back, 2 each top and bottom, 3 each side and put the 2 brackets back on.....all ready to go and not that tricky really.      
    • Onto the android unit. You need to remove the top screen because there is a daughterboard to put inside the case. Each side vent pops out from clips; start at the bottom and carefully remove upwards (use a trim remover tool to avoid breaking anything). Then the lower screen and controls come out, 4 screws, a couple of clips (including 3 flimsy ones at the top) and 3 plugs on the rear. Then the upper screen, 4 screws and a bunch of plugs and she is out. From there, remove the mounting brackets (2 screws each), 4 screws on the rear, 2 screws top and bottom and 3 screws holding in the small plates on each side. When you remove the back cover (tight fit), watch out for the power cable for the fan, I removed it so I could put the back aside. The mainboard is held in by 1 screw in the middle, 1 aerial at the top and 3 ribbon cables. If you've ever done any laptop stuff the ribbon cables are OK to work with, just pop up the retainer and they slide out. If you are not familiar just grab a 12 year old from an iphone factory, they will know how it works The case should now look like this:
    • Switching the console was tricky. First there were 6 screws to remove, and also the little adapter loom and its screws had to come out. Also don't forget to remove the 2 screws holding the central locking receiver. Then there are 4 clips on either side....these were very tight in this case and needed careful persuading with a long flat screw driver....some force required but not enough to break them...this was probably the fiddliest part of the whole job. In my case I needed both the wiring loom and the central locking receiver module to swap across to the new one. That was it for the console, so "assembly is the reverse of disassembly"
×
×
  • Create New...