Jump to content
SAU Community

Recommended Posts

Alright guys... heres an update...

Just got back from a "test run" of the BHP Nickel place.. Below are the photos which turned out ok...

Im thinking the one when i get my friend to model needs more ambient light (such as street lights), heading out tomorrow again to hunt down some places... was thinking east perth.. one of you guys mentioned this place i think...

oh and also, HID proved a problem, as they are too bright.. both our car has them (6000k), here are the best shots out of around 40 pics.

Anyway Enjoy!!

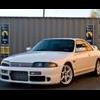
*featuring Br3ndan's R33 White Skyline (SAU WA member) & Seul_Avec's Red R33 Skyline (SAU WA member). Thanks to Jake for the photography.

post-43105-1207831236_thumb.jpgpost-43105-1207831222_thumb.jpg

post-43105-1207831252_thumb.jpgpost-43105-1207831242_thumb.jpg

post-43105-1207831274_thumb.jpgpost-43105-1207831262_thumb.jpg

post-43105-1207831285_thumb.jpgpost-43105-1207831280_thumb.jpg

post-43105-1207831802_thumb.jpgpost-43105-1207831917_thumb.jpg

post-43105-1207832395_thumb.jpgpost-43105-1207832634_thumb.jpg

Edited by br3ndan

Don't have the lights on for the entire exposure (unless we're talking hell short)

All you need is a quick flick on and off (less than half a second, esp with HID) and that's it

With the long exposures to work out, well that's very techinical but I'll try to explain as simple as possible, with some photos of mine as examples.

480831_14_full.jpg

The above is a 30second exposure from memory (took it years ago)

Basically, what I did was have a number of flash units around the car to light up the car, and 'freeze' the car.

The car park was reasonably dark, so needed the flash to light up the car.

You may think the long exposure will do it, but its not the same...trust me.

What I had planned was that for the last 10seconds of that 30 seconds I would have the car moving, so for 20 seconds I had to get the right exposure with the car.

Once that was found, I turned off all the lights on the car and got the shot rolling. During the 20seconds, I am flashing around the car the correct number of times that I have found was suitable to get it exposed properly (so doing some test shots would help prior) Once the 20seconds was up, the lights were turned on and the car moved slowly during the remaining 10 seconds. The streak of light is the movement of the car during that 10seconds.

This shot was also made more difficult also with the undercar neons. Like with the first advice given about the headlights, same thing applies in a way. What I found in this situation was that 16seconds into the exposure we had to turn the neons on to get a good pink exposure on the ground without over exposing it. This remained on for the rest of the shot.

Here is another quick breakdown, with an actual test shot before hand.

What makes this shot more difficult was because I wanted to capture the flames of the antilag coming out from the car. As some may know, this various in output and I wanted a really big flame.

So here you have my first shot, minus everything (lights and antilag flame) which gave me a rought idea of how much flash I needed on the car to light up the shot during the exposure (of which was 19seconds)

mortz01.jpg

Then came for the real shot which I only did one of due to the fact the antilag would have attracted unwanted attention to the place we were at.

mortz.jpg

What happened here I did the flash exposure for the car and then told my mate to reel off the flames. However it took a few attempts before we got a big enough flame and then the exposure blew out to 41seconds (instead of 30 I think, but I had it on bulb to be safe incase no flames came) but the results speak for themselves.

So yeah, it seems hard to do but if you break the photo down it's quiet simple. I haven't done the shot in a couple years now, but I've seen others trying to do the same after seeing the WRX photo and failing pretty bad.

Edited by MattyP

Thanks mattyP! appreciate the detailed reply! I will pass this onto the photographer as he wil probably make more sense out of it then i would!!

Im going to head out for a few more test runs at different locations... i dont think this location will suit with a girl in the pic. Chasing the urban effect now, which i will head out in the next few nights. Hopefully with some new ideas thanks from MattyP,, however the car moving and a girl modelling on the car at the same time... probably wouldnt give the best results... :D hahaha!

Once im 100% satisfied with the locations and effects, i will do the final one with the girl + car.

I will continue to post up the new few test runs... feel free to do what matt did and give more ideas or/and make comments good or bad! both are important and appreciated!

Cheers Guys!

P.S: Maybe SAU WA should get a good photoshoot/cruise happening for the next event? That would be awesome!

Brendan

you found the place OK then :)

I know seet FA about photography but IMO your shots look awesome WD and keep the thread updated with all your other locations.

Oh, and MattyP - :blink:

That antilag shot is Teh Shizz!

however the car moving and a girl modelling on the car at the same time... probably wouldnt give the best results... hahaha!

I've tried that..same thing applies. (got to find my examples though) The model though for it to really work out has to be behind something TOTALLY BLACK otherwise whatever is behind her will come through. You'd need to put a flash on her to expose her, and then once that happens she can walk out of the shot and you can continue with the long exposure with the car.

and [Michael], anytime dude :blink:

Create an account or sign in to comment

You need to be a member in order to leave a comment

Create an account

Sign up for a new account in our community. It's easy!

Register a new account

Sign in

Already have an account? Sign in here.

Sign In Now


  • Similar Content

  • Latest Posts

    • Well the install is officially done. Filled with fluid and bled it today, but didn't get a chance to take it on a test drive. I'll throw some final pics of the lines and whatnot but you can definitely install a DMAX rack in an R33 with pretty minor mods. I think the only other thing I had to do that isn't documented here is grind a bit of the larger banjo fitting to get it to clear since the banjos are grouped much tighter on the DMAX rack. Also the dust boots from a R33 do not fit either fyi, so if you end up doing this install for whatever reason you'll need to grab those too. One caveat with buying the S15 dust boots however is that the clamps are too small to fit on the R33 inner tie rod since they're much thicker so keep the old clamps around. The boots also twist a bit when adjusting toe but it's not a big deal. No issues or leaks so far, steering feels good and it looks like there's a bit more lock now than I had before. Getting an alignment on Saturday so I'll see how it feels then but seems like it'll be good to go       
    • I don't get in here much anymore but I can help you with this.   The hole is a vent (air relief) for the brake proportioning valve, which is built into the master cylinder.    The bad news is that if brake fluid is leaking from that hole then it's getting past the proportioning valve seals.   The really bad news is that no spare parts are available for the proportioning valve either from Nissan or after market.     It's a bit of a PITA getting the proportioning valve out of the master cylinder body anyway but, fortunately, leaks from that area are rare in my experience. BTW, if those are copper (as such) brake lines you should get rid of them.    Bundy (steel) tube is a far better choice (and legal  in Australia - if that's where you are).
    • EMU Classic. For what I need it to do I see no reason to upgrade. Link and Haltech would both cost an extra chunk of money for a lot of unutilized features
×
×
  • Create New...