Jump to content
SAU Community

Recommended Posts

Hi All,

Just thinking about the longevity of these spacer/liner kits and lack of cooling around the top of the sleave with a closed deck engine. The Kakimoto is only about 20mm thick which wouldnt leave much material to make it thick enough and allow for material to be removed to make it an open deck extension.

I have no idea about the thickness of the OS kits. There seems to have been 2 versions with diferent thicknesses.

Are these spacers really designed as more of a race only item?

Link to comment
https://www.sau.com.au/forums/topic/236477-kakimoto-and-os-spaced-blocks/
Share on other sites

SK posted a pic of the thinner OS spacer not too long ago.

Yep saw it and it wasnt possible to tell if it was open deck or not as it was pictured the same way up as it is instaled on the engine.

...

If you were to get an engine block and cut it in 1/2 down the center of the cylinders you would see the cylinders are about 4-5mm thick, and coolant is able to flow around the entire cylinder. Only at the top of the block does it become a seemingly solid piece.

Around each cylinder are 4 slots that water passes through from the block to the head, then it flows through the head over the combustion chamber and out the water outlet that is mounted on the plenum.

When sleaves are inserted into the block the normal cylinders that are cast into the shape of the block are bored out to allow the sleave to be fitted to the block. The sleaves can be pressed in, or shrunk fit and slipped in. The result is that the sleave material is considerably stronger than the standard cylinder material. This is for 2 reasons. Cylinders liners/sleaves are spun cast or in some cases machined from billet steel, which means no porosity. When boring out a standard block there is no guarantee the wall thickness is 100% even the full length of the cylinder, and also there risk if finding porosity increases the thinner the walls get. Even if you cant see it, it could blow through to the water chambers the first time the engine is started if its over-bored too much.... ala cracked block.

The whole point of a spaced block is to allow a better rod ratio to be maintained when running larger stroke crankshafts. What it does it make the block taller, but so the pistons and rings dont catch on the join between the block and the spacer, liners are inserted through the spacer into the block. I think the Kakimoto spacers are more suited to the RB28 strokers. An RB28 with SR20 rods would be possible with a 16-18mm spacer and would produce a 1.75:1 rod ratio. Larger is possible though and I suspect that the RPMGTR RB29 is a Kakimoto spaced block.

Now with a closed deck spacer, if you consider that the thickness of a spacer is 20mm, add the top of the block thickness to that and you end up with an area that the sleave is not exposed to coolant, especially where it needs it the most... at the top where combustion temps and pressures are their highest.

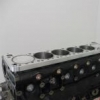
An open deck spacer looks the same as a closed deck from the top. Its the under side where you will see its hollowed out around the sleaves so that coolant can flow around them and joins up with the 4 water galleries that surround each liner. This means the cylinder liner is getting better cooling at the top.

Thats as much as ive been able to learn about them. It seems to me that it is still a good way to go instead of the RB30DET/AWD conversion option for the a GTR. There wont be a lot of diference in cost (a few K perhaps), and it makes fitting a lot easier too.

The taller the block the more need for cooling. I figure a thin spacer might survive on the street (this is what I really want to find out about), and if it was alloy it might conduct enough the heat away from the cylinder liners.

saw this spacer kit on RHD website, 1.5k for the kit....using this method to achieve 2.8L would it be a more cost effective way or to the incressing of the bore size etc to get 2.8L.

be interesting to know as havent seen many people take this path, maybe not as good??

What would you require parts wise to make it a 2.8L??

http://www.rhdjapan.com/images/product/270...rmal/Image1.jpg

was looking at the pic from RHD, looks like open deck if my understanding of it is correct.

Edited by godzl1975

That looks closed to me. The water galleries around the cylinder go straight through to the head. The spacer is the same thickness at its thickest part as it is around the cylinder liner, so there is no coolant contact with teh liner where it runs through the spacer plate.

Thats a much better picture than anything ive been able to find so far too.

To make it a 2.8 it would only need the tomei/gt500/hks crankshaft. Then using sr20 rods and standard compression height pistons, or even rb30 pistons, 2.8lt is achieved. Becaused its sleaved they can be bored to 88mm to for a little more displacement.

Edited by Vspec R33

Thanks for that, very informative. I am loving your posts VspecR33 your journey to find out which path you want to take with your GTR is very interesting and it helps people like me who have no idea what they want to do just yet.

Good luck mate!

Mike

  • 3 months later...
That looks closed to me. The water galleries around the cylinder go straight through to the head. The spacer is the same thickness at its thickest part as it is around the cylinder liner, so there is no coolant contact with teh liner where it runs through the spacer plate.

Thats a much better picture than anything ive been able to find so far too.

To make it a 2.8 it would only need the tomei/gt500/hks crankshaft. Then using sr20 rods and standard compression height pistons, or even rb30 pistons, 2.8lt is achieved. Becaused its sleaved they can be bored to 88mm to for a little more displacement.

The rare HKS 2.8L "High-Deck" bottom ends use a spacer and longer rods (possibly SR20).

The rare HKS 2.8L "High-Deck" bottom ends use a spacer and longer rods (possibly SR20).

It would make sense to use Sr20 rods. Common size, good rod ratio (1.75) with the 77.7mm crank. Im going to have a go at building one of these engines in about 6 months once other projects are out of the way. Custom sleaves and an open deck spacer plate fitted to a standard RB26 block for starters.

Im not chasing huge power with the project. I want response and drivability so I figure an RB30 crank/Sr20rod combination for starters. 9:1 compression and a limit of 8000 RPM will be fine. Probably GTRS's and a 1.5 bar tune. If it works well im contemplating making a cheap kit to allow someone with a blown RB26 to turn it into a 3lt relitavely cheaply.

Compare it to the expensive Jap stroker kits and it would be relatively cheap. Also, I guess if the local kit was made in significant numbers, I would imagine that the cost would be significantly lower.

Custom crank, SR20 rods, custom pistons, sleeves, spacer plate, block mods to suit. Better RS ratio than an RB30 and would rev to 9K+Also, I have heard of a Sydney workshop that has used a modified RB30 (or was it an RD28?) crank in an RB26. Also, Risking have an "RB29" kit usng the RD28 crank with 87.5 pistons.

I totally agree with you that the race pace method would be the best approach for ultimate performance. The problem is that all that custom work and parts puts the price tag up so much.

There is no middle ground with RB26/gtr modifications, and there needs to be. Its either keep it stock stroke and go to an 87mm bore, or throw three times+ more money at an engine rebuild project and step up to a 2.8. RB30 bottom ends have their issues as well. Mounting external accessories and that welding and re-drilling of the gearbox bell housing to acomodate the spaced sump adapter. Plus the height issues of the RB30 block, vs an RB26 spaced to use SR20 rods. Spaced/sleaved blocks would be used by everyone if they were just a cheaper.

The options work out to be as follows:

2.8lt high deck, 1.75:1 ratio, sr20 rods, 28mm rb26 pistons, 77.7mm crank = 14.7mm spacer

2.8lt high deck, 1.75:1 ratio, sr20 rods, stock rb26 pistons, 77.7mm crank = 16.7mm spacer

3lt high deck, 1.75:1 ratio, sr20 rods, 28mm rb26 pistons, RB30 crank = 18.35mm spacer

3lt high deck, 1.75:1 ratio, sr20 rods, stock rb26 pistons, RB30 crank = 20.35mm spacer

Im also considering using the chevy 5.4, 5.5 or 5.6 inch rod sizes as this provides more options with the rod ratio's. 1.61 - 1.67 is possible. Plus Chevy rods come in sets of 8 and are cheap as chips, were as you would have to buy two sets of SR20 rods otherwise. Chevy rods also support a larger gudgen pin bush so you could then use VG30 87.5mm pistons with 22mm gudgens and get a little more displacement.

All this is just calculations on paper and a few autocad drawings so far. Im a long way off making a prototype at this stage and am too busy with the rebuild of my other car and work in general.

  • 6 months later...

Create an account or sign in to comment

You need to be a member in order to leave a comment

Create an account

Sign up for a new account in our community. It's easy!

Register a new account

Sign in

Already have an account? Sign in here.

Sign In Now


  • Similar Content

  • Latest Posts

    • This. As for your options - I suggest remote mounting the Nissan sensor further away on a length of steel tube. That tube to have a loop in it to handle vibration, etc etc. You will need to either put a tee and a bleed fitting near the sensor, or crack the fitting at the sensor to bleed it full of oil when you first set it up, otherwise you won't get the line filled. But this is a small problem. Just needs enough access to get it done.
    • The time is always correct. Only the date is wrong. It currently thinks it is January 19. Tomorrow it will say it is January 20. The date and time are ( should be ! ) retrieved from the GPS navigation system.
    • Buy yourself a set of easy outs. See if they will get a good bite in and unthread it.   Very very lucky the whole sender didn't let go while on the track and cost you a motor!
    • Well GTSBoy, prepare yourself further. I did a track day with 1/2 a day prep on Friday, inpromptu. The good news is that I got home, and didn't drive the car into a wall. Everything seemed mostly okay. The car was even a little faster than it was last time. I also got to get some good datalog data too. I also noticed a tiny bit of knock which was (luckily?) recorded. All I know is the knock sensors got recalibrated.... and are notorious for false knock. So I don't know if they are too sensitive, not sensitive enough... or some other third option. But I reduced timing anyway. It wasn't every pull through the session either. Think along the lines of -1 degree of timing for say, three instances while at the top of 4th in a 20 minute all-hot-lap session. Unfortunately at the end of session 2... I noticed a little oil. I borrowed some jack stands and a jack and took a look under there, but as is often the case, messing around with it kinda half cleaned it up, it was not conclusive where it was coming from. I decided to give it another go and see how it was. The amount of oil was maybe one/two small drops. I did another 20 minute session and car went well, and I was just starting to get into it and not be terrified of driving on track. I pulled over and checked in the pits and saw this: This is where I called it, packed up and went home as I live ~20 min from the track with a VERY VERY CLOSE EYE on Oil Pressure on the way home. The volume wasn't much but you never know. I checked it today when I had my own space/tools/time to find out what was going on, wanted to clean it up, run the car and see if any of the fittings from around the oil filter were causing it. I have like.. 5 fittings there, so I suspected one was (hopefully?) the culprit. It became immediately apparent as soon as I looked around more closely. 795d266d-a034-4b8c-89c9-d83860f5d00a.mp4       This is the R34 GTT oil sender connected via an adapter to an oil cooler block I have installed which runs AN lines to my cooler (and back). There's also an oil temp sensor on top.  Just after that video, I attempted to unthread the sensor to see if it's loose/worn and it disintegrated in my hand. So yes. I am glad I noticed that oil because it would appear that complete and utter catastrophic engine failure was about 1 second of engine runtime away. I did try to drill the fitting out, and only succeeded in drilling the middle hole much larger and now there's a... smooth hole in there with what looks like a damn sleeve still incredibly tight in there. Not really sure how to proceed from here. My options: 1) Find someone who can remove the stuck fitting, and use a steel adapter so it won't fatigue? (Female BSPT for the R34 sender to 1/8NPT male - HARD to find). IF it isn't possible to remove - Buy a new block ($320) and have someone tap a new 1/8NPT in the top of it ($????) and hope the steel adapter works better. 2) Buy a new block and give up on the OEM pressure sender for the dash entirely, and use the supplied 1/8 NPT for the oil temp sender. Having the oil pressure read 0 in the dash with the warning lamp will give me a lot of anxiety driving around. I do have the actual GM sensor/sender working, but it needs OBD2 as a gauge. If I'm datalogging I don't actually have a readout of what the gauge is currently displaying. 3) Other? Find a new location for the OEM sender? Though I don't know of anywhere that will work. I also don't know if a steel adapter is actually functionally smart here. It's clearly leveraged itself through vibration of the motor and snapped in half. This doesn't seem like a setup a smart person would replicate given the weight of the OEM sender. Still pretty happy being lucky for once and seeing this at the absolute last moment before bye bye motor in a big way, even if an adapter is apparently 6 weeks+ delivery and I have no way to free the current stuck/potentially destroyed threads in the current oil block.
×
×
  • Create New...