Jump to content
SAU Community

Recommended Posts

Item: 1998 R34 Nissan Skyline GTT MANUAL

Location: Rockhampton Qld

Website: http://granthem.boostcruising.com

Item Condition: Excellent.

Reason for Selling: 33 GTR - I wanna step up to the big boys

Price and Payment Conditions: 24,000 ono

Extra Info: Excellent example of an R34. Sonic Silver in colour. I purchased with 58000k and its now just over 70k. Always serviced with Royal Purple oils, and Tectaloy 100plus (top of the range) coolant every 4-5thousand k.

5 Speed manual with stock clutch (proves it has not had a hard life, as these give up the ghost pretty easily)

Engine:

RB25DET NEO

Exhaust:

A'PEXI N1 Champagne, 3 Inch HPC dump and front pipe.

Suspension:

CUSCO Height and damper adjustable.

Wheels:

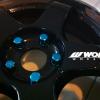
Brand new (not a mark on them) 19*8 KOYA Inox Imagines in Hyper Black. Stainless lip. Uniroyal Rain Sport 235/35/ZR19's. $2500

Modifications:

Splitfire Coil packs $600

Zorst $1500

Coil overs $2000

C West eyelids $150

East Bear LED tail lights $400

8000k HID $200

XENON headlights

Factory Privacy screen tinting (crazy dark rear windows)

Spoiler

Genuine Nissan Option Lip

Nismo clear side indicators $80

Nismo Clear front indicators $200

MTEC Titanium Wipers

Mostly debadged

Interior Converted to Blue LED

K&N Pod

Blitz Turbo Timer

RAZO Alloy Gear Knob

Stereo Audio / Visual:

Panasonic Touch Screen Head Unit.

Pictures: 45610226mj0jc9.jpg

14wk6mv7.jpg

10ul4jz6.jpg

50306633zz7xp5.jpg

Contact Details: Pm or post here. If you are really serious I will give you a mob number to call.

All in all its just a very cleanly modified nearly stock R34. I purchased it and literally have not needed to spend on dollar on it. Its been great. However, I have decided I would really like to step into an R33 GTR, so of course this has to go. If it doesnt go, I will be keeping it so I wont be taking any extreme offers as I am not in need of selling.

Link to comment
https://www.sau.com.au/forums/topic/242572-r34-gtt-skyline/
Share on other sites

oh man selling the beast mate? :)

Shame, it's one of the nicest ones around imo. Good luck with the sale.

Buyer will definitely not be disappointed

PS. I don't blame you, I've always had a soft spot for R33 GTRs

Link to comment
https://www.sau.com.au/forums/topic/242572-r34-gtt-skyline/#findComment-4230148
Share on other sites

oh man selling the beast mate? :)

Shame, it's one of the nicest ones around imo. Good luck with the sale.

Buyer will definitely not be disappointed

PS. I don't blame you, I've always had a soft spot for R33 GTRs

Well testing the waters at least. With the market the way it is at the moment these sort of cars are not shifting quickly.

Yeh I guess I just love the AWD, pumped guards and awesome times a near stock GTR can pull. 34 is out of the question, so Im looking towards a later model R33!

Thanks for the kind words, if nothing pops up that takes my fancy, I will have no trouble holding onto it. :)

Link to comment
https://www.sau.com.au/forums/topic/242572-r34-gtt-skyline/#findComment-4230169
Share on other sites

  • 1 month later...
you know you want it

!

GTR everything you want!

let me knoW!

Except your R33 isn't a GTR. :P

GL with the sale Grant. Buyer definitely won't be disappointed. I have driven this car and it is absolutely the tidiest and smoothest car to drive.

Link to comment
https://www.sau.com.au/forums/topic/242572-r34-gtt-skyline/#findComment-4306178
Share on other sites

  • 1 month later...

Open to offers now guys, looking for seomthing with abit more HP.

Car is nearly fully resprayed now too, thanks to a drunken idiot and him scratching the bonnet. Im fussy, and the job was top notch.

Throw some offers :P

Link to comment
https://www.sau.com.au/forums/topic/242572-r34-gtt-skyline/#findComment-4385526
Share on other sites

  • 3 months later...

Sorry Mate the LED tail lights played up so I no longer have them

Guys I'm really keen to step into an R33 GTR, and have found one perfect.

Therefore, price drop $23,000.00

Market isnt good at the moment but if you check out the condition of this car I'm sure you will see its well worth it.

Link to comment
https://www.sau.com.au/forums/topic/242572-r34-gtt-skyline/#findComment-4575163
Share on other sites

  • 2 weeks later...
  • 1 month later...

Create an account or sign in to comment

You need to be a member in order to leave a comment

Create an account

Sign up for a new account in our community. It's easy!

Register a new account

Sign in

Already have an account? Sign in here.

Sign In Now


  • Similar Content

  • Latest Posts

    • Hi, is the HKS  Tower Bar still available ? negotiable ? 🤔
    • From there, it is really just test and assemble. Plug the adapter cables from the unit into the back of the screen, then the other side to the car harness. Don't forget all the other plugs too! Run the cables behind the unit and screw it back into place (4 screws) and you should now have 3 cables to run from the top screen to the android unit. I ran them along the DS of the other AV units in the gap between their backets and the console, and used some corrugated tubing on the sharp edges of the bracket so the wires were safe. Plug the centre console and lower screen in temporarily and turn the car to ACC, the AV should fire up as normal. Hold the back button for 3 sec and Android should appear on the top screen. You need to set the input to Aux for audio (more on that later). I put the unit under the AC duct in the centre console, with the wifi antenna on top of the AC duct near the shifter, the bluetooth antenna on the AC duct under the centre console The GPS unit on top of the DS to AC duct; they all seem to work OK there are are out of the way. Neat cable routing is a pain. For the drive recorder I mounted it near the rear view mirror and run the cable in the headlining, across the a pillar and then down the inside of the a pillar seal to the DS lower dash. From there it goes across and to one USB input for the unit. The second USB input is attached to the ECUtec OBD dongle and the 3rd goes to the USB bulkhead connected I added in the centre console. This is how the centre console looks "tidied" up Note I didn't install the provided speaker, didn't use the 2.5mm IPod in line or the piggyback loom for the Ipod or change any DIP switches; they seem to only be required if you need to use the Ipod input rather than the AUX input. That's it, install done, I'll follow up with a separate post on how the unit works, but in summary it retains all factory functions and inputs (so I still use my phone to the car for calls), reverse still works like factory etc.
    • Place the new daughterboard in the case and mount it using the 3 small black rivets provided, and reconnect the 3 factory ribbon cables to the new board Then, use the 3 piggyback cables from the daughterboard into the factory board on top (there are stand offs in the case to keep them apart. and remember to reconnect the antenna and rear cover fan wires. 1 screw to hold the motherboard in place. Before closing the case, make a hole in the sticker covering a hole in the case and run the cable for the android unit into the plug there. The video forgot this step, so did I, so will you probably. Then redo the 4 screws on back, 2 each top and bottom, 3 each side and put the 2 brackets back on.....all ready to go and not that tricky really.      
    • Onto the android unit. You need to remove the top screen because there is a daughterboard to put inside the case. Each side vent pops out from clips; start at the bottom and carefully remove upwards (use a trim remover tool to avoid breaking anything). Then the lower screen and controls come out, 4 screws, a couple of clips (including 3 flimsy ones at the top) and 3 plugs on the rear. Then the upper screen, 4 screws and a bunch of plugs and she is out. From there, remove the mounting brackets (2 screws each), 4 screws on the rear, 2 screws top and bottom and 3 screws holding in the small plates on each side. When you remove the back cover (tight fit), watch out for the power cable for the fan, I removed it so I could put the back aside. The mainboard is held in by 1 screw in the middle, 1 aerial at the top and 3 ribbon cables. If you've ever done any laptop stuff the ribbon cables are OK to work with, just pop up the retainer and they slide out. If you are not familiar just grab a 12 year old from an iphone factory, they will know how it works The case should now look like this:
    • Switching the console was tricky. First there were 6 screws to remove, and also the little adapter loom and its screws had to come out. Also don't forget to remove the 2 screws holding the central locking receiver. Then there are 4 clips on either side....these were very tight in this case and needed careful persuading with a long flat screw driver....some force required but not enough to break them...this was probably the fiddliest part of the whole job. In my case I needed both the wiring loom and the central locking receiver module to swap across to the new one. That was it for the console, so "assembly is the reverse of disassembly"
×
×
  • Create New...