Jump to content
SAU Community

Recommended Posts

Morning,

yesterday afternoon i put down a deposit on a n/a r34...couple of questions.

1) the blue plate under the hood/drivers side was etched in...i know if its engraved it means its most likly stolen...but i know etching is different, should i be worried?

2) it has not been regerstered in australia before and its going to be put straight into my name...again...suss???

Overall the car is in good condition, few dints, scratches, but mechanicly it goes great...60,000kms on odo

Im getting a comprahensive inspection tomorrow, where the tester goes to his home. then the car is getting complied, then rwc, then rego...he is doing the compliance, rwc and rego

he seemed like a nice enough guy, seems to import a lot of cars (he had another r34 and a toyota chaser at his house for sale), but you cant be to careful, ya know?

if anyone wants to give anymore information, it would be great!

Im buying through a private sale.

Cheers.

Link to comment
https://www.sau.com.au/forums/topic/286178-so-i-just-put-a-deposit-down/
Share on other sites

This isn't that f***ing car that keeps getting advertised here every few months in attempt to pawn it off on some other sucker is it? Researching now...

EDIT: Different colour it seems, but could have been resprayed? I dunno, it just sounds a bit suss that he won't comply it before selling. See these threads for why I jumped to this assumption:

http://www.skylinesaustralia.com/forums/Il...lp-t247731.html

http://www.skylinesaustralia.com/forums/R3...50#entry4637150

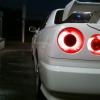
its a white 2 door 34 w/ sunroof.

he is complying before sale, along with 12 mnths reho and rwc, it arrived in australia couple of days back, so obviously hasnt had time to be complied, all he has atm is a deposit.

hope that makes more sense

Morning,

yesterday afternoon i put down a deposit on a n/a r34...couple of questions.

1) the blue plate under the hood/drivers side was etched in...i know if its engraved it means its most likly stolen...but i know etching is different, should i be worried?

2) it has not been regerstered in australia before and its going to be put straight into my name...again...suss???

3) Overall the car is in good condition, few dints, scratches, but mechanicly it goes great...60,000kms on odo

4) Im getting a comprahensive inspection tomorrow

5) he seemed like a nice enough guy

Cheers.

1) What do you mean by etched?

2) I was the first to register my car in AUS

3) I'd call BS on the 60,000K's

4) Good on you, who from?

5) Usually the guys trying to screw you over are the nicest, the guys who want the money for their pride and joy drive a hard sale

1) hmm...best way to describe etched...um...the plate is NOT smooth, you can feel the writing..if that makes sense....my dad told me its just the tool they use on all of them, its not engraved as there is NO depth.

2) i also know that the 60,000 is probally bs...BUT i must say that car runs VERY tight.

3) StateRoads is doing the inspection.

4) the guy regulary imports cars, so he after a easy sale, he does seem legit, he was offering information without us asking him...a good sign imo

Dont know what else to say bro, looks like your taking all the right channels, if it looks clean and drives clean then your probably aright, good job with StateRoads tho they do top quality work

EDIT: Out of curiosity whats this guys name? Just curious cause he might be the same guy that did my car

cheers mate, i mean, there are a couple of minor dents, scratches on it...but nothing bad...stateroads is actually doing check today at 2pm so they will tell me what i gotta know. :(

EDIT: the guy's name is Roy...cant remember the surname...car is in Fawkner

Cheers for ya help and advice mate...the compliance and rwc will not be done before inspection, obviously, so hopefully most of the things stateroads pick up will hopefully be done during compliance and rwc.

random question: the xenon lights in the 34's, are they changed for compliance??

its a white 2 door 34 w/ sunroof.

he is complying before sale, along with 12 mnths reho and rwc, it arrived in australia couple of days back, so obviously hasnt had time to be complied, all he has atm is a deposit.

hope that makes more sense

Sorry I misread your first post. In that case it does sound legit.

I wouldn't put it past a 34 having only 60,000km on the clock, particularly if it's a fresh import...my R33 still has only 98,000 and the engine feels too fresh to be anything more than that.

Cheers for ya help and advice mate...the compliance and rwc will not be done before inspection, obviously, so hopefully most of the things stateroads pick up will hopefully be done during compliance and rwc.

random question: the xenon lights in the 34's, are they changed for compliance??

I'm pretty sure only GTR's come with stock Xenon lights so having Xenon's in yours wont pass, but hopefully they wont notice

take a photo of the blue plate and post it up. someone can enter it into FAST and tell you the original details of the car if you have the VIN/chassis number and model code.

Good Idea Matt, wish I thought of that sooner

I've imported 2 cars. The car is always registered in your name since you are the first Australian owner. The only other case would be if purchased the car from a dealer who had already complied and then registered the car for sale. You'd then need to transfer the rego like a normal re-registered car.

Yours sounds a little odd though considering this is a private sale yeah?

With regards to the compliance plate these are usually quite clean and etched light, if it looks like it's been tampered with then that's sus. You should also find the new VIN etc engraved into the cars firewall or wheel arch near the suspension mounting point with the plate. The numbers should match and they should also match the cars original VIN but will be longer.

If you can get a pic of the plate post it up. Should look similar to this plate but will be blue as you said. It should have the details of the compliance agent and the approval number which you can check with the appropriate body.

IMG_7130.JPG

You can also request a copy of the import approval and compliance paper work from the compliance agent. I have copies of mine if you need to take a look just PM me.

thanks for your responces guys, wont be able to get a pic for a while, the build plates are etched in, so no issue with the build plate...i now know what i needeed too know :(

also, stateroads are doing the inspetcion as we speak, so ill have the report by tonight hopefully!

wish me luck...lol..honestly though, the car seems in good nick and as i said, runs very tightly and smoothly

ill let u all know how the inspection report goes!

WRT the blue nissan build plate - the plate in my 33 GTR is smooth. i feel no difference in texture beneath my fingertips at all - as if it has nothing marked on it.

Dunno bout 34s - the new VIN is generally engraved into the strut tower on 33s after compliance.

And James is correct to the best of my knowledge...they may have to take em out, not sure if they can get around it. If not - just put em back in yourself after RWC :(

Yeah, with the xenons, with a proper compliance job, they'd have to take it out, but some people won't bother with it, so just in case, take it out yourself before the compliance and like Kamikazeninja said, put them back in afterwards. But apparently, some people take the xenons out and they even modify the back of the headlights so you can't put the xenons back in.

But at the end of the day, the R34 factory xenons are illegal and my mate was driving a NA R34 on his P's and a cop dicked him for the lights, because they couldn't find anything else that was wrong with the car lol :D

Just wondering...is the deposit refundable? Because I woulda thought that you should get the car checked by a mechanic before you put a deposit down?

Create an account or sign in to comment

You need to be a member in order to leave a comment

Create an account

Sign up for a new account in our community. It's easy!

Register a new account

Sign in

Already have an account? Sign in here.

Sign In Now


  • Similar Content

  • Latest Posts

    • From there, it is really just test and assemble. Plug the adapter cables from the unit into the back of the screen, then the other side to the car harness. Don't forget all the other plugs too! Run the cables behind the unit and screw it back into place (4 screws) and you should now have 3 cables to run from the top screen to the android unit. I ran them along the DS of the other AV units in the gap between their backets and the console, and used some corrugated tubing on the sharp edges of the bracket so the wires were safe. Plug the centre console and lower screen in temporarily and turn the car to ACC, the AV should fire up as normal. Hold the back button for 3 sec and Android should appear on the top screen. You need to set the input to Aux for audio (more on that later). I put the unit under the AC duct in the centre console, with the wifi antenna on top of the AC duct near the shifter, the bluetooth antenna on the AC duct under the centre console The GPS unit on top of the DS to AC duct; they all seem to work OK there are are out of the way. Neat cable routing is a pain. For the drive recorder I mounted it near the rear view mirror and run the cable in the headlining, across the a pillar and then down the inside of the a pillar seal to the DS lower dash. From there it goes across and to one USB input for the unit. The second USB input is attached to the ECUtec OBD dongle and the 3rd goes to the USB bulkhead connected I added in the centre console. This is how the centre console looks "tidied" up Note I didn't install the provided speaker, didn't use the 2.5mm IPod in line or the piggyback loom for the Ipod or change any DIP switches; they seem to only be required if you need to use the Ipod input rather than the AUX input. That's it, install done, I'll follow up with a separate post on how the unit works, but in summary it retains all factory functions and inputs (so I still use my phone to the car for calls), reverse still works like factory etc.
    • Place the new daughterboard in the case and mount it using the 3 small black rivets provided, and reconnect the 3 factory ribbon cables to the new board Then, use the 3 piggyback cables from the daughterboard into the factory board on top (there are stand offs in the case to keep them apart. and remember to reconnect the antenna and rear cover fan wires. 1 screw to hold the motherboard in place. Before closing the case, make a hole in the sticker covering a hole in the case and run the cable for the android unit into the plug there. The video forgot this step, so did I, so will you probably. Then redo the 4 screws on back, 2 each top and bottom, 3 each side and put the 2 brackets back on.....all ready to go and not that tricky really.      
    • Onto the android unit. You need to remove the top screen because there is a daughterboard to put inside the case. Each side vent pops out from clips; start at the bottom and carefully remove upwards (use a trim remover tool to avoid breaking anything). Then the lower screen and controls come out, 4 screws, a couple of clips (including 3 flimsy ones at the top) and 3 plugs on the rear. Then the upper screen, 4 screws and a bunch of plugs and she is out. From there, remove the mounting brackets (2 screws each), 4 screws on the rear, 2 screws top and bottom and 3 screws holding in the small plates on each side. When you remove the back cover (tight fit), watch out for the power cable for the fan, I removed it so I could put the back aside. The mainboard is held in by 1 screw in the middle, 1 aerial at the top and 3 ribbon cables. If you've ever done any laptop stuff the ribbon cables are OK to work with, just pop up the retainer and they slide out. If you are not familiar just grab a 12 year old from an iphone factory, they will know how it works The case should now look like this:
    • Switching the console was tricky. First there were 6 screws to remove, and also the little adapter loom and its screws had to come out. Also don't forget to remove the 2 screws holding the central locking receiver. Then there are 4 clips on either side....these were very tight in this case and needed careful persuading with a long flat screw driver....some force required but not enough to break them...this was probably the fiddliest part of the whole job. In my case I needed both the wiring loom and the central locking receiver module to swap across to the new one. That was it for the console, so "assembly is the reverse of disassembly"
    • But first....while I was there, I also swapped across the centre console box for the other style where the AV inputs don't intrude into the (very limited !) space.  Part# was 96926-4GA0A, 284H3-4GA0B, 284H3-4GA0A. (I've already swapped the top 12v socket for a USB bulkhead in this pic, it fit the hole without modification:) Comparison of the 2: Basically to do the console you need to remove the DS and PS side console trim (they slide up and back, held in by clips only) Then remove the back half of the console top trim with the cupholders, pops up, all clips again but be careful at the front as it is pretty flimsy. Then slide the shifter boot down, remove the spring clip, loose it forever somewhere in the car the pull the shift knob off. Remove the tiny plastic piece on DS near "P" and use something thin and long (most screwdrivers won't fit) to push down the interlock and put the shifter down in D for space. There is one screw at the front, then the shifter surround and ashtray lift up. There are 3 or 4 plugs underneath and it is off. Next is the rear cover of the centre console; you need to open the console lid, pop off the trim covering the lid hinge and undo the 2rd screw from the driver's side (the rest all need to come out later so you can do them all now and remove the lid) Then the rear cover unclips (6 clips), start at the top with a trim tool pulling backwards. Once it is off there are 2 screws facing rearwards to remove (need a short phillips for these) and you are done with the rear of the console. There are 4 plugs at the A/V box to unclip Then there are 2 screws at the front of the console, and 2 clips (pull up and back) and the console will come out.
×
×
  • Create New...