Jump to content
SAU Community

Recommended Posts

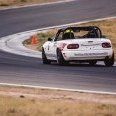
Jesus, looks like someone is going quick! Those Teins are the by of the century, the car looks pretty settled and the times show they must be working ok...even with the Jap springs still in them

So no pics of Russ Sr in the GTR. I am told it has grown a big wang!

They sure are! It's working well.

I actually got asked if my R32 was the ex-high octane 32. I said yes and held a straight face for about 15 seconds before I told him the truth.

Russ Sr. I love the wing. i want one!

  • Replies 1.4k
  • Created
  • Last Reply

Top Posters In This Topic

Top Posters In This Topic

Posted Images

The Hi Octane 32 is fully wicked now with the Hollinger installed. :D

Time got away on us with the rebuild after the prang, so Russell was forced to run without so much as a front undertray.

The best sounding car out there in my opinion too :)

here some pics of russ sr

IMG_2410.jpg

IMG_2405.jpg

IMG_2406.jpg

Looks good with the Advan signage! Was thinking about the brake dramas you were having. Perhaps you need to run drum brakes. :) So no more PPG?

Imagine if the BRI73Y was still black... would have confused plenty of people

Which remings me, it looks like the Cyber Evo runs std Mitsu Brembos! If thats the case, I am gutted. :D Whats the point of having an uber car if you dnt have 20k worth of braking hardware off an Indycar or something... :D

There are sum magnesim TEs for sale at the moment, I so need them ;)

the orange indicators on the 32 was the only way to tell the two apart.. both looked great on the track.. and sounded great.. although i prefered the barky note of the 34 and the extremely lumpy idle.

USING CFD AND VIRTUAL WIND TUNNELS FOR AERO DEVELOPMENT

Just need the hundred k +++ per annum in software, an engineer bright enough to run it and an almost exponential amount of time to get sensible results now... the computer is the easy part. Goodluck!

Does the High Octane R32 still have the same engine setup i.e. full counter 73.7mm crank, dry sump, Hypertune 6-throttle, modified -5's... etc?

Yes! :rofl: But;

We broke the block on Thursday which wrecked the bottom end and replaced it with a spare short we had in Brisbane on Friday.

The replacement short engine was the same but didn't have the full counterweight crank.

Yep!

Made a tubular frame that braced to the door skin and had tabs affixing the lexan to it. Preloaded against the window rubber.

Worked better than I expected to be frank!

And yes Roy, PPG GORN!

Edited by Marlin

Hey guys,

some mates and myself made the trip up from the mornington peninsula at 11.00 on friday night, we got to the track at about 9.00 saturday morning, and were bloody glad we made the effort to get up there. we were all very impressed by the cars, the times, and the ladies :)

a great day at a great event, and cant wait till next time.

aside from the on track and in pit action, it was great to see so bloody many skylines in the carpark. we dont have anywhere near the amount of imports down here on the peninsula, so it was an absolute treat to see so many GTR's.

also, a thankyou to the SAU NSW peeps who gave us vic boys a warm welcome, even inviting us back for a bbq later on. sorry we didnt make it back, we were pretty well set up at turn 12 :rofl:

cheers, Rowdy.

p.s. i now hate the sound of rotaries more than ever, and those hondas didnt sound great either...

Marlin, so when are you putting a PPG gearset in your bus? :rofl: Oh, and i have having a debate at the moment, What would be quicker on your car? 255/40/17s or 265/35/18s? I am betting he narrower 17s would be quicker on my car

I priced a PPG set for my RB25 box. $6800.... Damn...

SR20 gearsets work in the RB20 box, are lighter...but not as strong :)

Russ, you just needed new tyres. I cant believe you ran that time on 12 month old used Yokies! New tyres and some cheap, brand new 6 pots on 330mm rotors that i bought as i wanted to see how good the Endless knock offs were :)

I priced a PPG set for my RB25 box. $6800.... Damn...

yerrr... yet a wrx box is 3 or 4g....

ppg s14 gearset is rated for 300kw... or is it 400kw... ahhhh i forget now.

for 6800 you mayswell save up and extra 3g and buy a used holinger.. think i saw one for 10g not long ago

SR20 gearsets work in the RB20 box, are lighter...but not as strong :)

Russ, you just needed new tyres. I cant believe you ran that time on 12 month old used Yokies! New tyres and some cheap, brand new 6 pots on 330mm rotors that i bought as i wanted to see how good the Endless knock offs were :)

How cheap is cheap roy?

I need brakes for my bus

Create an account or sign in to comment

You need to be a member in order to leave a comment

Create an account

Sign up for a new account in our community. It's easy!

Register a new account

Sign in

Already have an account? Sign in here.

Sign In Now


  • Latest Posts

    • From there, it is really just test and assemble. Plug the adapter cables from the unit into the back of the screen, then the other side to the car harness. Don't forget all the other plugs too! Run the cables behind the unit and screw it back into place (4 screws) and you should now have 3 cables to run from the top screen to the android unit. I ran them along the DS of the other AV units in the gap between their backets and the console, and used some corrugated tubing on the sharp edges of the bracket so the wires were safe. Plug the centre console and lower screen in temporarily and turn the car to ACC, the AV should fire up as normal. Hold the back button for 3 sec and Android should appear on the top screen. You need to set the input to Aux for audio (more on that later). I put the unit under the AC duct in the centre console, with the wifi antenna on top of the AC duct near the shifter, the bluetooth antenna on the AC duct under the centre console The GPS unit on top of the DS to AC duct; they all seem to work OK there are are out of the way. Neat cable routing is a pain. For the drive recorder I mounted it near the rear view mirror and run the cable in the headlining, across the a pillar and then down the inside of the a pillar seal to the DS lower dash. From there it goes across and to one USB input for the unit. The second USB input is attached to the ECUtec OBD dongle and the 3rd goes to the USB bulkhead connected I added in the centre console. This is how the centre console looks "tidied" up Note I didn't install the provided speaker, didn't use the 2.5mm IPod in line or the piggyback loom for the Ipod or change any DIP switches; they seem to only be required if you need to use the Ipod input rather than the AUX input. That's it, install done, I'll follow up with a separate post on how the unit works, but in summary it retains all factory functions and inputs (so I still use my phone to the car for calls), reverse still works like factory etc.
    • Place the new daughterboard in the case and mount it using the 3 small black rivets provided, and reconnect the 3 factory ribbon cables to the new board Then, use the 3 piggyback cables from the daughterboard into the factory board on top (there are stand offs in the case to keep them apart. and remember to reconnect the antenna and rear cover fan wires. 1 screw to hold the motherboard in place. Before closing the case, make a hole in the sticker covering a hole in the case and run the cable for the android unit into the plug there. The video forgot this step, so did I, so will you probably. Then redo the 4 screws on back, 2 each top and bottom, 3 each side and put the 2 brackets back on.....all ready to go and not that tricky really.      
    • Onto the android unit. You need to remove the top screen because there is a daughterboard to put inside the case. Each side vent pops out from clips; start at the bottom and carefully remove upwards (use a trim remover tool to avoid breaking anything). Then the lower screen and controls come out, 4 screws, a couple of clips (including 3 flimsy ones at the top) and 3 plugs on the rear. Then the upper screen, 4 screws and a bunch of plugs and she is out. From there, remove the mounting brackets (2 screws each), 4 screws on the rear, 2 screws top and bottom and 3 screws holding in the small plates on each side. When you remove the back cover (tight fit), watch out for the power cable for the fan, I removed it so I could put the back aside. The mainboard is held in by 1 screw in the middle, 1 aerial at the top and 3 ribbon cables. If you've ever done any laptop stuff the ribbon cables are OK to work with, just pop up the retainer and they slide out. If you are not familiar just grab a 12 year old from an iphone factory, they will know how it works The case should now look like this:
    • Switching the console was tricky. First there were 6 screws to remove, and also the little adapter loom and its screws had to come out. Also don't forget to remove the 2 screws holding the central locking receiver. Then there are 4 clips on either side....these were very tight in this case and needed careful persuading with a long flat screw driver....some force required but not enough to break them...this was probably the fiddliest part of the whole job. In my case I needed both the wiring loom and the central locking receiver module to swap across to the new one. That was it for the console, so "assembly is the reverse of disassembly"
    • But first....while I was there, I also swapped across the centre console box for the other style where the AV inputs don't intrude into the (very limited !) space.  Part# was 96926-4GA0A, 284H3-4GA0B, 284H3-4GA0A. (I've already swapped the top 12v socket for a USB bulkhead in this pic, it fit the hole without modification:) Comparison of the 2: Basically to do the console you need to remove the DS and PS side console trim (they slide up and back, held in by clips only) Then remove the back half of the console top trim with the cupholders, pops up, all clips again but be careful at the front as it is pretty flimsy. Then slide the shifter boot down, remove the spring clip, loose it forever somewhere in the car the pull the shift knob off. Remove the tiny plastic piece on DS near "P" and use something thin and long (most screwdrivers won't fit) to push down the interlock and put the shifter down in D for space. There is one screw at the front, then the shifter surround and ashtray lift up. There are 3 or 4 plugs underneath and it is off. Next is the rear cover of the centre console; you need to open the console lid, pop off the trim covering the lid hinge and undo the 2rd screw from the driver's side (the rest all need to come out later so you can do them all now and remove the lid) Then the rear cover unclips (6 clips), start at the top with a trim tool pulling backwards. Once it is off there are 2 screws facing rearwards to remove (need a short phillips for these) and you are done with the rear of the console. There are 4 plugs at the A/V box to unclip Then there are 2 screws at the front of the console, and 2 clips (pull up and back) and the console will come out.
×
×
  • Create New...