Jump to content
SAU Community

Recommended Posts

Hi Guys,

I am trying to clean up my wheels. The middle part of the wheel cleans up nice with some wheel cleaner. However the dish remains stained. I have tried different wheel cleaners but it seems to be within the metal now. I also tried quickly some metal polish but no luck either.

Any ideas?

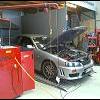
Here is a pic, needs to be closer but you get the idea.

post-29432-1276648538_thumb.jpg

Tried "Upper Engine Cleaner" from Subaru?

It could remove all the sh/t that was on my OEM wheels from Japan.

It works if Zymol wheel cleaner doesn't.

When it's all off, you may need to respray the wheels with 'clear'.

Ah ok yup thats the next step if I cant do it pretty easily myself.

After some google searching I found two products, ALUPLUS and ALUBRITE. It is an acid that is supposed to clean aluminium and then polish it really well.

Think I will try that and then resort to a rim repair shop if it doesnt work.

That ALUBRITE is a pretty harsh acid, Ive used it to clean the outside of the head, the cross over pipe and stuff like that.

ALUBRITE will burn your hands if you dont wear gloves its that strong, it will eat the duco as well and anything else that gets in its way... Ive used it in conjunction with a toothbrush to clean all sorts of things... it'll clean brake dust build up off rims, but it will also scar the paint and leave shiny alloy dull, I havnt tried it on powdercoat...

But it should work on the aluminium dish of my rims as long as I dont get it anywhere else?

I will just try a very small part of the dish with a toothbrush to start off with.

Edited by Harey

As mentioned alloy brightener can make shiny alloy dull but if you then polish it you should be ok...

Be careful with the stuff. Wear a mask or don't breathe, & wear gloves. I use it at work to clean transmission cases & it's strong stuff!

You'll know when you breathe it in...

Edited by wlspn

hey... okay here's what you do.

first of all.. this method sounds strange and it will be MOST noticable with bad rims (i mean RIM rims... not "wheels")

go to bunnings

get a very fine steel wool.

no. not that dishwashing crap that you use to get black stuff off pots. this is steel. wool. SIFA make it.

2175040__32055_thumb.jpg

looks like that.

rip a chunk off. big chunk. the bigger the chunk, the more surface area you have to scrub with. the more surface area. the less pressure. less pressure, less chance of scratching. get it?

use either water - or olive oil as a lubricant... i suggest olive oil as it won't ake the steel wool RUST. use a lot of it.

gently rub the steel wool on the wheel. if the stains won't come out, apply a little bit more pressure etc

the basic premise of this is... steel wool is soft as butter. but it is still a METAL. your aluminium / steel rims are a harder metal, and will not "give in" to the steel wool easilly

the steel wool sacrifices itself to clean the metal.

give it a go if you so wish - i imagine that there is a certain element of risk doing this method... but i've done it plenty of times on my wheels which - at one stage were VERY badly corroded.

steel wool is about 8/9 bucks

everyone else take note.

oh and wash the olive oil off the rim using a soap / detergent / shampoo (dah)

  • 1 month later...
i think you need to determine if the dish area is clearcoated from factory - if it is, you will most likely need to remove that before being able to polish it.

Your right on the money here, the dish does have a clear coat.

I started with the steel wool and it wasnt doing much, so I went a bit harder and I could see it take the clear coat off and go down to metal. I have only done this in one small area.

What issues does removing the clear coat raise? Should I remove it or just leave it there and give up.

These guys seem use aircraft stripper to remove the clear coat:

http://forums.corral.net/forums/showthread.php?t=763405

They just say it takes a bit more effort to keep em clean. Its only the dish of my wheels so dont have little nooks and crannys that would be tricky to keep clean.

Would love the rims to have a super shiny dish :happy:

I am leaning towards removing the clear coat.

Edited by Harey

Create an account or sign in to comment

You need to be a member in order to leave a comment

Create an account

Sign up for a new account in our community. It's easy!

Register a new account

Sign in

Already have an account? Sign in here.

Sign In Now


  • Similar Content

  • Latest Posts

    • Welp, good to know. Will have to wait awhile until steady hands with drills and taps are available. In other news, these just arrived! I will weigh them for posterity.
    • 100% the factory sender is tapered, that is how it seals (well, that and teflon paste or tape)
    • Thanks folks - I've saved a few links and I'll have to think of potential cable/adapters/buying fittings. First step will be seeing if I can turn the curren abortion of a port into something usable, then get all BSPT'y on it. I did attempt to look at the OEM sender male end to see if it IS tapered because as mentioned you should be able to tell by looking at it... well, I don't know if I can. If I had to guess it looks like *maybe* 0.25 of a mm skinnier at the bottom of the thread compared to where the thread starts. So if it is tapered it's pretty slight - Or all the examples of BSPT vs BSPP are exaggerated for effect in their taper size.
    • Have a look at that (shitty) pic I posted. You can see AN -4 braided line coming to a -4 to 1/8 BSPT adapter, into a 1/8 BSPT T piece. The Haltech pressure sender is screwed into the long arm of the sender and factory sender (pre your pic) into the T side. You can also see the cable tie holding the whole contraption in place. Is it better than mounting the sender direct to your engine fitting......yes because it removes that vibration as the engine revs out 50 times every lap and that factory sender is pretty big. Is it necessary for you......well I've got no idea, I just don't like something important failing twice so over-engineer it to the moon!
    • Yup. You can get creative and make a sort of "bracket" with cable ties. Put 2 around the sender with a third passing underneath them strapped down against the sender. Then that third one is able to be passed through some hole at right angles to the orientation of the sender. Or some variation on the theme. Yes.... ummm, with caveats? I mean, the sender is BSP and you would likely have AN stuff on the hose, so yes, there would be the adapter you mention. But the block end will either be 1/8 NPT if that thread is still OK in there, or you can drill and tap it out to 1/4 BSP or NPT and use appropriate adapter there. As it stands, your mention of 1/8 BSPT male seems... wrong for the 1/8 NPT female it has to go into. The hose will be better, because even with the bush, the mass of the sender will be "hanging" off a hard threaded connection and will add some stress/strain to that. It might fail in the future. The hose eliminates almost all such risk - but adds in several more threaded connections to leak from! It really should be tapered, but it looks very long in that photo with no taper visible. If you have it in hand you should be able to see if it tapered or not. There technically is no possibility of a mechanical seal with a parallel male in a parallel female, so it is hard to believe that it is parallel male, but weirder things have happened. Maybe it's meant to seat on some surface when screwed in on the original installation? Anyway, at that thread size, parallel in parallel, with tape and goop, will seal just fine.
×
×
  • Create New...