Jump to content
SAU Community

Recommended Posts

hey guys, thought now i had the scanner up and running i could put this up. while my car is under construction and not as hot as many others on here i have quite a few dyno results from when i started upgrades so might be a useful threads for people starting out. unfortunately i have a bad habit of taking photos after i finish something and not taking beforehand so bear with me.

bought this car between chrissie and new year at the end of 2003 after realising the sump in my berlina had a big dent and maybe the pickup was broken. i was always interested in skylines and bought a few magazines and decided 33`s had the look i wanted and set out. within a week i had my new car. a 1993 s1 gtst with 70k kilometres on it. it stayed stock 4 a bit and after realising all mags were advertising exhaust for around 2500 i got a quote for 3 inch cat back mild steel with stainless lukey muffler for 750 so i got it. wasnt loud at all. ran this for a bit until the West Coast Nationals were on in Collie. ran it up on the dyno stock apart from exhaust and i pulled out the panel filter for the dyno run.

_Untitled_.pdf

Link to comment
https://www.sau.com.au/forums/topic/339703-t-revz-r33-s1-gtst-build/
Share on other sites

Took the car to Collie and entered the 1/8th mile drags. cant remember my times anymore but in the 9`s from memory. went well enough the beat a few V8s mostly from a better start but couldnt keep up with a stockish Rex that was there. anyway about half track on the 5th or 6th run the power backed off and i realised immediately the clutch had gone... i turned off at the end of the strip and putted it home in 3rd.

I got talking with a guy from work the next day who is big into old Falcons and told him what happened and he told me his brother in law had a modified GTR and said Xspeed were the best place to go. i Gave em a call and told them how i used the car and they recommended a cushioned ceramic clutch and exchange flywheel by Xtreme. Jacked the car up in the garage. ripped the box out and took flywheel up to Perth. cost me 600 for the exchange. slammed the box back in when i got home but the input shaft must have picked up the spigot bush on the way in and clutch wasnt releasing all the way and was squealing a little. dropped it out again and sanded the bush a little as i couldnt get one straight away. put it back in and was all good. was heavier but good for a daily driven car.

Few months later i wanted a bit more so i pulled the filter assembly out and took the AFM to work to make up a pod adaptor. found some spare pipe at work and plate and welded it together then oxy`ed out the hole. dropped it back in and seemed better but may have just been the noise. picked up a Turbosmart manual bleed valve and took it to Adrenaline to set the boost as the boost guage in car wasnt the best. manged 236.4 rwhp after turning it up a few pound.

dyno_3.pdf

so the 100k was up i booked it in at Xspeed for timing belt, v-belts to be changed and a HYBRID intercooler kit.

intercooler supplied and fitted was $1450

timing belt $80 plus $210 fitting.

alt and p/s belts $75

took the car back to Adrenaline and was up to 266.9 rwhp and held same figures everytime consistently instead of dying off like before due to crap stock intercooler

doc_6.pdf

went to the spoiler shop which used to be near Xspeed to get a body kit as the stock front bar was scratched up. i ordered a veilside front bar and 400r side skirts for 800 unpainted.

also got an Autometer air/fuel mixture gauge. post-24655-1286689140_thumb.jpghooked the gauge up and it kind of worked on start up then turned off. i checked all the wiring was ok the put it in my dads fairmont and it worked perfectly. put it back in mine and ordered a new 02 sensor. picked up a universal sensor for about $40 and put it in. the guage worked correctly and fixed up the poor fuel consumption which had recently started. went from 350km a tank back to 500.

ripped the front bar off and had to cut the side skirts off as they were so heavily glued on. cleaned it all up then got bodykit sprayed and fitted up.

photos of the car are poor quality as they were taken from a phone

had the drivers window stop winding for a bit unless holding the button down and hitting the door skin. so i stripped the controller and found a dry solder joint and was all good. nothing much changed for a while until i was on strike for 10 weeks. i went to Bunbury to see a mate then we both went to Collie. we came up to Roelands hill which is quite steep and couple k`s long. we came up to the overtaking lane and started to line up with each other. my mate had an Xr8 ute with a few mods. we smashed the pedals to the floor and he was just pulling away, but about 100m up the hill my car lost all power and was hesitating badly. i hit the clutch and the engine stalled. turned the key while still rolling and it fired back up. off i went again and stalled again. i got it going and took it very easy. found on the way home if i tried to accelerate much it misfired badly so i sat around 100 to get me home. by the time i got there it was running on 5 cylinders. i pulled the plugs out and this is what i found...

post-24655-1286715105_thumb.jpg

post-24655-1286715131_thumb.jpg

i rang up Xspeed and booked it in for an 040 fuel pump and if that didnt fix it to diagnose for me

  • 1 month later...

took the car to get new 040 fuel pump and decided to wait in the store while they did it...this was where things started to get expensive. i got talking with one of the guys about what order things should be done when upgrading. by the end of the conversation i had booked the car in for a Gcg hi-flow turbo, stainless steel dump pipe, Power FC with hand controller, Blitz DSBC spec s, Turbosmart Dual port Bov.

Dropped car off during the week and came back friday to pick it up.car went on the dyno and Ant came in to see me and said the turbo wasnt responding properly and might take a bit longer. he ripped the inlet off the turbo and found the impeller to be rubbing on the housing. apparently it was caused by insufficient oil able to pass through the cartridge due to poor assembly. another turbo was ordered and i got to borrow Xspeeds Nissan Micra for the weekend :whistling:

As i had planned to drive from Perth to Gold Coast the following week i asked for a safe tune as i wouldnt be able to buy 98 across the nullabor. picked it up following week and was up to 282.9 rwhp @ 12 psi. i was happy but wondering where the missing parts of the spark plugs had gone when detonating and whether this had affected my power now.

post-24655-1291037375_thumb.jpg

post-24655-1291037447_thumb.jpg

Spent a few months working in Brisvegas before a mate got me doing cashies after work for a Jag repair shop nearby. We struck up a deal where I would help him out then he would re-spray the bonnet as it had bubbles appearing and looked crap. Eventually I decided I wanted the whole car sprayed. So at new year when I couldn’t get holidays I snatched it and planned to rip into it after new year.

At this stage I had my sights set on the pearl blue that holden had only recently released.post-24655-1291037913_thumb.jpg

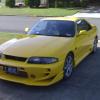
In the final days I changed my down to the yellow ford was running at the time.post-24655-1291037973_thumb.jpg

For the next 4 weeks I set out ripping it apart and sanding it back. I drove it there each day until it was too far gone. Got quite a few looks each day when it looked this far gone.

post-24655-1291038117_thumb.jpg

post-24655-1291038143_thumb.jpg

post-24655-1291038169_thumb.jpg

post-24655-1291038199_thumb.jpg

post-24655-1291038282_thumb.jpg

post-24655-1291038421_thumb.jpg

  • 2 weeks later...
  • 3 months later...

These were taken the next day after putting it back together

post-24655-0-27752800-1301924310_thumb.jpg

post-24655-0-73264600-1301924342_thumb.jpg

I moved back to WA soon after and gave it a service before back on the dyno to get it re-tuned for 98.

post-24655-0-42399200-1301925140_thumb.jpg

post-24655-0-74760200-1301925164_thumb.jpg

managed 284.5 rwhp and was told they had changed plugs but had a slight miss and likely coils at fault.

ordered some splitfires and fitted which seemed to fix the missfire which had slightly got worse.

post-24655-0-49568700-1301925355_thumb.jpg

post-24655-0-68612700-1301925383_thumb.jpg

only 275 this time. not sure why but they never cranked it up and boost was down just a touch but confirmed missfire was completely gone.

She went well for a year then i moved to Japan for 8 months and left her parked up.When i got back just needed a new battery and service and was good to go. Put some new belts on for good measure.

Back into FIFO work and noticed after arriving back one time the temp shot up when i began going home. Turned around back to my mates and threw the hose at it and cooled it down. Was just over 100c. Kept an eye on it but no further problems. 3 months later same thing. Got 2-3 kms from mates and temp went up this time reached 119c. This time appeared to be empty. No further problem. Went to a mates work to book in 4 cooling pressure test etc but while chatting she started dripping and found water pump leaking from tell tale.

Bought a new pump and belt and put it in. Unfortunately when i put the CAS in i mustnt have been concentrating as it went in a tooth out and broke the locator. Lined in up and started ok. No dramas for 6 months or so then one day got back from a drive and 10 seconds after shutting it off it let out a big bang(backfire). Was still running ok. A month later it happened again and began backfiring when decelarating but only slightly. booked it in at Xspeed but couldnt get in for 2 weeks. Kept driving it as i had plans down south. Was good on cruise but now didnt enjoy accel or decel.

3 days before it was due to be checked was going up a long steep hill nearby and it let out a terrible scream. pulled over to find turbo was glowing white and harnesses were melting. YAY. Towed it to Xspeed. Turbine fins were shredded, manifold warped, 8 or 9 ex studs broken, etc etc. Got all the necessary new bits fitted and some troubleshooting to find out the cause was a crack in CAS bracket that was opening up and throwing the timing out.I must have stressed it when i put CAS in previously a tooth out.

While there i also got Z32 AFM, Nismo fuel Reg, Nismo 740cc injectors and new fuel pump.

post-24655-0-30564000-1301926721_thumb.jpg

post-24655-0-08991400-1301926741_thumb.jpg

was happy with the 308.5 rwhp it now was producing even as the engine was tired and had endure some hard times

Went good for another year but was still using some oil. about 500ml every service. Compression was 125psi cylinders 1-5 and 6 was 120. Finally bought the missus a new car and i had a work car now so i could afford to take it off the road and give it a birthday.

  • 1 month later...

Since i never painted the engine bay when i changed the car colour i was pretty keen to hook into this, didnt take any pics before though, after cleaning it up i hit it with 4 coats of matte black followed by 3 coats of clear to give a bit of gloss

IMG_0299.jpg

IMG_0297.jpg

IMG_0302.jpg

IMG_0306.jpg

IMG_0304.jpg

IMG_0303.jpg

ended up finding 4 valve stem seals leaking

IMG_0348.jpg

IMG_0347.jpg

5 pistons had broken ringlands and you can see number 6 is missing a piece from the crown

IMG_0342.jpg

IMG_0344.jpg

IMG_0337.jpg

15082010301.jpg

IMG_0346.jpg

IMG_0345.jpg

IMG_0338.jpg

IMG_0341.jpg

Create an account or sign in to comment

You need to be a member in order to leave a comment

Create an account

Sign up for a new account in our community. It's easy!

Register a new account

Sign in

Already have an account? Sign in here.

Sign In Now


  • Similar Content

  • Latest Posts

    • Place the new daughterboard in the case and mount it using the 3 small black rivets provided, and reconnect the 3 factory ribbon cables to the new board Then, use the 3 piggyback cables from the daughterboard into the factory board on top (there are stand offs in the case to keep them apart. and remember to reconnect the antenna and rear cover fan wires. 1 screw to hold the motherboard in place. Before closing the case, make a hole in the sticker covering a hole in the case and run the cable for the android unit into the plug there. The video forgot this step, so did I, so will you probably. Then redo the 4 screws on back, 2 each top and bottom, 3 each side and put the 2 brackets back on.....all ready to go and not that tricky really.      
    • Onto the android unit. You need to remove the top screen because there is a daughterboard to put inside the case. Each side vent pops out from clips; start at the bottom and carefully remove upwards (use a trim remover tool to avoid breaking anything). Then the lower screen and controls come out, 4 screws, a couple of clips (including 3 flimsy ones at the top) and 3 plugs on the rear. Then the upper screen, 4 screws and a bunch of plugs and she is out. From there, remove the mounting brackets (2 screws each), 4 screws on the rear, 2 screws top and bottom and 3 screws holding in the small plates on each side. When you remove the back cover (tight fit), watch out for the power cable for the fan, I removed it so I could put the back aside. The mainboard is held in by 1 screw in the middle, 1 aerial at the top and 3 ribbon cables. If you've ever done any laptop stuff the ribbon cables are OK to work with, just pop up the retainer and they slide out. If you are not familiar just grab a 12 year old from an iphone factory, they will know how it works The case should now look like this:
    • Switching the console was tricky. First there were 6 screws to remove, and also the little adapter loom and its screws had to come out. Also don't forget to remove the 2 screws holding the central locking receiver. Then there are 4 clips on either side....these were very tight in this case and needed careful persuading with a long flat screw driver....some force required but not enough to break them...this was probably the fiddliest part of the whole job. In my case I needed both the wiring loom and the central locking receiver module to swap across to the new one. That was it for the console, so "assembly is the reverse of disassembly"
    • But first....while I was there, I also swapped across the centre console box for the other style where the AV inputs don't intrude into the (very limited !) space.  Part# was 96926-4GA0A, 284H3-4GA0B, 284H3-4GA0A. (I've already swapped the top 12v socket for a USB bulkhead in this pic, it fit the hole without modification:) Comparison of the 2: Basically to do the console you need to remove the DS and PS side console trim (they slide up and back, held in by clips only) Then remove the back half of the console top trim with the cupholders, pops up, all clips again but be careful at the front as it is pretty flimsy. Then slide the shifter boot down, remove the spring clip, loose it forever somewhere in the car the pull the shift knob off. Remove the tiny plastic piece on DS near "P" and use something thin and long (most screwdrivers won't fit) to push down the interlock and put the shifter down in D for space. There is one screw at the front, then the shifter surround and ashtray lift up. There are 3 or 4 plugs underneath and it is off. Next is the rear cover of the centre console; you need to open the console lid, pop off the trim covering the lid hinge and undo the 2rd screw from the driver's side (the rest all need to come out later so you can do them all now and remove the lid) Then the rear cover unclips (6 clips), start at the top with a trim tool pulling backwards. Once it is off there are 2 screws facing rearwards to remove (need a short phillips for these) and you are done with the rear of the console. There are 4 plugs at the A/V box to unclip Then there are 2 screws at the front of the console, and 2 clips (pull up and back) and the console will come out.
    • So, a bit of a side trip, but one that might be interesting for people with JDM cars and japanese head units. I know @Pac previously posted about a carplay/android auto adapter he installed which used the AUX input, and @V35_Paul put in one of the Tesla style units that replace both screens. The option I went with was a Lsait LLT-YF-VER5.87_2 (https://www.alibaba.com/product-detail/Lsailt-8GB-Android-Multimedia-Interface-for_1601187633672.html). Price was $1,150 for a single unit although they are much cheaper if you are willing to buy 2....$857ea. Make you you get the version 2 not version 1, it is faster and has a better UI - this is the manufacturer listing: http://www.lsailt.com/product/348.html. BTW if you've never bought from Alibaba before, don't be concerned....these guys can't stay in business unless they are responsive, ship fast etc, they were excellent (probably faster shipping than most local places) So, this was my task for a lazy Sat afternoon....looks complex but was all done in a few hours (it probably helps that I had some of it apart before so it was a bit familiar). I also decided to add a HD USB drive recorded at the same time and the unit also supports an aftermarket reverse cam (if you don't want to retain factory) and also AV in and HDMI out It looks much worse than it is, in fact in was genuinely all plug and play (no custom wiring at all). This video was pretty good (skipped a few steps), unfortunately they are an Aussie seller but no longer sell this unit (I guess Carplay/AA adapters are easier to install and much cheaper) https://www.youtube.com/watch?v=T5hJfYOB8Dg
×
×
  • Create New...