Jump to content
SAU Community

R33 Gts Build


Recommended Posts

  • Replies 49
  • Created
  • Last Reply

Top Posters In This Topic

Top Posters In This Topic

Posted Images

Havnt updated this in a while, will do tomorrow.

Looking good mate, how long did it take you to clean up the rear interior??

Just fitted up my rollcage, harness, mirrors and canards this week...need to clean mine up a bit.

Depends how far you have already gone with the job, if the sound deadening is still fully in there it takes a few days to clear it all by yourself.

If you only have the left over bits of glue/gunk it doesnt take very long at all. Heat up the bits with a heat gun and then wipe it away with a dirty rag.

Link to comment
Share on other sites

Heres the update i said i would do 3 days ago :whistling:

Bought some CTP insurance for it today as its heading off for a roadworthy tomorrow and hopefully if that goes all smooth it will get rego.:thumbsup:

Promise I will invest in a decent camera one day.

post-63710-0-88898000-1298522392_thumb.jpg

Ahh its glowing! The back now seems to be a bit higher so umm some new adjustable coilovers to come.:unsure:

post-63710-0-63385600-1298522426_thumb.jpg

post-63710-0-61874200-1298522434_thumb.jpg

Not much has happened here except for the new Nismo shifter

post-63710-0-00340700-1298522448_thumb.jpg

Still need to clean up the back a bit more, will put some of the side trim so it looks a bit better and so its a bit more 'roadworthy' and safe.

Thats about it for stripping at the moment, still have some engine mods that are waiting on a bit more cash and then onto suspension, will have to spruce-up the interior a bit also its getting a bit worn.

Link to comment
Share on other sites

I love the way your going mate,,,learning as you go,,,very cool.

Got any more pics of your dog,,we might own a great dane but we love dashounds!!!.

If you want to fill in the rear seat belt holes so no water comes in,,,try and find a van like a vw kombi that was made in both a people mover and a delivery van. The delivery version will have plastic screw in plugs that do the job perfectly.

Cheers

Neil.

I would imagine finding a VW kombi would be a bit challenging will have a look around though.

My dogs name is Dobby have had him for about 2 years, awesome dog.

post-63710-0-21678700-1298698206_thumb.jpg

post-63710-0-15176500-1298698224_thumb.jpg

scared of the camera haha.

Well, the car went in for a roadworthy yesterday and as I feared a few things came up that I have to fix but its no biggy.

1. Headlight lenses smokey - Done.

2. Wiper blades need replacing - Done.

3. Small chip in windscreen - Setting atm.

4. Bare wiring in engine bay (just need to hook them up to the sensors) - Done.

5. Clutch bite point too low - about to sus this out.

6. Front bump stops need replacing - this is the only annoying one.

So I will need to buy some new bump stops for the front suspension and get them done early next week. Not sure where im going to get some new ones, could go Nissan or some aftermarket stuff?

Link to comment
Share on other sites

Passed it's roadworthy yesterday and put 6 months rego on it. Must say im very happy with the difference in performance from just stripping some weight from the car.

Finally getting closer to where i want the car to be, shouldnt be too much longer and I will be hitting the track to have some fun with it :thumbsup:

Link to comment
Share on other sites

  • 4 weeks later...

Little update... Not too much has been going on with the car, have just been making it tidy and having some fun with it.

Got these made up as the interior was looking a bit old and worn, I quite like them they suit the car well.

post-63710-0-41678200-1301368017_thumb.jpg

The diff has also been re shimmed making it very tight :whistling: It should loosen up in the next few weeks but for now going around tight turns is fun.

Next thing on the list is to get the rear guards rolled as they hit the tires when I give it some.

After that its off to Willowbank to see what I can do.

Link to comment
Share on other sites

  • 1 month later...

Update!

Have done a bit to the car in the last few weeks, first thing... racing seat.

Bride lowmax repilca with lowered seat rails.. all ADR approved which is sweet. Need to get custom mounts made up for the seat considering im tall though :/

post-63710-0-82375100-1306240537_thumb.jpg

O yea and a mighty car mods sticker. DIY = win

Also have all 4 guards rolled thanks to Sexydave :thumbsup:

no pic, as rolled guards are umm rolled... not much to see

Next thing, i got a set of mint Tein RE's for a sweet deal

"TEIN Type RE Coilovers are like the Type RA, but with an added full-length adjustment system. Ride height is adjustable without changing the preload of spring. This is the special feature of the full-length adjustment system due to threads on the lower bracket. The Type RE has a wide range for setting the stroke and length of the shock. It is possible to set up this suspension for various road, weather, or track conditions while maintaining optimal suspension stroke. "

post-63710-0-58094200-1306240588_thumb.jpg

Next thing on the list suspension arms. Rear camber, rear toe and front caster from 999

post-63710-0-82436900-1306240559_thumb.jpg

Had work till 9pm... so work through the night to get them in for alignment early the next day...

post-63710-0-93686200-1306240573_thumb.jpg

Went down to fulcrum on Saturday and got an alignment and height adjust for Happy laps at lakeside the next day.

That is about it for now, seat is off getting sorted and have a 21 Row PWR cooler ready to go in some time this week :turned:

Will be getting out to a driver training session at Queensland raceway sometime in the next month.

post-63710-0-45081600-1306240549_thumb.jpg

Link to comment
Share on other sites

  • 4 weeks later...

awesome stuff mate, will be keeping an eye on this to see where it goes!

Thanks for the comment :)

It has been a while since I've had an update, so here is what I have been up to. After getting the suspension sorted I went out to Lakeside Raceway for a few happy laps with SAUQLD, the car handled 100x better than before but I then came across another problem.... oil temp.

After a few laps it had spiked to 130 deg, so I decided it was time to give it a rest and let it cool down.

So it's time to invest in an Oil cooler setup. Went to PWR and picked up a 21 Row cooler, and also bought an oil filter relocation kit.

Make sure you use Teflon tape or something like that on all of the fittings... or else you end up with 1 liter of Motul oil on the floor >_<

Time for installation.. Went for a trip to Bunnings bought a strip of aluminum, nuts, bolts and rubber grommets.

Making the bracket was easy enough mark the holes drill... heat up the aluminum with a blow torch, bend and your done.

post-63710-0-52687800-1308487599_thumb.jpg

post-63710-0-26700000-1308487847_thumb.jpg

Made it out to a Drift day to learn some car control, nailed a few corners but had many spins and off the track experiences... nothing broken and happy to say the cooler kept everything at 80 degrees no matter how hard I pushed the car.

post-63710-0-41817900-1308488039_thumb.jpg

post-63710-0-09277200-1308488048_thumb.jpg

Have also put in the S1 grill.

Next project is a new/used front bar and some sparco pedals.

post-63710-0-59294200-1308488264_thumb.jpg

post-63710-0-46500800-1308488279_thumb.jpg

post-63710-0-57919500-1308488245_thumb.jpg

Link to comment
Share on other sites

  • 1 month later...

Time for a quick midnight update.

Pedals are in, no pictures because its not that exciting...

Im still working on the front bar as it needed a bit of bog and thought I might as well try it for myself. Turns out I've done quite well, still sanding down and building up some rough spots to get the shape but its almost done.

Then it will be off to get plastic welded in a few places. (the bar wasn't in the best condition when I bought it, but i got it for a steal.)

Put the car up on a dyno again to see if it is all still healthy and producing the same amount of power as before... and it is. thumbsup.gif (167.2hp)

Decided to do a run with my Varex exhaust fully closed to see what difference it makes. Turns out I go from 167.2hp to 149.0hp which isn't too surprising but cool to test it out.

Attended the annual Nissan time attack day at QR, would have liked to run my car but didn't, but what I did do was get a free corner weight thanks to Fulcrum.

Car weighs in at 1266kg LF 371kg - RF 377KG - RR 281kg - LR 303kg. Im very happy with the weight but I think I can go lower to the 1100's with losing the spare tire, passenger seat getting rid of a few small bits and buying lighter parts.

Hit the strip last Saturday and managed to get 15.064s @ 93.52mph pass, was really hoping to get into the 14's but this was good enough for me.

post-63710-0-48251500-1312294019_thumb.jpg

post-63710-0-67126800-1312294031_thumb.jpg

Will be heading down to Sydney on Thursday in my pinny wagon for world time attack (hope it makes it) and hopefully I come back with some presents for the car.rolleyes.gif

Going to put this photo up because I love it, at Lakeside heading onto the track for happy laps.

post-63710-0-08157700-1312294299_thumb.jpg

Link to comment
Share on other sites

Mate,

Thank you for such a good read whilst work is boring. lol.

So cool to see and watch you building up the NA. respect.

Car looks wicked, especially with the interior out and new seat looks mint!! even for a replica its great!

Really like the wheels on it also good look and nice stance. sets off the white very nicely!!

gonna chuck this in my watched section!

All the best! good look at the time attack!!

Thanks for the kind words thumbsup.gif

World time attack was great my wagon made it down and back with no problem. I also bought the skyline a present and a half... that will be arriving in 8 weeks.

Got a cheap deal at the advan stall for some rims and tyres so I bought a set of Dark Gun Metallic Advan RS rims and Advan Neova ad08's. O and some advan lock nuts that he pretty much gave to me.

Specs are:

Currents: 17x8 +34 on all 4.

New fronts are 17x 8.5 +31

Inner clearance is 3mm less from inside of the wheel to strut.

Outer side extends an extra 9mm to the guard.

Rear 17x9 +29

Inner clearance: 8mm less

Outer: Extend 18mm

Should look amazing rofl.gif

Thinking of getting out to a track day at QR on the 24th Aug yes.gif

post-63710-0-22365100-1313034124_thumb.jpg

Link to comment
Share on other sites

Thanks for the kind words thumbsup.gif

World time attack was great my wagon made it down and back with no problem. I also bought the skyline a present and a half... that will be arriving in 8 weeks.

Got a cheap deal at the advan stall for some rims and tyres so I bought a set of Dark Gun Metallic Advan RS rims and Advan Neova ad08's. O and some advan lock nuts that he pretty much gave to me.

Specs are:

Currents: 17x8 +34 on all 4.

New fronts are 17x 8.5 +31

Inner clearance is 3mm less from inside of the wheel to strut.

Outer side extends an extra 9mm to the guard.

Rear 17x9 +29

Inner clearance: 8mm less

Outer: Extend 18mm

Should look amazing rofl.gif

Thinking of getting out to a track day at QR on the 24th Aug yes.gif

NICE MAN! was out at parramatta seeing a movie with some friends and they had the ADVAN drift stage there. was awesome! checked out simmilar rims for my gtr. in the end i went with the ROTA grid's. much cheaper and they are a decent sort of rim. Now if i got myself a R34 Gtr i would splurge for some Advans or TE37's.

Anyways these are what mine look like: looking forward to the new pics mate!! will look dope as!

gtr1dh.th.jpg

Uploaded with ImageShack.us

Link to comment
Share on other sites

Nice man! if you dont mind me asking how much was your deal on the ADVANS for future reference for myself? mine will be heaps more as width and offset will be more expensive also in an 18.

have you seen the drift wings for the R33? the boot lid drift wing? i reckon would look mean on your car.

what needs to be done on front bar? aside from prep and pain. getting my lower lip redone and few touch ups to smarten up car.

Link to comment
Share on other sites

Well i got the Neova ad08's for $300 and $374 each getting 225 45 17's and 255 45 17's If you look at at the Nengun prices it adds up to $1839.96 and i think that's before shipping.

The advan book has the 17x8.5 priced at 53,550 yen = $675

and 9's 54,075 = $681

I got them in the low 600's

Expensive stuff but I've been saving since i've had the car.

The front bar needs to be plastic welded in 1 or 2 places then just a bit more prep work for paint. I've already have 2L or paint for the bar ( I know I dont need that much)

Then I will be putting one of the group buy garage door seals on it for a lip should be done by next weekend.

I have considered getting a small boot lip spoiler thing, but I figured it wouldn't be so great for downforce if I ever needed it.

Link to comment
Share on other sites

Create an account or sign in to comment

You need to be a member in order to leave a comment

Create an account

Sign up for a new account in our community. It's easy!

Register a new account

Sign in

Already have an account? Sign in here.

Sign In Now
 Share


  • Similar Content

  • Latest Posts

    • Hi! Is it possible to use and swap the RB25DET/RB25Neo manual gerbox on to my RB20DE Neo engine with an automatic transmission?
    • my current daily - BiTurbo Diesel SQ5 8R with a remap and some light cosmetic mods. Which is sitting in front of my old daily that hasn’t been driven in 7 years now, home to numerous redbacks no doubt. MK4 Golf GTI with a boser hood extension, air ride airbag suspension, factory RHD Xenon’s from the Japanese R32 and stubby electric mirrors (also from Japan) sitting on custom made 18x10” Work Meisters for the golf’s bolt pattern and offset. one day I’ll revive it as a project, pull the engine out, put some forged bits in, chuck a big turbo on it and tune it to somewhere around 250kw and call it a barn find to make millions off YouTube views. Till then, it is a good breeding home for redbacks and the boot is good for storing my Christmas tree for 11 months of the year.
    • Thanks for jumping in guys, suggested @Sbluatx post here for help. Was hoping one of the guys with a RWD stages could confirm if the tank was the same as the AWD one
    • I got another MAF and installed it. Idle misfire was still present. Finally got the tank low enough to refuel and did so. Did a short drive to warm the car up and no issues, pretty short drive. Going to attempt soon to take a longer drive to see. I don't think the MAF fixed it if anything, definitely thinking it was fuel related. As soon as I put fresh fuel in the car felt so much better. But, still need a longer test drive to verify. I'll report back once done.  I'm definitely going to be getting monitoring and tuning parts soon as my next upgrade (decided on the link after talking with my tuner), just been real tight with just purchasing the car and sudden onset of issues. I've also ordered a new exhaust stud kit and gasket to fix that obvious problem. Once it's back up to par I'll start with the goodies
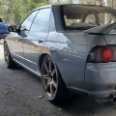
    • Meant it’s 2WD. And my tank is cracked.  
×
×
  • Create New...