
Changing Brake Pads Help

Announcements
-
Similar Content
-
-
Latest Posts
-

By hoodedreeper · Posted
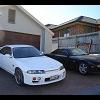
Welcome to my 2004 Toyota Mark ii IR-V Fortuna (series 2) With a 1JZ-GTE powerplant under the bonnet (hood) it'll give me plenty of scope for power upgrades. For those who aren't familiar with imports, the 1JZ-GTE is a 2.5L 6 cylinder VVTi engine with a single turbocharger. This has the factory R154 5 speed gearbox, along with a aftermarket 2 way LSD differential (brand unknown). Under the arches are a set of CST Zero 1 alloys, 18x9 +30 225/40 up front and 18x9.5 +15 265/35 on the rear. The car was quite low in Japan and there's evidence of the wheels catching the rolled arches/fenders. The tyre's aren't great so I'm in two minds whether to replace both or just the tyres and put up with the wider wheels on the rear. The car still uses stock brakes with the addition of some braided hoses. The exterior is stock with the exception of a BN Sports front bumper and a replacement Fortuna grill Moving to the interior, the steering wheel has been replaced with a dished MOMO steering wheel (which will get swapped for my Momo Tuner for the time being) Defi Link Gauges are mounted above the climate controls and on the A pillar, the Oil Temp,Oil Pressure,Water Temp and Boost gauges should help with spirited and track driving The stock seats have been replaced with some retrimmed Recaro bucket seats. Being a larger build these are a little snug, unfortunately the orange isn't for me so I'll look into replacing these down the line. Other modifications include a twin plate clutch, Blitz intercooler, Evolve alloy radiator, a stainless exhaust with decat, HKS EVC-S boost controller and coil overs -
By hoodedreeper · Posted
Apologies for the long read My R34 GTT was up for sale at the beginning of spring due to a few repairs creeping up. The strut tops needed replacing, roof and bonnet (hood) painting (yay for 3 stage pearl) and the underside stripped and treated. I sold the car which allowed me to be in a much better place financially. Leading up to the sale I was already thinking about the replacement. In an ideal world it needed to be a good all-rounder. Something I can mess around with, modify, do track days, do the school run, go on long drives etc. Options included but not limited to... Laurel C35, Evo 8/9, Civic FD2, Impreza Hawkeye, Aristo and even an Audi S4 Avant (I've already got the Mazda 6 wagon). But there was always one car at the top of the list The Toyota Mark ii JZX110 I found an advert on a Facebook group for an example in Japan, from a seller called Jon at Rising Sun Exports. A few messages back and forth and Jon calls me from Yokohama one morning (or afternoon in his case). He briefly explained the import process, the costs involved and a repeat of the advert. After much deliberation, the price was agreed and the sale was locked in. I've never imported a vehicle so I jumped into the unknown head first. The money transfer was completed through wise.com (fees apply), very easy to use and the money was with him within a day or two. The car suspension was raised for the vessel and the car dropped off at the port. It was 7 weeks later when the bill of lading was received and the freight invoice sent to me, followed by the export certificate a couple of days after (both digital copies) In the mean time the port had been in contact. I needed an agent to deal with the NOVA (notification of vehicle arrival) along with the tax/duty invoice, this was £75.00. The port also had a fee of £100, I'm guessing to cover the cost of the 10 day 'free storage' and for moving the car off the boat etc. They need a copy of the vehicle invoice, freight invoice and export certificate to allow the vehicle to pass through customs. The vessel arrived on Tuesday 5th August, the tax/duty invoice was generated and sent over. This is generally tax 20% and duty 10% of the vehicle value. Although the invoice came in at a higher amount than I had calculated. Once HMRC had received the payment the vehicle could be released from customs. I thought once the tax/duty was paid you could collect at any point, that's not the case. Your agent will need to book a collection slot, I requested Thursday 7th which was accepted, with a 9:00am slot allocated. It was a 5:00am start from Norfolk heading to Southampton. We eventually found the compound, upon presenting the bill of lading and some ID they released the car (they drove it out of the compound to the front ready for us to load up). The email from the port stated each slot had a 10 minute window, which seemed abit farfetched but the staff said it's not a strict rule. We were there for approx. 30-40 mins in total. A week prior to collecting I contacted my garage and explained the situation, I was able to get an inspection slot that afternoon. For the registration, DVLA require the car to be insured, for this I used a company called Adrian Flux who can insure the vehicle using the VIN number. -
 Hey guys, looking for these side skirts if anyone can help me out.
 -

By TurboTapin · Posted
Wife and I are still looking for a new home. One condition was a large enough garage for a full-size lift in one bay. Now if only we could find something... We've been looking for almost a year now. -
By TurboTapin · Posted
Thanks everyone for the ideas! Sadly, ramps are a no go for me. With young kids at home, I do most of my work late at night while they're sleeping. Starting the car multiple times wouldn't be a great idea. I'll go see one of those new long reach low profile jacks and take a couple measurements to see if they will fit.
-


Recommended Posts
Create an account or sign in to comment
You need to be a member in order to leave a comment
Create an account
Sign up for a new account in our community. It's easy!
Register a new accountSign in
Already have an account? Sign in here.
Sign In Now