Jump to content
SAU Community

Recommended Posts

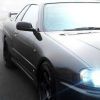
I just installed H1 8000K xenon headlights (lo-beams) and tested them out tonight. I didn't receive anyone flashing me or anything but when i walked out of the car and stood a few metres infront of it, i couldn't even see my car and was just blinded! When i'm driving down the motorways, all the signs light up from AGES away and it looks like i have high-beams on constantly.

Could anyone please help me out and let me know if it's normal, or how to adjust the intensity so it's a lot more... "mild" ??

I have a feeling that if i drive it around for a longer period of time, i'll get flashed, beeped at and maybe even pulled over by the cops cos it's too bright :\

Thanks!

Link to comment
https://www.sau.com.au/forums/topic/388047-hids-too-bright-help/
Share on other sites

You should have a little knob/switch with about 3 settings on the right hand side of the steering wheel near the bonnet release leaver, this dips/raises the lights.

That said, 8000k is very bright and dipping them probably wont help all that much, i believe 4700k or so is optimal for the best driver vision and minimal distraction to other drivers.

Wrong!

4700k are brighter than 8000k HIDs. Also you will find that 8000k have poor penetration in bad weather conditions.

The lower the Kelvin rating the high the Lumen (brightness) is.

Just lower the beam of your light enough so you dont get "as" blinded.

Wrong!

4700k are brighter than 8000k HIDs. Also you will find that 8000k have poor penetration in bad weather conditions.

The lower the Kelvin rating the high the Lumen (brightness) is.

Just lower the beam of your light enough so you dont get "as" blinded.

I was under the impression that the lower the K rating the less (glarey?) it would be for oncoming traffic? Lower K rating also means a more yellow/orange light and higher rating means a more Blue light? Although a more yellow light will penetrate better than the bluer type.

Am i close?

3000k Yellow

4500k White with yellow hue

5000k Pure White

6000k White with blue/purple hue

8000k White with distinct blue hue

10000k Strong blue light

Above that, you are getting into UV/black light territory.

For a street car anything above 6000k is pointless, 4500-5000k has the best light output vs penetration.

mine are similar, catches every piece of reflective tape/signage.

good to see the back of cop cars from far away.

and mine arnt set too high.

have travelled behind mates who havnt complaid, and when asked said it was ok.

i have LB 10000k 35w hid kit and the 100w 6000k kit for hb :) the 10k arent as bright but there ok and wen i do country driveing the 600k hids rape everything :)

also like sarge said the 10000k are really only good for looks there ok in the rain so i installed some driveing lights to counter them

It is my impression when I was researching them for my tow car & replacements for the KHR30, 4700k was Daylight, 6000k was Super White and anything past that was blue - purple the higher up the Kelvin scale you go and Kelvin is a temperature measure ONLY, nothing to do with brightness of a particular globe rating.

I have genuine Philips 6000K HID in my Jackaroo and cruising at night, Sydney ~ Melbourne & Sydney ~ Gold Coast they are without a doubt genuine 100kph plus lights on low beam and the high beam isn't much advantage over low. Better and more light with a good set of driving lights with good quality globes.

My advice is not buy sh!t ebay ex China/Hong Kong brands for $50 odd dollars. Their wiring kits & ballasts are sub standard and will often catch fire when your least expecting it & loosing the car is a very high possibility.

If they are blinding, lower the beam slightly until you find your not looking straight into the beam, irrespective of your globe choice, but adjusting to NSW RTA specs is absurd. A guide for me is when you're following another car about 20-30m behind and if your low beam isn't above the boot line, or bottom of rear windscreen they are adjusted properly enough to not distract.

JMHO

my lights in the 34 are idjustable :) took my Fn ariund to wire em in but they work a treat :thumbsup: i brought both my hid kits of ebay but yer you get wat you pay for my kits i didnt get any change from 160 '.' but they pay for them self being about to spot things along the road and police cars hi vis stand out like a DD boobies :rolleyes:

A lot of new cars these days come out with 6000k HID standard. Im pretty sure thats the legal limit aswell anything above that is illegal for low beam anyway and at own risk. I put 8000k in my 32 for LB, im not to concerned about the visibility issue as much, they work a treat and light up signs and centre line mint. I just hope i dont get caught pretty much.

They were pointing a little high like suwidji said, but i just adjusted the bulbs down and now they dont flash on coming cars. There is typically 2 or 3 screws in the headlight cases behing the headlight you tweak to adjust the bulb direction. Have a play around, its an easy fix.

From what ive read, Nytsky is right, 4500 to 5000k is the best viewing performance range. I think higher like 6000k 8000k you see signs etc better.

just one thing unless ur car has projection HID's there not legal also it must have wipers because water will trow the light , its all bull shut but thats how they will get ya ,, as projection hid's have a very sharp cut off line to stop the dazzle youtube it to see wat i mean :thumbsup:

Create an account or sign in to comment

You need to be a member in order to leave a comment

Create an account

Sign up for a new account in our community. It's easy!

Register a new account

Sign in

Already have an account? Sign in here.

Sign In Now


  • Similar Content

  • Latest Posts

    • From there, it is really just test and assemble. Plug the adapter cables from the unit into the back of the screen, then the other side to the car harness. Don't forget all the other plugs too! Run the cables behind the unit and screw it back into place (4 screws) and you should now have 3 cables to run from the top screen to the android unit. I ran them along the DS of the other AV units in the gap between their backets and the console, and used some corrugated tubing on the sharp edges of the bracket so the wires were safe. Plug the centre console and lower screen in temporarily and turn the car to ACC, the AV should fire up as normal. Hold the back button for 3 sec and Android should appear on the top screen. You need to set the input to Aux for audio (more on that later). I put the unit under the AC duct in the centre console, with the wifi antenna on top of the AC duct near the shifter, the bluetooth antenna on the AC duct under the centre console The GPS unit on top of the DS to AC duct; they all seem to work OK there are are out of the way. Neat cable routing is a pain. For the drive recorder I mounted it near the rear view mirror and run the cable in the headlining, across the a pillar and then down the inside of the a pillar seal to the DS lower dash. From there it goes across and to one USB input for the unit. The second USB input is attached to the ECUtec OBD dongle and the 3rd goes to the USB bulkhead connected I added in the centre console. This is how the centre console looks "tidied" up Note I didn't install the provided speaker, didn't use the 2.5mm IPod in line or the piggyback loom for the Ipod or change any DIP switches; they seem to only be required if you need to use the Ipod input rather than the AUX input. That's it, install done, I'll follow up with a separate post on how the unit works, but in summary it retains all factory functions and inputs (so I still use my phone to the car for calls), reverse still works like factory etc.
    • Place the new daughterboard in the case and mount it using the 3 small black rivets provided, and reconnect the 3 factory ribbon cables to the new board Then, use the 3 piggyback cables from the daughterboard into the factory board on top (there are stand offs in the case to keep them apart. and remember to reconnect the antenna and rear cover fan wires. 1 screw to hold the motherboard in place. Before closing the case, make a hole in the sticker covering a hole in the case and run the cable for the android unit into the plug there. The video forgot this step, so did I, so will you probably. Then redo the 4 screws on back, 2 each top and bottom, 3 each side and put the 2 brackets back on.....all ready to go and not that tricky really.      
    • Onto the android unit. You need to remove the top screen because there is a daughterboard to put inside the case. Each side vent pops out from clips; start at the bottom and carefully remove upwards (use a trim remover tool to avoid breaking anything). Then the lower screen and controls come out, 4 screws, a couple of clips (including 3 flimsy ones at the top) and 3 plugs on the rear. Then the upper screen, 4 screws and a bunch of plugs and she is out. From there, remove the mounting brackets (2 screws each), 4 screws on the rear, 2 screws top and bottom and 3 screws holding in the small plates on each side. When you remove the back cover (tight fit), watch out for the power cable for the fan, I removed it so I could put the back aside. The mainboard is held in by 1 screw in the middle, 1 aerial at the top and 3 ribbon cables. If you've ever done any laptop stuff the ribbon cables are OK to work with, just pop up the retainer and they slide out. If you are not familiar just grab a 12 year old from an iphone factory, they will know how it works The case should now look like this:
    • Switching the console was tricky. First there were 6 screws to remove, and also the little adapter loom and its screws had to come out. Also don't forget to remove the 2 screws holding the central locking receiver. Then there are 4 clips on either side....these were very tight in this case and needed careful persuading with a long flat screw driver....some force required but not enough to break them...this was probably the fiddliest part of the whole job. In my case I needed both the wiring loom and the central locking receiver module to swap across to the new one. That was it for the console, so "assembly is the reverse of disassembly"
    • But first....while I was there, I also swapped across the centre console box for the other style where the AV inputs don't intrude into the (very limited !) space.  Part# was 96926-4GA0A, 284H3-4GA0B, 284H3-4GA0A. (I've already swapped the top 12v socket for a USB bulkhead in this pic, it fit the hole without modification:) Comparison of the 2: Basically to do the console you need to remove the DS and PS side console trim (they slide up and back, held in by clips only) Then remove the back half of the console top trim with the cupholders, pops up, all clips again but be careful at the front as it is pretty flimsy. Then slide the shifter boot down, remove the spring clip, loose it forever somewhere in the car the pull the shift knob off. Remove the tiny plastic piece on DS near "P" and use something thin and long (most screwdrivers won't fit) to push down the interlock and put the shifter down in D for space. There is one screw at the front, then the shifter surround and ashtray lift up. There are 3 or 4 plugs underneath and it is off. Next is the rear cover of the centre console; you need to open the console lid, pop off the trim covering the lid hinge and undo the 2rd screw from the driver's side (the rest all need to come out later so you can do them all now and remove the lid) Then the rear cover unclips (6 clips), start at the top with a trim tool pulling backwards. Once it is off there are 2 screws facing rearwards to remove (need a short phillips for these) and you are done with the rear of the console. There are 4 plugs at the A/V box to unclip Then there are 2 screws at the front of the console, and 2 clips (pull up and back) and the console will come out.
×
×
  • Create New...