Jump to content
SAU Community

Recommended Posts

hi guys,

so bout 6 years ago i made the mistake of buying rims from tempe tyres(rays etc were way expensive then) - they are starcorp racing vortex 18 x 7, not sure of my offset (well it says 7 on the rim but google searching the wheels says 18 x 7.5 no offsets provided - doubt they make any different widths or offsets as they are cheapie wheels). is there anyway i can measure the offset myself?? and guess i should measure the width so i know for sure. i ring tempe tyres and they dont really want to help me find out. i have 225/40 on front and 235 40 on rear. no scrubbing anywhere though the front tyres sit really close to the upper control arm.

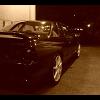
i ask this question cos i am wanting to but new rims for the car, either gramlights 57d or work xt7. trying to get a comparison on how the wheels will fit in relation to the guards etc. the photo below is how my current rims sit and i would like to keep the same sort of style. i dont like the 'mexican' look of rims sticking out past the guards and tyres stretched to the max. the car is not lowered (on adj coilovers though - the blue g4 ones), have no guard work and have the standard discs and four pot calipers in the front and standard discs and 2 pot calipers in the rear.

post-42311-0-47998600-1336957815_thumb.jpg

the choices i have on the gramlights are

17 x 9 offset +12, +22, +38

18 x 9.5 offset +12, +22, +38

and the xt7 are

17 X 7.0 offset +32, +42, +47

17 X 8.0 offset +32, +42, +47

17 X 9.0 offset +17, +28, +38, +44

18 X 7.5 offset +35, +42, +48

18 X 8.5 offset +32, +38, +46

18 X 9.5 offset +12, +20, +30, +38

i would like to keep 18's but am considering 17's for cost of tyres, ride harshness due to the stiffness of the coilovers. I wouldnt mind if the new wheels and tyres come out that little bit more but i dont want them in any way to extend past the guards as imo they are magnets for the boys in blue.

i tried looking at the offset calculator but i dont know offset of my current wheels, also looked/searched the forums for pics etc but most people like the sticking out and stretched tyre look. also i dont completely understand the offset thing on different stlye of wheels, surely different styles would have an effect on what offset the wheels should be.

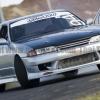
i cant stress enough that i dont want my car looking like this post-42311-0-05920500-1336958328_thumb.jpg

any help would be greatly appreciated

thanks

mick

Edited by mii11x
Link to comment
https://www.sau.com.au/forums/topic/400072-r32-gtst-wheels/
Share on other sites

its probably not crucial that you know what the offset of your current wheels are, just know the values of the stock wheels which are 16x7 +40 IIRC (if i'm wrong, somebody correct me, its been ages since i've had my wheels off the car to check) but thats very close to it, if not it.

check this thread out:

http://www.skylinesaustralia.com/forums/topic/84208-wheel-sizes-offsets-for-skylines/

have a look through that thread and you'll see what wheel sizes work for any skyline out there

Link to comment
https://www.sau.com.au/forums/topic/400072-r32-gtst-wheels/#findComment-6357415
Share on other sites

i no longer have the original wheels (but i believe the stock wheels are 16 x 6.5 +40) so when the calculator says eg sits 12mm furtherout i have no base on which to measure this from.

i have looked in this thread and searched r32gtst and it doesnt give me much........also in my original post i ask/said the offset with different styles of wheels would also have an effect on where the wheel actually sits to my guard. does/would it??

there are a lot of posts regarding wheel offset and 32gtst's, most people go for the wheel sticking out and tyre stretching thing, but it aint for me. surely someone must have tried these wheels on a 32gtst before???

Link to comment
https://www.sau.com.au/forums/topic/400072-r32-gtst-wheels/#findComment-6357631
Share on other sites

yeah i'm hearing ya on the whole wheel sticking out thing and stretched tyres business, its fkn stupid. most of them seem to be aiming for rims that sit exactly flush with the guards, personally i like mine slightly sunken in from the guards so i can get the car a little bit lower without having to worry about guard rub.

that thread has heaps of r32 results in it, although nowadays that thread has grown pretty massive and i think at one point i spent ages trawling through it to get a good range of results.

here are a couple examples from that thread that i noted down ages ago:

1992 R32 gtst

Wheel dia= 17"

Wheel width=8" fronts 9" rear

Wheel offset 35 fronts 38 rears

tyres 235-45-17 front 255-40-17 rear

Didnt need to do any mods car was lowered 25mm

Skyline model = R32 GTST

Wheel diameter = 17"

Wheel width = 8" front 9" Rear

Wheel offset = +42 Front +42 Rear

Tyre size = 235/45/17 Front 235/45/17 Rear

Modifications to fit: front requires 5mm spacers to give enough spacing with 235's

a lot of them included pictures of the results so you could see how the rim sat in relation to the guards and stuff. there will be no variation between brands. as long as you get the wheel width and offset right, they will fit exactly the same as another brand of the same dimensions.

its the combination of offset AND wheel width which will determine where the outward (and inner) face of the wheel will sit in relation to the guards and everything else. the lower the offset, the further the wheel will stick out from the mounting surface on the hub. pic related

offset

Link to comment
https://www.sau.com.au/forums/topic/400072-r32-gtst-wheels/#findComment-6357698
Share on other sites

http://wheelsfitmentguide.blogspot.com.au/2010/08/nissan-skyline-r32-r33-r34-gt-r-gts-t.html

that list the stock size and offset as 16x6.5 +42

I am going to be putting my LMGT3's on the car this week which are 17x7 +30 for the fronts and 17x8 +38 for the rear which is pretty damn close to what they recommend for track work on that site

Link to comment
https://www.sau.com.au/forums/topic/400072-r32-gtst-wheels/#findComment-6357846
Share on other sites

any chance you could take a photo after you fit these rims triptych??? something that shows how they sit in relation to the guards, like my photos in the original post. also what size tyres will you use??? and is your car lowered, have any guard work, have upgraded discs/callipers??

i received an email back from jdm concept in regards to 18's. they tell me a very conservative set will be

18x7.5 +35

18x8.5 +38

so i am leaning towards what they have to say, but wouldnt mind reading more responses, checking out photos etc. i am searching everywhere lol.

guessing at a 225/40 tyre on front would be ok(maybe pretty close to what i already have) and maybe a 235-255/40 on the rear??

thanks to the replies so far though guys

cheers

mick

Link to comment
https://www.sau.com.au/forums/topic/400072-r32-gtst-wheels/#findComment-6358431
Share on other sites

Well hopefully the work will start on them tomorrow (gotta do a few things while the wheels are off) but the specs are as follows.

Nismo LMGT3

Standard height, no guard work, standard disc and callipers (upgraded I would have clearance issues at the front).

Fronts are 17x7 +30 running 215/45/17 Toyo Proxes R888

Rears are 17x8 +38 running 235/40/17 Toyo Proxes T1R

Hopefully I will have pictures by Sunday as long as everything goes smoothly.

Link to comment
https://www.sau.com.au/forums/topic/400072-r32-gtst-wheels/#findComment-6358532
Share on other sites

alright here are the pictures.

Remember the car is stock height with stock brakes etc etc.

Rims: Nismo LMGT3

Fronts: 17x7 +30 running 215x45x17

Rears: 17x8 +38 running 235x40x17

post-27369-0-03073700-1337495768_thumb.jpg

The finished product

Using a level on the guard this gives you an idea of how far out they stick

post-27369-0-11387100-1337495829_thumb.jpg

This is the rear rim.

post-27369-0-78660000-1337495820_thumb.jpg

This is the front

Photos of how they look from an angle behind them to give another idea how they sit.

post-27369-0-28478500-1337495813_thumb.jpg

Rear fitment.

post-27369-0-87982100-1337495801_thumb.jpg

Front fitment

Brake clearance

post-27369-0-72561800-1337495792_thumb.jpg

Front brakes

post-27369-0-49056100-1337495785_thumb.jpg

Rear Brakes

Inner Clearance at full lock

post-27369-0-05960000-1337495777_thumb.jpg

Front drivers side (passenger is the same)

I hope that was enough details for you.

Link to comment
https://www.sau.com.au/forums/topic/400072-r32-gtst-wheels/#findComment-6363268
Share on other sites

Create an account or sign in to comment

You need to be a member in order to leave a comment

Create an account

Sign up for a new account in our community. It's easy!

Register a new account

Sign in

Already have an account? Sign in here.

Sign In Now


  • Similar Content

  • Latest Posts

    • Hi, is the HKS  Tower Bar still available ? negotiable ? 🤔
    • From there, it is really just test and assemble. Plug the adapter cables from the unit into the back of the screen, then the other side to the car harness. Don't forget all the other plugs too! Run the cables behind the unit and screw it back into place (4 screws) and you should now have 3 cables to run from the top screen to the android unit. I ran them along the DS of the other AV units in the gap between their backets and the console, and used some corrugated tubing on the sharp edges of the bracket so the wires were safe. Plug the centre console and lower screen in temporarily and turn the car to ACC, the AV should fire up as normal. Hold the back button for 3 sec and Android should appear on the top screen. You need to set the input to Aux for audio (more on that later). I put the unit under the AC duct in the centre console, with the wifi antenna on top of the AC duct near the shifter, the bluetooth antenna on the AC duct under the centre console The GPS unit on top of the DS to AC duct; they all seem to work OK there are are out of the way. Neat cable routing is a pain. For the drive recorder I mounted it near the rear view mirror and run the cable in the headlining, across the a pillar and then down the inside of the a pillar seal to the DS lower dash. From there it goes across and to one USB input for the unit. The second USB input is attached to the ECUtec OBD dongle and the 3rd goes to the USB bulkhead connected I added in the centre console. This is how the centre console looks "tidied" up Note I didn't install the provided speaker, didn't use the 2.5mm IPod in line or the piggyback loom for the Ipod or change any DIP switches; they seem to only be required if you need to use the Ipod input rather than the AUX input. That's it, install done, I'll follow up with a separate post on how the unit works, but in summary it retains all factory functions and inputs (so I still use my phone to the car for calls), reverse still works like factory etc.
    • Place the new daughterboard in the case and mount it using the 3 small black rivets provided, and reconnect the 3 factory ribbon cables to the new board Then, use the 3 piggyback cables from the daughterboard into the factory board on top (there are stand offs in the case to keep them apart. and remember to reconnect the antenna and rear cover fan wires. 1 screw to hold the motherboard in place. Before closing the case, make a hole in the sticker covering a hole in the case and run the cable for the android unit into the plug there. The video forgot this step, so did I, so will you probably. Then redo the 4 screws on back, 2 each top and bottom, 3 each side and put the 2 brackets back on.....all ready to go and not that tricky really.      
    • Onto the android unit. You need to remove the top screen because there is a daughterboard to put inside the case. Each side vent pops out from clips; start at the bottom and carefully remove upwards (use a trim remover tool to avoid breaking anything). Then the lower screen and controls come out, 4 screws, a couple of clips (including 3 flimsy ones at the top) and 3 plugs on the rear. Then the upper screen, 4 screws and a bunch of plugs and she is out. From there, remove the mounting brackets (2 screws each), 4 screws on the rear, 2 screws top and bottom and 3 screws holding in the small plates on each side. When you remove the back cover (tight fit), watch out for the power cable for the fan, I removed it so I could put the back aside. The mainboard is held in by 1 screw in the middle, 1 aerial at the top and 3 ribbon cables. If you've ever done any laptop stuff the ribbon cables are OK to work with, just pop up the retainer and they slide out. If you are not familiar just grab a 12 year old from an iphone factory, they will know how it works The case should now look like this:
    • Switching the console was tricky. First there were 6 screws to remove, and also the little adapter loom and its screws had to come out. Also don't forget to remove the 2 screws holding the central locking receiver. Then there are 4 clips on either side....these were very tight in this case and needed careful persuading with a long flat screw driver....some force required but not enough to break them...this was probably the fiddliest part of the whole job. In my case I needed both the wiring loom and the central locking receiver module to swap across to the new one. That was it for the console, so "assembly is the reverse of disassembly"
×
×
  • Create New...