Jump to content
SAU Community

Recommended Posts

Thought I would finally get around to starting a build thread of my car.

Ive had her about a year now and has been nothing but head aches the whole time (never bought a skyline for reliabilty anyway)

Its a 1993 GTS25T, Wine red, 125,000kms and for the age is quite a tidy car.

came with a few mods, Teins, a set of Roh Drift R's which I actually like and think suit the car. FMIC and a HKS Silent power exhaust and a few interior bits.

I had never owned a turbo car before so I was wary about purchasing one, I spent a while deciding what to buy (I almost bought a VL Turbo -.-) I decided on a R33 Skyline as they were quite cheap, comfy and good bang for buck.

Lots of searching on Gumtree and carsguide let me to quite a few examples, one of which the bloke didn't speak a word of English and wouldn't let me test drive it!

Then I found mine, had a look at it, test drove it, did the usual checks, fluids, tyres, undercarriage and panel fitment etc.

post-86315-0-78879300-1347895292_thumb.jpg

post-86315-0-77791800-1347899395_thumb.jpg

all checked out, handed over the cash and was on my way.

Being my first drive I was babying her, I always make sure I get a new car home for a fluid change before I drive it the way I drive a car.

Almost made it home (about a 2 hour drive) temperature guage shoots up and the car started blowing white smoke out the tailpipe.

I've been working on cars for a few years now and its generally easy to identify the cause of smoke by its colour.

I let the car cool down a bit and sure enough the oil is milky, started her up to see how it idled and it was knocking and stuttering to shut her off and called a tow truck.

It stayed in my yard for a while until I sold my VL project, to make way for the Skyline to sit in the shed.

we decided it was either a cracked head/head gasket. Not knowing too much about the car I decided to buy a second hand low km engine and replace it, I was on a budget after just purchasing the car.

post-86315-0-12272500-1347895568_thumb.jpg

post-86315-0-04440500-1347895653_thumb.jpg

Very untidy engine bay!

All the ancillaries were in good order, albeit a bit filthy so we decided a short motor would be the most cost effective and be a good learning experience for me and my mates.

Found a Low km S2 RB25DET Short motor for an absolute bargain, ordered that and a few goodies.

ASI radiator, Genuine Nissan 100,000km service kit, new radiator hoses, plugs, gaskets, some nulon 10w-40 and a good coolant.

post-86315-0-78449300-1347895976_thumb.jpg

When the engine arrived we decided we couldn't leave it in the filthy state it was in so we gave the covers a good sand a paint.

post-86315-0-53934900-1347896181_thumb.jpg

While a few of us did that the rest of us got to pulling the old motor out, took us a while, especially the gearbox/motor bolts, they are an absolute b*tch!

post-86315-0-64076800-1347896379_thumb.jpg

Progress! this was at 2am with many beers sunken. I'm lucky to have such good mates that have put their time into this car, One of which has now purchased an R34 GT-T :yes:

When we pulled the motor out we found a Heavy duty clutch, in almost new condition!

post-86315-0-11953100-1347897127_thumb.jpg

Just a little excited that its finally out. :laugh:

so set about stripping the engine down and prepare the new one for drop in, had all new gaskets and seals.

post-86315-0-77990300-1347896659_thumb.jpg

While the bolt on's were off we decided to clean them up a bit, Inlet manifold was pulled apart and wire brushed and degreased, intercooler piping was degreased and exhaust manifold painted with high temp exhaust paint.

in hindsight I regret that as it burned off pretty quickly!

post-86315-0-08903400-1347897028_thumb.jpg

post-86315-0-40900500-1347897389_thumb.jpg

the next couple of days were spent preparing the new motor for install, timing belt, main seals, bolting on Inlet manifold, exhaust manifold, turbo and front pipe, took us a while between work and sleep, If I didn't have to sleep I would have so much more time for activities!

post-86315-0-99517200-1347897475_thumb.jpg

post-86315-0-65279600-1347897732_thumb.jpg

post-86315-0-65973300-1347897855_thumb.jpg

On the crane almost ready to go in! Shannon checking a few bolts, learning for when he has to do this to his R34, after all it is a Skyline :happy:

it was about 3am and we were all drunk and starving so we cranked out the bbq in the drive way as peter tried to eat the RB

post-86315-0-36828500-1347898169_thumb.jpg

No passers by were keen on a snag though.

We ended up calling it quits, we were all tired and my missus was getting quite grumpy that I had been practically living in the shed since I got this car.

working week finished and we got back into it!

got the engine back on the crane and got everyone on board, took us about an hour of trial and error getting it on the right angle and to line it up with the gearbox.

post-86315-0-12971000-1347898500_thumb.jpg

Engine in!

I spent the next few days getting all the little things done ready for startup.

post-86315-0-71947500-1347898614_thumb.jpg

post-86315-0-18025100-1347898820_thumb.jpg

Very tight fit, the fan had already been cut when the FMIC was installed.

As it is now 2am I will be leaving the thread as is for now.

I will be updating this regularly as the car has come along way since this engine change over and is currently in the process of some BIG changes.

Its been a great learning experience so far and I know my car extremely well and have become quite attached. I would not have been able to get this far with out SAU and its knowledgeable members, my mates who hate my car now! and my Wife who brought us sandwiches and beverages as we worked.

post-86315-0-86385400-1347896116_thumb.jpg

Link to comment
https://www.sau.com.au/forums/topic/409525-my-ecr33-gts25t-type-m-build-thread/
Share on other sites

Been very busy with the car and other things, My wife and I are expecting a baby girl in january so ive sped things up a bit to make sure we get the car finished for summer.

New parts

Wolf 3D V4 ecu

Denso 850cc Injectors

Walbro fuel pump

Fuel pressure regulator(yet to be fitted)

Slide Industries FFP (Greddy copy)

Braided steel turbo lines

Hybrid steam pipe top mount manifold

38mm External wastegate (yet to be fitted)

Hypergear ATR43G2.5

post-86315-0-85347200-1348068734_thumb.jpg

post-86315-0-44999200-1348068774_thumb.jpg

Will be getting a new o2 sensor and EBC In the coming weeks and when I can afford to shes off to get the Front/Dump pipe & Intercooler piping to suit the FFP.

Unsure of whether I will run the pipe through the hole from the previous cooler piping or will need to cut a hole in battery tray.

Interior is more less where I want it, New gauges, JVC head unit, dash fascia colour coded, Nardi wheel and DRIFT carbon gearknob with leather gear/handbrake boot.

post-86315-0-82342600-1348068838_thumb.jpg

post-86315-0-74212700-1348069029_thumb.jpg

Once my shed has been cleaned up (got a new workbench so its a disaster zone atm!) I will get some better pictures and update with any progress.

  • 3 weeks later...

Cars on hold atm as my wife is unable to work so money is tight but I have all the parts needed so once I have the funds Im getting the beast towed to a fabricator. Will take some progress photos soon. I scored a new bootlid and S2 wing for $100 as mine was rusted and faded but being a S2 is slightly lighter on tone but still better than rust.

Hey guys it's been a while since I really did any more to the car so thought I'd get my lazy ass to the shed and get a few of the smaller jobs out the way.

Had a few parts arrive during the week (wastegate, FPR, drivers side cooler piping)

Installed the 38mm wastegate, hooked up vacuum lines for wastegate. oil return, water feed and water return bolted up, all new braided steel lines. Turbo torqued up. Inlet side intercooler piping dummied up, used a 2.5" hole-saw filed down to fit pipe. All measured within 1mm :D

post-86315-0-52421900-1350530275_thumb.jpg

Decided to paint a few bits too, since oxidized steel and brown plastic seem out of place in the engine bay.

CAS painted to match timing cover and painted an ugly brown electrical box of some sort near the wiper motor.

post-86315-0-76777600-1350530214_thumb.jpg

Awaiting a reducer for throttle body to cooler piping, Turbotech V2 boost controller, braided fuel hose and 1 speedflow fitting for fuel rail return line. Its a very tight fit back there so a 180· fitting is required. Finally got around to changing the fuel pump, got to the tank and found a tidy Bosch 044! Too easy :)

I will be contacting Stao for my dump pipe flange in a few weeks, then there's just the dump pipe/front pipe and a idle air hose and a couple of vacuum nipples.

Hope someones enjoying the read, I will keep this thread updated with any more progress.

post-86315-0-42334400-1350530315_thumb.jpg post-86315-0-14785500-1350530877_thumb.jpg

Edited by Crazy Xav

Yep, did all the bolt ons with the engine in the car.

There's not much room under the plenum, so its crucial to make sure all the hoses are fitted correctly, I had a mate hold the plenum up while I fitted the oil cooler pipes etc before it was bolted up.

Looks good bud.

Babies and cars are hard work to balance so thumbs up to you.

Just a quick bit of advice please move the power steer reservoir forward so it does not boil. You just need to make three little bits of flat bar up to space it away.

  • 1 month later...

Has been a while since I have been able to get on here with some progress, so I thought I would get a few new shots up.

Fuel pressure reg is fitted up with a steel mount that took 2 mins to do :)

post-86315-0-05266700-1354554119_thumb.jpg

Fuel lines are all fitted up, Cleaned fuel level sender while I was direct wiring the Bosch 040.

post-86315-0-86911200-1354554313_thumb.jpg

Pulled her out of the shed on a nice day and gave it much deserved clean!

post-86315-0-39273100-1354555035_thumb.jpg

post-86315-0-41537600-1354556169_thumb.jpg

The wife also helped polish the wheels with autosol, Brilliant stuff!

For the moment I've done all I can do, The rest will have to be fabricated.

The serious stuff should start in around 2 months so me and my mates are getting excited to enjoy all the hours put into the car! wont be long fellow SAU'ers :D

Im interested to know how people mounted their throttle cables with the aftermarket plenum.

It seems majority use the standard mount but I cant get it to work all that well (angle is terrible and would most likely cause the thing to snap.

Bought some black mesh for the Bumper and grill, Took about 2 hours to install as the bar had been hacked up for FMIC install so some creative thinking was required ;)

post-86315-0-12772900-1354555631_thumb.jpg

post-86315-0-21173700-1354556275_thumb.jpg

post-86315-0-30102900-1354556405_thumb.jpg

post-86315-0-65684000-1354555676_thumb.jpg

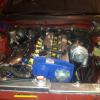
Where were at with the engine bay at the moment. Not very stealth which I am regretting a little since i saw alot of coppers on my drive home from work.

Edited by Crazy Xav
  • 4 weeks later...

Create an account or sign in to comment

You need to be a member in order to leave a comment

Create an account

Sign up for a new account in our community. It's easy!

Register a new account

Sign in

Already have an account? Sign in here.

Sign In Now


  • Similar Content

  • Latest Posts

    • This. As for your options - I suggest remote mounting the Nissan sensor further away on a length of steel tube. That tube to have a loop in it to handle vibration, etc etc. You will need to either put a tee and a bleed fitting near the sensor, or crack the fitting at the sensor to bleed it full of oil when you first set it up, otherwise you won't get the line filled. But this is a small problem. Just needs enough access to get it done.
    • The time is always correct. Only the date is wrong. It currently thinks it is January 19. Tomorrow it will say it is January 20. The date and time are ( should be ! ) retrieved from the GPS navigation system.
    • Buy yourself a set of easy outs. See if they will get a good bite in and unthread it.   Very very lucky the whole sender didn't let go while on the track and cost you a motor!
    • Well GTSBoy, prepare yourself further. I did a track day with 1/2 a day prep on Friday, inpromptu. The good news is that I got home, and didn't drive the car into a wall. Everything seemed mostly okay. The car was even a little faster than it was last time. I also got to get some good datalog data too. I also noticed a tiny bit of knock which was (luckily?) recorded. All I know is the knock sensors got recalibrated.... and are notorious for false knock. So I don't know if they are too sensitive, not sensitive enough... or some other third option. But I reduced timing anyway. It wasn't every pull through the session either. Think along the lines of -1 degree of timing for say, three instances while at the top of 4th in a 20 minute all-hot-lap session. Unfortunately at the end of session 2... I noticed a little oil. I borrowed some jack stands and a jack and took a look under there, but as is often the case, messing around with it kinda half cleaned it up, it was not conclusive where it was coming from. I decided to give it another go and see how it was. The amount of oil was maybe one/two small drops. I did another 20 minute session and car went well, and I was just starting to get into it and not be terrified of driving on track. I pulled over and checked in the pits and saw this: This is where I called it, packed up and went home as I live ~20 min from the track with a VERY VERY CLOSE EYE on Oil Pressure on the way home. The volume wasn't much but you never know. I checked it today when I had my own space/tools/time to find out what was going on, wanted to clean it up, run the car and see if any of the fittings from around the oil filter were causing it. I have like.. 5 fittings there, so I suspected one was (hopefully?) the culprit. It became immediately apparent as soon as I looked around more closely. 795d266d-a034-4b8c-89c9-d83860f5d00a.mp4       This is the R34 GTT oil sender connected via an adapter to an oil cooler block I have installed which runs AN lines to my cooler (and back). There's also an oil temp sensor on top.  Just after that video, I attempted to unthread the sensor to see if it's loose/worn and it disintegrated in my hand. So yes. I am glad I noticed that oil because it would appear that complete and utter catastrophic engine failure was about 1 second of engine runtime away. I did try to drill the fitting out, and only succeeded in drilling the middle hole much larger and now there's a... smooth hole in there with what looks like a damn sleeve still incredibly tight in there. Not really sure how to proceed from here. My options: 1) Find someone who can remove the stuck fitting, and use a steel adapter so it won't fatigue? (Female BSPT for the R34 sender to 1/8NPT male - HARD to find). IF it isn't possible to remove - Buy a new block ($320) and have someone tap a new 1/8NPT in the top of it ($????) and hope the steel adapter works better. 2) Buy a new block and give up on the OEM pressure sender for the dash entirely, and use the supplied 1/8 NPT for the oil temp sender. Having the oil pressure read 0 in the dash with the warning lamp will give me a lot of anxiety driving around. I do have the actual GM sensor/sender working, but it needs OBD2 as a gauge. If I'm datalogging I don't actually have a readout of what the gauge is currently displaying. 3) Other? Find a new location for the OEM sender? Though I don't know of anywhere that will work. I also don't know if a steel adapter is actually functionally smart here. It's clearly leveraged itself through vibration of the motor and snapped in half. This doesn't seem like a setup a smart person would replicate given the weight of the OEM sender. Still pretty happy being lucky for once and seeing this at the absolute last moment before bye bye motor in a big way, even if an adapter is apparently 6 weeks+ delivery and I have no way to free the current stuck/potentially destroyed threads in the current oil block.
×
×
  • Create New...