Jump to content
SAU Community

Recommended Posts

Hey guys,

First post on the forums so i'm hoping this is in the right section.

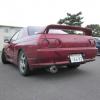
I'm a proud owner of an R34 25GT, fresh imported, full complianced. Havn't had any problems with it until now.
When imported it had approx 67,000k's clocked up so i thought i'd leave i until around 70,000 before getting a major service. Just after hitting 70,000, check enigne light starting appearing periodically, an ignition restart would remove the light so i didn't think much of it.Took it in for a major service and the mechanic shits bricks when he sees the condition of the timing belt (I saw this also, didn't look as bad as he was making out but i figured i'd get it replaced to be on the safe side). So after forking out $800 for a full service and timing kit i get my car back on the weekend and i'm less than impressed with the outcome.

Firstly, check engine light is still showing, being more persistent now than ever.
Secondly, in the low RPM range car has lost a substantial amount of power.
Thirdly, the note the exhaust is making is not what i remember at all, when driving every now and then it starts grumbling like a V8 with no exhaust.

All this is making me question the condition of the coilpacks. I took the car back to the mechanic who ran it on the computer and got an error code advising that the coilpack(s) were faulty.

I'm really beginning to question the integrity of this mechanic as he claims he cannot diagnose which coilpack is faulty so we have to replace them all and he quoted approx $320 for the parts + labour on top.
Now this sounds like absolute shit to me so i did a little research and it seems coilpacks can be tested using a multimeter? Can anyone confirm this?

Normally wouldn't care too much about the pricing but i know when i'm being shafted and i;m not keen to give this guy any more business. Can anyone either recommend a mechanic in the northern suburbs of Melbourne or is the job simple enough that i may be able to do this myself?

Cheers,
Vexx.

Sounds like a coilpack issue, if you definitly notice a change in power and exhaust note youve probably dropped a cylinder. If the car idles rough like its not running on all cylinders u can check which coilpack is faulty by disconnecting each coilpack. If the engine changes note again then that coilpack is fine but when u un plug one and there is no change that will be the triublemsome coilpack.

Make sure u do an ecu diagnostic to tell u which fault codes come up. If it IS a coilpack issue you will have code 21.

What is making you lean towards a timing issue BuuBox?

Would timing issues be bringing up the engine light?

Also just thought i might add, she's starting to chug the petrol pretty hard lately - Another sign of a bad coilpack?

Thanks for the info there RB25DETC33, might have to give that method a try on the weekend and see how i go. =]

It could well be a timing issue... Since the mechanic has done the timing belt, he may not have aligned the cams up with the timing marks, one of the cams may slightly be advanced or retarded throwing out your combustion timing.

But do an ecu check first. eliminate things that the ecu can tell you.

  • 2 weeks later...

So a little update here.

Took my car to a different mechanic for a second opinion.
This bloke said it's possible that coilpacks are shitty but he said the cam timing seems a bit off.

Went back to original mechanic who did the job and he conceded it was a little bit off, corrected it (Free of charge of course) and then ran some scans to find an error code for the CEL.
Codes came up as :

21 - P1320 IGN SIGNAL-PRIMARY

Bloke reckons i should replace all 6 coilpacks, he doesn't seem to think it would be worth trying to isolate which pack is failing.

Would it be wise to just replace all or should i attempt to isolate?

Any suggestions for which packs to go for? OEM or Splitfires?

Cheers,
Vexx.

if i was you i would replace all six coil packs then you wont have to worry about them for a long time. . choice of brand seems to be a personal thing on this forum so you will get a few different opinions on that

  • 6 months later...

I've been getting the same problem recently (R34GTT) - inconsistent misfire and farting only under WOT at 16-18psi and close to redline, a lot of the time it doesnt happen but 20-30% of the time it does. Took out and inspected my Yellow Jackets (less than 2yrs old) and copper spark plugs NGK BCP7RES gapped at 0.8mm (done only like 2000kms) - the plugs look new - no soot or signs of running rich -just the thin lower thread strip is black, coilpacks look new, no hairline cracks etc,. No visible oil/fuel in cylinders/ spark plugs.

Multimeter tests consistent resistance throughout coilpacks, and idle tests by removing coilpack connections one by one changes the engine note throughout so all coilpacks seem to be good here. But obviously under WOT it starts misfiring n farting. I didnt take out n inspect my 4th coilpack/spark plug as its under the J pipe and I couldnt be farked removing all that crap. But pretty sure its the same as others / good cond. Did take out connector under idle and it changed engine note so it seems ok.

Check engine light came on after coilpack inspection - paperclip test/clear codes and reset ecu (remove battery terminals n drain charge) didn't remove it - only threw out one error code which was the boost sensor. How do I get rid of this light?

The last couple days after removing coilpacks/plugs I get no power n torque from 1000-2000rpms but after that its normal and hammers hard under boost to redline bar the ocassional misfire/brickwall. Esp on a hill from stop to go I get inconsistent no power till 2000rpms. Is this a timing issue?? Wasnt happening before. Checked all connections of coilpacks/plugs all firm n good. Please help.

cheers

Edited by rondofj

I dont know about the plug gap, JEM had fitted new sparkies and set it at 0.8mm and it ran fine for 4 months till now, I'm thinking it could be the bloody afm, maybe a solder joint or something, its weird, upon first startup and driving for the initial 5-10 mins theres just NO power between 1000-2000rpms then its normal after that rpm band. Driving a bit over 10mins after its warmed up, some/not all power comes back, so could it be the thermostat or temp sensor?

My car does something similar, it runs rough when cold then all of a sudden after about 5 minutes it runs fine. Even weirder, when I first start it up it's fine, the issue kicks in about a minute after. I'm placing my bet on AFMs.

took out Z32 afm, soldered all 4 joints and put it back together no difference - initial startup and first 5-10 mins of driving theres NO power from 1000-1800rpms for 2-3 seconds then it jerks a bit then power comes back lol. Fuel filter clogged? It doesnt happen when engines warm.

  • 1 month later...

Hey mate did you ever fix the check engine light problem having the exact same thing happen to me

Took it in for a service they said all was fine turned it on next morning and the same thing

Did you ever find turning off and on fixed the problem ?

  • 3 weeks later...

Hey mate,

Sorry for the lack of replies here guys.

Fixed the problem.

New set of YellowJacket coilpacks instantly fixed the engine light, stopped the exhaust note sounding like a beast WRX and gave me a noticeably quicker vehicle. =]

PS. Yes, turning off ignition and flicking it back over did remove the engine light.. for a few minutes.

Create an account or sign in to comment

You need to be a member in order to leave a comment

Create an account

Sign up for a new account in our community. It's easy!

Register a new account

Sign in

Already have an account? Sign in here.

Sign In Now


  • Similar Content

  • Latest Posts

    • Did this end up working? Did you take some pictures?
    • And finally, the front lower mount. It was doubly weird. Firstly, the lower mount is held in with a bracket that has 3 bolts (it also acts as the steering lock stop), and then a nut on the shock lower mount itself. So, remove the 3x 14mm head bolts , then the 17mm nut that holds the shock in. From there, you can't actually remove the shock from the lower mount bolt (took me a while to work that out....) Sadly I don't have a pic of the other side, but the swaybar mounts to the same bolt that holds the shock in. You need to push that swaybar mount/bolt back so the shock can be pulled out past the lower control arm.  In this pic you can see the bolt partly pushed back, but it had to go further than that to release the shock. Once the shock is out, putting the new one in is "reverse of disassembly". Put the top of the shock through at least one hole and put a nut on loosely to hold it in place. Put the lower end in place and push the swaybar mount / shock bolt back in place, then loosely attach the other 2 top nuts. Bolt the bracket back in place with the 14mm head bolts and finally put the nut onto the lower bolt. Done....you have new suspension on your v37!
    • And now to the front.  No pics of the 3 nuts holding the front struts on, they are easy to spot. Undo 2 and leave the closest one on loosely. Underneath we have to deal with the wiring again, but this time its worse because the plug is behind the guard liner. You'll have to decide how much of the guard liner to remove, I undid the lower liner's top, inside and lower clips, but didn't pull it full off the guard. Same issue undoing the plug as at the rear, you need to firmly push the release clip from below while equally firmly gripping the plug body and pulling it out of  the socket. I used my fancy electrical disconnect pliers to get in there There is also one clip for the wiring, unlike at the rear I could not get behind it so just had to lever it up and out.....not in great condition to re-use in future.
    • Onto the rear lower shock mount. It's worth starting with a decent degrease to remove 10+ years of road grime, and perhaps also spray a penetrating oil on the shock lower nut. Don't forget to include the shock wiring and plug in the clean.... Deal with the wiring first; you need to release 2 clips where the wiring goes into the bracket (use long nose pliers behind the bracket to compress the clip so you can reuse it), and the rubber mount slides out, then release the plug.  I found it very hard to unplug, from underneath you can compress the tab with a screwdriver or similar, and gently but firmly pull the plug out of the socket (regular pliers may help but don't put too much pressure on the plastic. The lower mount is straightforward, 17mm nut and you can pull the shock out. As I wasn't putting a standard shock back in, I gave the car side wiring socket a generous gob of dialectric grease to keep crap out in the future. Putting the new shock in is straightforward, feed it into at least 1 of the bolt holes at the top and reach around to put a nut on it to hold it up. Then put on the other 2 top nuts loosely and put the shock onto the lower mounting bolt (you may need to lift the hub a little if the new shock is shorter). Tighten the lower nut and 3 upper nuts and you are done. In my case the BC Racing shocks came assembled for the fronts, but the rears needed to re-use the factory strut tops. For that you need spring compressors to take the pressure off the top nut (they are compressed enough when the spring can move between the top and bottom spring seats. Then a 17mm ring spanner to undo the nut while using an 8mm open spanner to stop the shaft turning (or, if you are really lucky you might get it off with a rattle gun).
    • You will now be able to lift the parcel shelf trim enough to get to the shock cover bolts; if you need to full remove the parcel shelf trim for some reason you also remove the escutcheons around the rear seat release and you will have to unplug the high stop light wiring from the boot. Next up is removal of the bracket; 6 nuts and a bolt Good news, you've finally got to the strut top! Remove the dust cover and the 3 shock mount nuts (perhaps leave 1 on lightly for now....) Same on the other side, but easier now you've done it all before
×
×
  • Create New...