Jump to content
SAU Community

Recommended Posts

so basically im just unsure of two possible problems here and was hoping someone could point me in the right direction

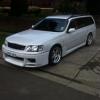
I've got a c34 stagea and for the past 2 weeks my gauge hasn't been able to read higher than half way when i fill up
so i opened up the tank and pulled the float assembly out and moved it manually to see where the gauge needle landed and what i got was:

float at full position = gauge just over half

float at half way = gauge at 1/4
float at empty position = gauge at empty

so i was wondering two things....(1) faulty gauge?? or (2) faulty sender unit??
or other??

appreciate any help on this one guys =]

Link to comment
https://www.sau.com.au/forums/topic/433191-need-help-with-fuel-gauge-issue/
Share on other sites

Yeah if its just a 2 pin plug then either bridging it or opening it will send the gauge full. I'd say it needs 100% voltage to read full on the gauge

If its 3 pin then you will have a power, ground and signal. Joining power directly to signal should give you full gauge

IMPORTANT: Be very very very careful bridging wires near the fuel tank. Fuel vapours, spark..... These are the things that cause explosions in combustion chambers :)

  • Like 1

You should really post in the Stagea section, owners there are more likely to know there are two level senders in a Stagea fuel tank. :P

Check the other side once the tank is empty next, and make sure you replace any Orings.

I would try bridging the level sensor wires, I think if gauge is ok bridging word would cause it to read full.

Yeah if its just a 2 pin plug then either bridging it or opening it will send the gauge full. I'd say it needs 100% voltage to read full on the gauge

If its 3 pin then you will have a power, ground and signal. Joining power directly to signal should give you full gauge

IMPORTANT: Be very very very careful bridging wires near the fuel tank. Fuel vapours, spark..... These are the things that cause explosions in combustion chambers :)

ohh yea cheers guys ill give that one a shot after work this afternoon

haha yes things that can make the car go boom.....easy enough to play it safe i can keep the tank sealed and have the plugs disconnected, ill let you know if i make it out alive :P

You should really post in the Stagea section, owners there are more likely to know there are two level senders in a Stagea fuel tank. :P

Check the other side once the tank is empty next, and make sure you replace any Orings.

yea i was thinking to but i figured this could be a pretty generic issue and id be likely to get more reply's over here

thanks for the heads up though ,will do if i dont have it figured by this weekend :thumbsup:

You should really post in the Stagea section, owners there are more likely to know there are two level senders in a Stagea fuel tank. :P

Check the other side once the tank is empty next, and make sure you replace any Orings.

Really?

Is this for more accurate fuel readings when turning corners etc?

ok so i took some advice off you guys and the gauge seems to be fine..... heres a few things that i came up with

(1). if i short the signal wire to ground i get the gauge reading at full (low resistance means full)

(2). and if i leave an open circuit between signal wire and ground i get the gauge reading dead empty (higher resistance means empty)

(3). between the terminals attached to the sender im getting a reading of 53 OHM's...tank is about half full at the moment.

quick little explanation:

http://i756.photobucket.com/albums/xx202/Jalalladin_Mohammad/fuel_zpsc1eba111.png

so now i suppose i move on to one of two things...... can the sender be fixed or where can i get a replacement??

Good work! I don't think it would be viable to repair the sender, start looking for another :) if you find 2 let me know cos I also want one to modify how my fuel pump word are run through the lid. I haven't been looking hard though.

Edited by superben

Good work! I don't think it would be viable to repair the sender, start looking for another :) if you find 2 let me know cos I also want one to modify how my fuel pump word are run through the lid. I haven't been looking hard though.

id say so....well at least i know where fault is now thanks guys

haha yea ill start looking around and if i do find 2 ill drop you a PM mate

so i havnt been able to track down a new sender after about a week....didnt try very hard either
but i did manage to find the problem :)....so just if any one was curious

if you look at the image in the link below, where ive drawn the "red arrow" that part of the arm for the contact was touching the PCB so so slightly but enough obviously to mess up all my readings and blah blah give a wrong reading on the gauge

http://i756.photobucket.com/albums/xx202/Jalalladin_Mohammad/arm_zpsc3b0f902.jpg

happy with that result, i saved myself a few dollars ;)

Create an account or sign in to comment

You need to be a member in order to leave a comment

Create an account

Sign up for a new account in our community. It's easy!

Register a new account

Sign in

Already have an account? Sign in here.

Sign In Now


  • Similar Content

  • Latest Posts

    • Hi...so a "development" here aswell The swap is "done" and car went "test drive" BUT it seems the clutch(maybe gearbox?) is a little bit sad? I bought this clutch kit https://justjap.com/products/xtreme-heavy-duty-organic-clutch-flywheel-kit-nissan-skyline-r31-r32-r33-push-type "Problem" is that the first gear is hard to put into and it seems that the clutch is not disengaged. It was not the problem with the old clutch...(or like sometime the first gear would not get as easy specialy when the fluid was cold) So? Can it be like...bad "install" or is the clutch wrong ((it should not have been) i done research to get the right one) Or is this "normal" with new clutch and needs to be break in? 
    • @Duncan I can try  and thanks i did not thought about VIN and part numbers for 33/34. @GTSBoy yeah it looks like iam gonna do that  
    • Forgot to include this but this is the mid section of my steering rack that looks like it has a thread/can be turned with that notch mentioned in the post:
    • Hey everyone, Wanted to pick some brains about this issue I'm having with rebuilding my 33 rack (PN is 49001-19U05). All of the tutorials/videos I've seen online are either R34 or S Chassis racks which seem to be pretty straightforward to disassemble but this process doesnt carry over to my rack. Few of the key differences that I've noted The pinion shaft on the other racks bolt on with 3 torx bolts: Whereas my rack bolts on with 2 allen head bolts: These changes are pretty inconsequential but the main difference is how you pull the actual rack out of the housing. The other skyline/s chassis racks can be taken out by tapping the rack out of the body with a socket and it just slides right out. I'm unable to do that with my rack because there's a hard stop at the end that doesn't let the seal/shaft be tapped out. Can also see a difference in the other end of the rack where mine has a notch that looks like you're able to use a big wrench to unthread 2 halves of the rack whereas the other racks are just kinda set in with a punch. My rack: Other racks: TLDR; Wanted to know if anyone has rebuilt this specific model of steering rack for the R33 and if there were any steps to getting it done easier or if I should just give this to a professional to get done. Sorry if this post is a bit messy, first one I've done.
    • I would just put EBC back on the "I would not use their stuff" pile and move on.
×
×
  • Create New...