Jump to content
SAU Community

Recommended Posts

Hey guys,

Well, its been a few years but I am finally back behind the wheel of another rex. Albeit this one is much nicer/newer. Not a Nissan but feel something different posted up won't hurt as I have always browsed these forums for the past 5 or so years!

After weighing up many options and almost pulling the trigger on a 99 V-Spec GTR (had piss poor compression and leak down results) I was contacted by a member of P-WRX interested in parting ways with his Subi.

After arranging an inspection and a viewing, the deal was made.

Aesthetically, I have no plans to change it's look as I personally believe the previous owner did a bang on job of making it look amazing. Performance wise however, I plan to eventually change the turbo back to something more "streetable" as it is a bit of a lag monster! With that said, once it does hit boost it hits hard and pulls well but there is nothing down low which is a bit of a bummer.

Was dyno'd at 365hp.

Future plans are a mild engine build when the current donk let's go, not chasing big hp but something that is suitable for everyday use. So reliability, strength and the opportunity to pursue more hp down the track if the bug bites.

Mods below:

AEM dry type pod filter Process west piping
Deatsch work fuel pump dw265c
Equal length headers and up pipe heat treated
x-force turbo back exhaust
bendix ultimate pads front and rear
std coilovers
gtps03 td06-20g
psr turbo inlet pipe
bosch 1000cc injectors
ultrex underbrace
hella braided telfon brake hoses
Dba T3 4000 rotors
goodridge clutch line
kartboy short shifter
whiteline positive traction kit
whiteline rear camber kit
whiteline diff bushes
kart boy transmission bushes
grimmspeed light weight pulley
grimmspeed mac valve
perrin radiator shroud
greddy magnetic sump plug
Cusco brake master cylinder stopper
1m fuel line mod
Dynotuned to 363.9hp and 499.5nm
23psi

interior
Retrimmed dash and glovebox in alcantara with red stitching
Full stereo with custom boot
0 gauge wiring split off to 2x 2gauge to amps
custom tweeter pods with suede and stitched
2x jl audio w6v2 subs
alpine pdx1.1000
alpine pdx4.100
jl audio c5 speakers allround
soundboard connected to headunit
odyssey 34r deep cycle battery
dynamat through out
Beltronics built in radar detector
JDM sti centre console extra compartment
perrin hub centric 20mm spaces bolt on
reverse camera

exterior
professionally sprayed pearl black rims
Hella super tones
Project Mu lug nuts
full genuine ht aeros kit
black JDM sti side badges


Enjoy!

Constructive criticism is welcome.

Cheers,


Shaun

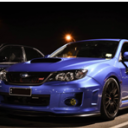
post-77042-0-17416600-1431566076_thumb.jpg

Link to comment
https://www.sau.com.au/forums/topic/456602-my12-wrx-sti-spec-r-shaunus/
Share on other sites

Thanks guys!

Yeah between heading to Europe next month and buying a house I'm not going to go silly with it.

Just going to look at adding the following:

- 18x10 +18 Work Emotion XD9's all round - undecided on finish yet.

- Perrin FMIC kit from the States

Then going to get a re-tune to make the most of the new intercooler kit as I believe I am right on the border of maxing out my stock STI cooler. I'm also wanting them to get rid of a bit of a flat spot around 3500rpm (most likely due to the new intake) which I believe has room for improvement in the current tune. I also want to have the launch control setup properly as it is currently only set at 3500rpm. It barely makes any boost and just bogs down. Need's to be increased a fair bit in order to do proper launches. Not chasing massive HP so not too worried if we lower the boost and try and get some more low/mid range power as I am currently relying on torque down low which is a bit of a shame.

Everything else is on point!

Thanks for the kind responses guys! As for the fitment of the wheels. I want something quality, light and aggressive to fill the massive arches on the sti. I have everything already fitted to the rex to make some serious fitment achievable.

I also forgot to mention, this car is strictly only used for daily purposes. It will see no track work at all unfortunately.

  • 1 year later...

Long time user and thought I would give this thread a little update.

January 25th 2016 - Was an epic storm in Kalgoorlie and silly me decided to go for a little drive. Basically, got to the top of a large bridge crossing and on the other side was a large puddle..with nowhere to turn around and traffic behind me I had no choice but to soldier on and proceed with caution. Caution wasn't enough and the result was a hydro-locked motor. After countless minutes spent cussing and pushing my sti in one foot of a water to a side street I managed to calm my nerves and file an insurance claim then and there. The car was towed and a short stroll to the pub with wet shoes was in order.

Fast forward a few weeks and the insurance assessor was on his way up to Kal to view the car. Long story short the repairs were authorized albeit not with who I wanted to perform the work so I phoned up and put a temporary hold on carrying out any repairs until I was satisfied in the direction everything was going. The local guys had pulled apart the top mount and other hardware and just thrown it all in the boot with loose fasteners etc rolling around freely. I lost my sh*t obviously as that is in no way professional nor a good sign.

After a few calls to the guy handling my claim he informed me I could choose my own repairer and he will review the quotes prior to approval.  I had a few of the top Subi specialists in Perth quote up a brand new oem bottom end, arp fasteners throughout, my head's re-worked, new timing kit, re-tune etc. All of this still came in cheaper than the shonky original quote done here in Kal for a reconditioned motor by some unknown company without a re-tune.  A few days later the car was on a truck to Perth at the insurers cost. I was less stressed out by this point :)

Upon tear down they discovered a small portion of the crown of piston no. 4 was missing. I guess that explained why it was using a bit of oil!! That storm is starting to look like a blessing in disguise after all!

The motor only took a few weeks for them to assemble and it was all back in and running. This is where the drama started as they wanted to re-tune it as the previous tune was questionable at best. High boost, no bottom end and only 1000rpm usable power up top which resulted in a less than satisfying drive...I'm glad they were as keen as I was to get it dialed in properly. It was re-tuned using Ecutek...A very well known Perth shop did the first tune after the run in period which resulted in a big stumble in power as it transitioned from vacuum to boost. Granted it was already there on the last tune they just didn't seem too interested in diagnosing it nor fixing it so they keys were handed back and on it went to another shop in Perth. It lobbed into Tokyo Motorsports which specialize primarily in Evo's however, they went above and beyond to ensure the stumble was fixed and it would be good fun to drive. Can't thank them enough for the work they did.  They completely wiped the ecu clean and stole the oem map off another stock 2012 sti as mine had been played with so much that it was easier to start from scratch than try and correct what was already there.

The result was slightly less power however, instead of running 23 pound it now is running a conservative 17 tapering down to 1 bar. A lot safer for daily duties and with better fuel consumption...most of all the stumble is gone!!! It is seriously a much nicer drive and it makes hp more at 4000rpm now than it did on the previous tune! It is a lot more responsive and is punchy as hell compared to its previous state. I apologize for the long post but thought it might be of interest to some of you guys as its a bit different than the usual R or gtst build.


Few attachments.

- Old tune is in colour (bhp)

- New tune is black and white (awkw)

Future mods.

- Wheels need some attention - undecided of fitment at the moment however will aim for 18x10 +35 or so all round. Want Sp1's 


attachment_zps7ff242bc.jpg

IMG_5296.JPG

1781403_621465804599484_2050021308_o.jpg

FullSizeRender.jpg

attachment_zps7ff242bc.jpg

IMG_5296.JPG

1781403_621465804599484_2050021308_o.jpg

FullSizeRender.jpg

Edited by shaunus
  • Like 1
  • 7 months later...

So after not posting in a while, I thought I would chuck up some more info/pics on how it sits currently...

Installed a new set of coilovers to replace the ones that were on it. I believe they damaged the front pair by strapping it down too hard for freight when they sent it back to me from Tokyo Motorsports and S-Technic. Pretty simple fix to do and was rather satisfying to not hear any more clunking and seeing the wheels no longer off centre in the guards. When I tore the old front pair down there was noticeable shaft play and a grinding feel when depressing them. Glad they went in the bin!

Have since installed a set of 18x9.5" wheels. Opted for Rota's mainly due to the fact the roads where I live are brutal and I couldn't justify the expense of legit jap rims until I move back to the coast. The wheels site much nicer and fill out the enormous guards quiet well. Am currently waiting on an S206 lip kit for it to replace the one I have on it at the moment. It has copped years of abuse and the plastic is rather banged up.

Still haven't gotten round to installing my process west fmic kit but it is on the cards next time I head back to Perth with the car as a tune needs to accompany it. Going to wind up the boost a tiny bit more and look at adding a few features within the tune. 

Any input is encouraged :)

IMG_6458.JPG

FullSizeRender.jpg

  • Like 1

Create an account or sign in to comment

You need to be a member in order to leave a comment

Create an account

Sign up for a new account in our community. It's easy!

Register a new account

Sign in

Already have an account? Sign in here.

Sign In Now


  • Similar Content

  • Latest Posts

    • From there, it is really just test and assemble. Plug the adapter cables from the unit into the back of the screen, then the other side to the car harness. Don't forget all the other plugs too! Run the cables behind the unit and screw it back into place (4 screws) and you should now have 3 cables to run from the top screen to the android unit. I ran them along the DS of the other AV units in the gap between their backets and the console, and used some corrugated tubing on the sharp edges of the bracket so the wires were safe. Plug the centre console and lower screen in temporarily and turn the car to ACC, the AV should fire up as normal. Hold the back button for 3 sec and Android should appear on the top screen. You need to set the input to Aux for audio (more on that later). I put the unit under the AC duct in the centre console, with the wifi antenna on top of the AC duct near the shifter, the bluetooth antenna on the AC duct under the centre console The GPS unit on top of the DS to AC duct; they all seem to work OK there are are out of the way. Neat cable routing is a pain. For the drive recorder I mounted it near the rear view mirror and run the cable in the headlining, across the a pillar and then down the inside of the a pillar seal to the DS lower dash. From there it goes across and to one USB input for the unit. The second USB input is attached to the ECUtec OBD dongle and the 3rd goes to the USB bulkhead connected I added in the centre console. This is how the centre console looks "tidied" up Note I didn't install the provided speaker, didn't use the 2.5mm IPod in line or the piggyback loom for the Ipod or change any DIP switches; they seem to only be required if you need to use the Ipod input rather than the AUX input. That's it, install done, I'll follow up with a separate post on how the unit works, but in summary it retains all factory functions and inputs (so I still use my phone to the car for calls), reverse still works like factory etc.
    • Place the new daughterboard in the case and mount it using the 3 small black rivets provided, and reconnect the 3 factory ribbon cables to the new board Then, use the 3 piggyback cables from the daughterboard into the factory board on top (there are stand offs in the case to keep them apart. and remember to reconnect the antenna and rear cover fan wires. 1 screw to hold the motherboard in place. Before closing the case, make a hole in the sticker covering a hole in the case and run the cable for the android unit into the plug there. The video forgot this step, so did I, so will you probably. Then redo the 4 screws on back, 2 each top and bottom, 3 each side and put the 2 brackets back on.....all ready to go and not that tricky really.      
    • Onto the android unit. You need to remove the top screen because there is a daughterboard to put inside the case. Each side vent pops out from clips; start at the bottom and carefully remove upwards (use a trim remover tool to avoid breaking anything). Then the lower screen and controls come out, 4 screws, a couple of clips (including 3 flimsy ones at the top) and 3 plugs on the rear. Then the upper screen, 4 screws and a bunch of plugs and she is out. From there, remove the mounting brackets (2 screws each), 4 screws on the rear, 2 screws top and bottom and 3 screws holding in the small plates on each side. When you remove the back cover (tight fit), watch out for the power cable for the fan, I removed it so I could put the back aside. The mainboard is held in by 1 screw in the middle, 1 aerial at the top and 3 ribbon cables. If you've ever done any laptop stuff the ribbon cables are OK to work with, just pop up the retainer and they slide out. If you are not familiar just grab a 12 year old from an iphone factory, they will know how it works The case should now look like this:
    • Switching the console was tricky. First there were 6 screws to remove, and also the little adapter loom and its screws had to come out. Also don't forget to remove the 2 screws holding the central locking receiver. Then there are 4 clips on either side....these were very tight in this case and needed careful persuading with a long flat screw driver....some force required but not enough to break them...this was probably the fiddliest part of the whole job. In my case I needed both the wiring loom and the central locking receiver module to swap across to the new one. That was it for the console, so "assembly is the reverse of disassembly"
    • But first....while I was there, I also swapped across the centre console box for the other style where the AV inputs don't intrude into the (very limited !) space.  Part# was 96926-4GA0A, 284H3-4GA0B, 284H3-4GA0A. (I've already swapped the top 12v socket for a USB bulkhead in this pic, it fit the hole without modification:) Comparison of the 2: Basically to do the console you need to remove the DS and PS side console trim (they slide up and back, held in by clips only) Then remove the back half of the console top trim with the cupholders, pops up, all clips again but be careful at the front as it is pretty flimsy. Then slide the shifter boot down, remove the spring clip, loose it forever somewhere in the car the pull the shift knob off. Remove the tiny plastic piece on DS near "P" and use something thin and long (most screwdrivers won't fit) to push down the interlock and put the shifter down in D for space. There is one screw at the front, then the shifter surround and ashtray lift up. There are 3 or 4 plugs underneath and it is off. Next is the rear cover of the centre console; you need to open the console lid, pop off the trim covering the lid hinge and undo the 2rd screw from the driver's side (the rest all need to come out later so you can do them all now and remove the lid) Then the rear cover unclips (6 clips), start at the top with a trim tool pulling backwards. Once it is off there are 2 screws facing rearwards to remove (need a short phillips for these) and you are done with the rear of the console. There are 4 plugs at the A/V box to unclip Then there are 2 screws at the front of the console, and 2 clips (pull up and back) and the console will come out.
×
×
  • Create New...