

Announcements
-
Similar Content
-
-
Latest Posts
-

-

By Marshall88 · Posted
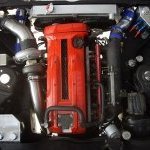
Hi, so I am in the United States and bought a R33 skyline series 2. I am having a real hard time finding any information on it. Does anyone know the valve clearance and steps to set valve clearance while engine is still in the car? -
 They used to hang people for stealing horses Hope you able to get it back soon
 -
If only Brock had forked out the extra $10k for an SS at the time, then this car would be worth something
-
 Trying to find a rich collector I see. I love their comment "it's cheap if you compare it to the price of Carol Shelby's personal cars at $23mill"
-


Recommended Posts
Create an account or sign in to comment
You need to be a member in order to leave a comment
Create an account
Sign up for a new account in our community. It's easy!
Register a new accountSign in
Already have an account? Sign in here.
Sign In Now