Jump to content
SAU Community

Recommended Posts

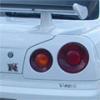
i recently purchased some decals for my car (the same as the ones in the attached image) and they have just arrived, seeing they cost close to $200 inc shipping the last thing i want to do is bugger them up, basically just asking if anyone has applied these kind of size decals to their car before or knows of anyone/company in adelaide who could help me with it, they did come with instructions but am not too sure about attempting it myself (worried about leaving air bubbles etc) thanks guys!

post-24902-1135037459.jpg

Link to comment
https://www.sau.com.au/forums/topic/99035-applying-decals/
Share on other sites

I've done this before, you just have to do it really slowly. Make sure you paint is perfectly clean and dry, take off the backing sheet, lay a small corner piece on and then apply using something with a nice flat surface, like a credit card etc. Make sure you push the air out as you go, and the end there may be a couple of tiny air holes, get a pin and gently pop them, then slowly peel the top sheet off, again using the cridt card or what ever as you go, and presto it's on. Also a good move to rub over the decal with the card prior to fitment so it's stick properly to the top layer of paper, otherwise parts can end up staying on the bottom piece and totally f**king it up.

Best of luck mate

Link to comment
https://www.sau.com.au/forums/topic/99035-applying-decals/#findComment-1803619
Share on other sites

sounds quite expensive for 400R/nismo style decals. but like mxtcy has suggested, take it real slow. patience is the key, in my opinion there is no need to take it to someone else to do it as its just going to cost you more money - i assume so anyways.

Link to comment
https://www.sau.com.au/forums/topic/99035-applying-decals/#findComment-1803735
Share on other sites

spray windex on your car, put the decal on, move it into place and wipe down with your credit card to make sure it's all smoooooooooth, let it dry then peel top sheet off........IS DONE IS GOOD!

BINGO!! DONT do it dry 1 stuff up and its there for good kiss 200$$ goodbuy

i used to work @ olympic trailers and they used a simular method i think with just water spray to put there stickers on... u can get bubbles out with a rubber squigee

Link to comment
https://www.sau.com.au/forums/topic/99035-applying-decals/#findComment-1804536
Share on other sites

spray windex on your car, put the decal on, move it into place and wipe down with your credit card to make sure it's all smoooooooooth, let it dry then peel top sheet off........IS DONE IS GOOD!

cheers for the advice, gonna give it a go tonight with a mate, ill let you know how it goes :)

where did you get them from thirty four?

got them off ebay from a guy based in hong kong

Link to comment
https://www.sau.com.au/forums/topic/99035-applying-decals/#findComment-1804667
Share on other sites

Create an account or sign in to comment

You need to be a member in order to leave a comment

Create an account

Sign up for a new account in our community. It's easy!

Register a new account

Sign in

Already have an account? Sign in here.

Sign In Now


  • Latest Posts

    • Should be more than fine, especially the overall fuel pressure would never exceed 3.5bar (assuming that thing never gets more than 0.5bar of boost in stock form). According to the chart, it's 11amps.
    • I definitely know the first rule here, look first, ask second. I've seen many people get roasted 😂 I found a few diagrams for the RB, but I'm yet to come across one for the VQ. From what I have read, the pump gets the +12v along with the FPCM, and it's the negative wire that gets passed through the resistor to regulate the voltage. So I assume I can just ground the negative wire at the pump to eliminate the FPCM control. But I really wanted to see the VQ circuit diagram first to make sure I understood it correctly. Once the new pump is in I'll do some testing to see how it behaves, and in the meantime, I'll keep looking for a wiring diagram. Thanks for your help mate, your time is greatly appreciated.    
    • Maybe? I have the Supercheap ToolPro low thingo. It has a somewhat smaller diameter lifting "bowl" than you would expect on a workshop grade trolley jack, and a split rubber pad to suit that diameter. It clears the "N1" style skirts I have. Probably wouldn't if the jack's bowl and a suitably larger rubber block were in use. Having said that though.....you only need the rubber block to exist on the inner side of the pinchweld, so could carve away any rubber that fouled the skirt, leaving some there for "insurance" </simples>
    • I used to do that (sills with rubber jack block).. ... then I got side skirts, and there's no way for the jack to actually work there, the jack pad itself on the jack is too big. Is the answer to use a... smaller (?) jack? Hmmm.
    • I have too much trauma from every skyline I've ever seen having crushed jack points/pinch welds lol.    Yep, works 100%, it's what I use when I'm using the quick jack. Don't know why I can't also bring myself to do the same thing when I'm using a jack. I blame the skyline PTSD. 
×
×
  • Create New...