Jump to content
SAU Community

M35 Factory Boost Gauge Repair.


scotty nm35
 Share

Recommended Posts

Great tip, if you don't have a soldering iron and want to quick fix get a small clean blade and clean around the edges of the solder where it contacts the pcb. That's where mine had the crud built up and it worked a treat after, I noticed their is two small pots on the pcb also, look to be voltage regulators, anybody know for sure? This could be tweaked to help prevent future failure.

Zelda

  • Like 1
Link to comment
Share on other sites

Cleaning a dry solder joint won't repair the connection, you need to heat the solder, remove it using a solder sucker or wick and replace with new solder. It's not like soldering irons are expensive, they are much cheaper than a second hand sensor.

Tweaking the pots will likely make the gauge read wrong, then it's useless.

  • Like 2
Link to comment
Share on other sites

Look at the pic; the three pins, in a straight line at the very top of shot.

They are the ones that need resoldering.

re-solder the 3 pins in red color

2gv51za.jpg

thanks guys! are those 3 pins connected to some wires or the chip? cause when you say resolder that 3 pins. what are you actually doing to it? heat them up so they can connect back to the wires/chip or?

p.s. sorry... real beginner here.

Link to comment
Share on other sites

thanks guys! are those 3 pins connected to some wires or the chip? cause when you say resolder that 3 pins. what are you actually doing to it? heat them up so they can connect back to the wires/chip or?

p.s. sorry... real beginner here.

Yes, heat them up then let them re-connect. I just repaired mine because intermittent not working problem.

  • Like 1
Link to comment
Share on other sites

Great tip, if you don't have a soldering iron and want to quick fix get a small clean blade and clean around the edges of the solder where it contacts the pcb. That's where mine had the crud built up and it worked a treat after, I noticed their is two small pots on the pcb also, look to be voltage regulators, anybody know for sure? This could be tweaked to help prevent future failure.

Zelda

This is probably the dumbest advice I have ever read on here.. please atleast have some knowledge in anything before recommending how people fix their cars.

Link to comment
Share on other sites

Thanks heaps Yang!

Actually you can take your boost sensor to home applications repair shop or mobile repair shop if you really don't know how to do that. It is only 10mins job.

  • Like 1
Link to comment
Share on other sites

This is probably the dumbest advice I have ever read on here.. please atleast have some knowledge in anything before recommending how people fix their cars.

Thanks for the insult brick.

I'm an electrician by trade. If you didn't know, copper actually oxidises and by gently removing this with a clean blade your essentially cleaning the contact to the pcb.

Sorry that my common sense insulted you ?

Link to comment
Share on other sites

Cleaning a dry solder joint won't repair the connection, you need to heat the solder, remove it using a solder sucker or wick and replace with new solder. It's not like soldering irons are expensive, they are much cheaper than a second hand sensor.

Tweaking the pots will likely make the gauge read wrong, then it's useless.

It's not necessarily a dry solder joint, as you have all found the re soldering of the connections only lasts so long.. This is probably due to over voltage or a lack of it, solder tends to add resistance to a join creating a hot spot causing the actual connection to fail before anything else, hence the reason for putting voltage pots in the pcb to compensate for added or less resistance in the total circuit ( impedance or Z )

Link to comment
Share on other sites

Thanks for the insult brick.

I'm an electrician by trade. If you didn't know, copper actually oxidises and by gently removing this with a clean blade your essentially cleaning the contact to the pcb.

Sorry that my common sense insulted you

If you are an electrician you should know better and maybe go back to tafe. . I am an electronic technician by trade so I also know about pcbs etc. Firstly you are correct in saying that it may help, but it won't fix the issue. All it may do is minimize the intermittent issue you are having. That being said if you drive a long a bumpy street you will most likely have signal drop in and out as the joint moves around. Secondly the issue will return quickly. For the cost of a $5 soldering iron why wouldn't you just actually fix it.

Thirdly you were recommending people adjust the pots on the pcb. This is the really dumb thing. It is obvious that they would be set to the correct settings from factory. And adjusting them will only make it read incorrect.

So opt simply your original recommendation will not fix the problem and then when the person adjusts the pots they will ruin it all together so I stand by what I said in it being the dumbest post ever.

Link to comment
Share on other sites

It's not necessarily a dry solder joint, as you have all found the re soldering of the connections only lasts so long.. This is probably due to over voltage or a lack of it, solder tends to add resistance to a join creating a hot spot causing the actual connection to fail before anything else, hence the reason for putting voltage pots in the pcb to compensate for added or less resistance in the total circuit ( impedance or Z )

That is exactly what a dry solder joint is. Just resolder it like Scotty has said and it is fixed.

Link to comment
Share on other sites

It's not necessarily a dry solder joint

As an electronics tech that worked on PCB level repair myself, I am entirely confident it is a dry solder joint that needs fresh solder for repair, which I have fixed on a dozen cars at least.

Josh 1 - Zach 0 :P

  • Like 1
Link to comment
Share on other sites

Lol yes Scott. What's causing this dry solder joint? Over or under voltage.

Josh I'm not telling people to adjust their pots I was asking if somebody like yourself who apparently knows everything if they had a better idea on how to find out for sure before tweaking it. ?

All I'm saying is cleaning the joins will also work if you don't have a soldering iron( which I do, just didn't need it) Sure may not be as good. The boost gauge is so crappy anyway I'm not sure why you have to get so defensive about it. It's only good for 1bar.

Just another option guys ?

Link to comment
Share on other sites

Create an account or sign in to comment

You need to be a member in order to leave a comment

Create an account

Sign up for a new account in our community. It's easy!

Register a new account

Sign in

Already have an account? Sign in here.

Sign In Now
 Share


  • Similar Content

  • Latest Posts

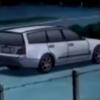
    • So I raised the car up a fair bit for shipping - see image - then lowered it again when it arrived. I then rushed to get an alignment in NL before the track and the shop just wasn’t anywhere near as precise as what I got in Japan. The guys that did the alignment this week said there was a fair amount of toe in the rear that could have contributed to the understeer. It was also the case that the rear camber went from about -2 to -3 at the shop in NL. However, since I’ve now got slightly wider tires in the rear - NS2Rs run wider than Accelera 651S - I could only get a minimum of -3 in the rear now due to clearance. Front is now -2.75 (-2.45 in minutes) due to being raised a bit (previously -3 in JP). So it’s likely a combination of the two factors, camber and toe. The issue now is I have more camber in the rear than the front and the next step on the front Cusco arms will put me at -3.5ish front which seems a bit excessive to me. The weird thing is I’ve never had any understeer at the track in Japan but they are very different circuits - Japanese circuits are much slower than the one I’ve been to here.    I’m probably going to have to start another thread for the E90. The plan is sort of to keep it as a daily but progressively mod it into a track car - honestly, you need a cage for the sort of speeds you go here. Just ordered the M3 front arms btw.  Love the car despite it being in pretty shitty condition. Oil analysis came back okay and it seems to have stopped consuming oil since fixing a load of engine bay things. Saw yours is a 335i right? f**king mistake on my part getting the DI N53 over the N52, fuel economy is insanely good though at 14-16 km/L.   Cheers, it’s great to see the benefits and pitfalls of different places. I’m contemplating going back to the U.K. around next year as the cost of living in the Netherlands is just ridiculous. GF is nagging me to settle and buy a house but I don’t know what LSD to buy. 
    • Have you seen the Milwaukee Train Horn? It's a beast! I stumbled upon it while browsing for upgrades. I'm thinking of adding it to my ride for some serious sound. Here's the link if you wanna check it out: https://bosshorn.com/products/milwaukee-train-horn. Anyway, thanks again for sharing your method.
    • Anybody home...? I used to moderate this part of SAU about 20 years ago... hard to beleive it's still around basically unchanged with all the old posts pinned at the top. Amazing to read all those posts again.  If anyone drops by, I'm still in Japan (Nishinomiya, between Osaka and Kobe).  Cheers 🙂
    • Ah, yeah, the diff bushing in the rear subframe, this has been a problem since the start of the V35 in the early '00s and the only solution ever offered by Nissan is a whole new subframe.  Since they are fluid filled, as soon as they form the smallest crack, they leak brown fluid everywhere.  The aftermarket options for the v35 and V36 aren't suitable for the V37 either, Z1 has built an aftermarket option, but a few people have had issues with it. The brace should reduce movement in that bushing, so should extend its life! Did you notice any increase in noise from the driveline?  I know some have installed solid subframe collars and complain about the amount of noise it transmits through to the body, but not sure if the diff brace makes any noticeable difference?
×
×
  • Create New...