Jump to content
SAU Community

Recommended Posts

This is a very condensed version of what I have done to prep my 33 for drift and curcit racing. Dan has done an awsome job with his and I had a look at it at the QLD round, a job well done there.

My rebuild started about 14 months ago when the cambelt tesionerstud snaped off. The end result was 5 bent valves and 2 broken off.

The pic below is of the offending stud. The lesson here for all is to replace it with every cambelt change. This one let go 4000 shy of a schedualed timming belt change.

post-15176-1156403728.jpg

With the motor out I started the Job of stripping the interior, and the sound deadening with a heat gun and paint scraper.... I wish I knew about the dry ice idea. The chasie did twist alot when we took it to the track so I set about seam welding with a mig at and inbetween the original sopt welds, about every 1/2 inch or 12 mm.

post-15176-1156404470.jpg

Then we sent it off to get the roll cage fitted by Bruce Dumbit at NRW rollcages in Nambour QLD. An 8 point cage to cams specs with x intrusion bars. the cage picks up the rear struts, main hoop, down the A pillar dnt through the fire wall to the front struts. It has been tagged to the body in as many places as possible ti incraese the ridgidity of the chasie. I have painted it all in stone guard with a roller so it doesn't reflect the sun or lights.

post-15176-1156404437.jpg

post-15176-1156404684.jpg

Being a drift car, stearing lock and camber have been modified for greater and adjustable angles.

post-15176-1156404810.jpg

With the extra lock more guard clearance was needed. This process took some weeks to get just right. Cuttin pulling dollying etc.

post-15176-1156404967.jpg

post-15176-1156404979.jpg

post-15176-1156404994.jpg

post-15176-1156405013.jpg

post-15176-1156405024.jpg

post-15176-1156405036.jpg

post-15176-1156405054.jpg

and the finished product

post-15176-1156405068.jpg

I will put up some more latter, have to run. :)

Edited by Noddy
Link to comment
https://www.sau.com.au/forums/topic/131579-another-r33-drift-car/
Share on other sites

The body work has been a long and tedious job. Any one who does this for a living earns every cent. We diddn,t take the windows out but got advice from a mate who has a shop in brisbane, Camerons pannell works. The drivers sill was crushed by a water barrier at QR 1 drift day a few years back and needed to be cut off, bashed back to shape and welded back on. The passenger side always had some cracks and odd bumps, obviously from some dodgy jap shop. Everything on the pasenger side has been fixed or replaced at somestage. Looks like it had been T boned and rearended, bog every where. Looks good now after 3 or 4 weekends drowning in bog dust.

post-15176-1156481528.jpg

Putting the primer took a long time as every weekend for a few weeks there were showers and made it very hard to transport a car that had baer metal here and there. Sara my partner is works at a company where they build grain conveyors and have a paint bay/booth that you could paint an entire semi in plus some.

We did the painting ourselvs, Sara proved the steadier hand at it. Primer on at last.

post-15176-1156482012.jpg

Then 1 week later edging up in door jambs, filler cap, in guards etc.

post-15176-1156482177.jpg

and anothe week or two the outside

post-15176-1156482330.jpg

post-15176-1156482374.jpg

Edited by Noddy
  • 2 weeks later...

The engine returned form my machinist on monday and have just started by painting the block and installing the crank. Im still waiting on a few items, oil pump, head gasket and oil sandwich plate so Im not in the greatest of rushes to get it all to gether just yet.

If all goes well I might beable to get down to the sat arvo sprints next weekend at Queensland Raceway to run it in. I hope.

  • 4 weeks later...
  • 2 weeks later...

The big man up stairs on occasions (in my opinion any way) must sometimes need a laugh and makes dumb stuff go wrong. For example, some 18 months ago the Cambelt tensioner stud in my skyline just snapped in one clean faccet. Result was it ate some valves. A random act of GOD? I rebuilt the motor and the car from the ground up.

Just this week while running in the newly finnished machine, checking and fixing the little things, BEHOLD!!! another random act of GODLENESS. Checking to see if an oil leek from the oil cooler sandwich plate was fixed i started the motor cold, let it idle for 2-3 min to get some temp into it. I gave it 3 quick mild blips on the throttle bodie to about 2-3000 rpm. Comming down from the third blip there was a fast tapping sound. It got louder and the motor just turnd off. It did not jar, just stoped as if the key was turned off. From he start of the noise to engine stoped was abou 3-5 sec. Then I said some,. no, a word very loudly, sounded like truck.

Testing showed,

0 compression in every cylinder.

Cams turn fine (not broken cam).

Pittions all go up and down (not a rod prob)

All timing marks line up fine(not a timing belt slip)

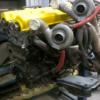
As I took it appart I took photos so I could try to trace the cause. When I got down to head bolts I found that the Inlet cam was 1/4 of a turn out of place. The retainer bolt was still at the correct tension and onct the cam gear was removed, the drive/shear dowle was sheared it 2. this has bent/broken every inlet valve and guide. How does that type of thing happen???

  • 2 weeks later...

nice work mate.........looks a treat and the yellow stands out big time. how come u went flare option rather then bolton fibre glass???

u probly could of saved time, then again.......flaring it looks awesome

top stuff again

nice work mate.........looks a treat and the yellow stands out big time. how come u went flare option rather then bolton fibre glass???

u probly could of saved time, then again.......flaring it looks awesome

top stuff again

subtleness and its unique.

  • 1 month later...

The head is fixed, and I've been waiting for a vernier inlet cam wheel to be machined up. All the parts arrived this arvo so it is slowly going back together again. This time specificly to the specs for the cam shafts.

  • 1 month later...

Finaly, It goes and has completed a 350km caining of a run in drive. The drive wound through the Great Deviding Range popping into NSW for a bit and along some amazingly bumpy roads. There were some very nice ones too, with some biblickly fun couners.

Wed a mixtures and dyno test in Dalby.

This Sat, 1/8th mile tast at Warwick &

Friday week it will be at QR for it's first drift performance.

After talking to the local motorsport community out here in Warwick I took the car down to a local dyno that was reccomended by most, to check mixtures etc.

At first I was a bit worried because at low boost levels (7 psi) it was looking a touch lean. At this level it was producing about 250 rwhp.

Then we pushed about 10 psi. Surprisingly the mix got richer and naturaly moer power, 270ish rwhp.

seeing this we looked at 12-13 psi. The mixture got richer and the power was just nudging 300 rwhp.

On the road it feels very nice in it's delivery and put a very big smlie on my dial.

There has been no tuning yet, this is purely the result of mild porting and some mild cam work. Before the rebuild it made 275rwhp on 14psi so Im very pleased.

sounds like some great results happening, and the guy upstairs seems to be on your side at the moment haha!!

sorry if i havent seen a thread before or just didnt see it, but what turbo are you using on your setup.

I have roughly the same power, maybe a bit less with actuator and hesitation problems making 320rwhp on 15psi.

im in the process of gettin another turbo (gt3040)

looking into cams, and suspension gear.

also have 19's arriving soon, so hopefully will look the part.

Anyway im glad that everything is going well, and cant wait to see it on the track.

same thing happened to me, crank was exactly 180 degrees (or 360, whatever way you look at it) out of phase with the cams, nfi how the hell it happened :S i could seriously swear that everything was exactly perfect when i tensioned the belt, checked time and time again, but yeah, like you say, the guy upstairs must get bored :laugh:

The big man up stairs on occasions (in my opinion any way) must sometimes need a laugh and makes dumb stuff go wrong. For example, some 18 months ago the Cambelt tensioner stud in my skyline just snapped in one clean faccet. Result was it ate some valves. A random act of GOD? I rebuilt the motor and the car from the ground up.

Just this week while running in the newly finnished machine, checking and fixing the little things, BEHOLD!!! another random act of GODLENESS. Checking to see if an oil leek from the oil cooler sandwich plate was fixed i started the motor cold, let it idle for 2-3 min to get some temp into it. I gave it 3 quick mild blips on the throttle bodie to about 2-3000 rpm. Comming down from the third blip there was a fast tapping sound. It got louder and the motor just turnd off. It did not jar, just stoped as if the key was turned off. From he start of the noise to engine stoped was abou 3-5 sec. Then I said some,. no, a word very loudly, sounded like truck.

Testing showed,

0 compression in every cylinder.

Cams turn fine (not broken cam).

Pittions all go up and down (not a rod prob)

All timing marks line up fine(not a timing belt slip)

As I took it appart I took photos so I could try to trace the cause. When I got down to head bolts I found that the Inlet cam was 1/4 of a turn out of place. The retainer bolt was still at the correct tension and onct the cam gear was removed, the drive/shear dowle was sheared it 2. this has bent/broken every inlet valve and guide. How does that type of thing happen???

Create an account or sign in to comment

You need to be a member in order to leave a comment

Create an account

Sign up for a new account in our community. It's easy!

Register a new account

Sign in

Already have an account? Sign in here.

Sign In Now


  • Similar Content

  • Latest Posts

    • Look, realistically, those are some fairly chunky connectors and wires so it is a reasonably fair bet that that loom was involved in the redirection of the fuel pump and/or ECU/ignition power for the immobiliser. It's also fair to be that the new immobiliser is essentially the same thing as the old one, and so it probably needs the same stuff done to make it do what it has to do. Given that you are talking about a car that no-one else here is familiar with (I mean your exact car) and an alarm that I've never heard of before and so probably not many others are familiar with, and that some wire monkey has been messing with it out of our sight, it seems reasonable that the wire monkey should be fixing this.
    • Wheel alignment immediately. Not "when I get around to it". And further to what Duncan said - you cannot just put camber arms on and shorten them. You will introduce bump steer far in excess of what the car had with stock arms. You need adjustable tension arms and they need to be shortened also. The simplest approach is to shorten them the same % as the stock ones. This will not be correct or optimal, but it will be better than any other guess. The correct way to set the lengths of both arms is to use a properly built/set up bump steer gauge and trial and error the adjustments until you hit the camber you need and want and have minimum bump steer in the range of motion that the wheel is expected to travel. And what Duncan said about toe is also very true. And you cannot change the camber arm without also affecting toe. So when you have adjustable arms on the back of a Skyline, the car either needs to go to a talented wheel aligner (not your local tyre shop dropout), or you need to be able to do this stuff yourself at home. Guess which approach I have taken? I have built my own gear for camber, toe and bump steer measurement and I do all this on the flattest bit of concrete I have, with some shims under the tyres on one side to level the car.
    • Thought I would get some advice from others on this situation.    Relevant info: R33 GTS25t Link G4x ECU Walbro 255LPH w/ OEM FP Relay (No relay mod) Scenario: I accidentally messed up my old AVS S5 (rev.1) at the start of the year and the cars been immobilised. Also the siren BBU has completely failed; so I decided to upgrade it.  I got a newer AVS S5 (rev.2?) installed on Friday. The guy removed the old one and its immobilisers. Tried to start it; the car cranks but doesnt start.  The new one was installed and all the alarm functions seem to be working as they should; still wouldn't start Went to bed; got up on Friday morning and decided to have a look into the no start problem. Found the car completely dead.  Charged the battery; plugged it back in and found the brake lights were stuck on.  Unplugging the brake pedal switch the lights turn off. Plug it back in and theyre stuck on again. I tested the switch (continuity test and resistance); all looks good (0-1kohm).  On talking to AVS; found its because of the rubber stopper on the brake pedal; sure enough the middle of it is missing so have ordered a new one. One of those wear items; which was confusing what was going on However when I try unplugging the STOP Light fuses (under the dash and under the hood) the brake light still stays on. Should those fuses not cut the brake light circuit?  I then checked the ECU; FP Speed Error.  Testing the pump again; I can hear the relay clicking every time I switch it to ON. I unplugged the pump and put the multimeter across the plug. No continuity; im seeing 0.6V (ECU signal?) and when it switches the relay I think its like 20mA or 200mA). Not seeing 12.4V / 7-9A. As far as I know; the Fuel Pump was wired through one of the immobiliser relays on the old alarm.  He pulled some thick gauged harness out with the old alarm wiring; which looks to me like it was to bridge connections into the immobilisers? Before it got immobilised it was running just fine.  Im at a loss to why the FP is getting no voltage; I thought maybe the FP was faulty (even though I havent even done 50km on the new pump) but no voltage at the harness plug.  Questions: Could it be he didnt reconnect the fuel pump when testing it after the old alarm removal (before installing the new alarm)?  Is this a case of bridging to the brake lights instead of the fuel pump circuit? It's a bit beyond me as I dont do a lot with electrical; so have tried my best to diagnose what I think seems to make sense.  Seeking advice if theres for sure an issue with the alarm install to get him back here; or if I do infact, need an auto electrician to diagnose it. 
    • Then, shorten them by 1cm, drop the car back down and have a visual look (or even better, use a spirit level across the wheel to see if you have less camber than before. You still want something like 1.5 for road use. Alternatively, if you have adjustable rear ride height (I assume you do if you have extreme camber wear), raise the suspension back to standard height until you can get it all aligned properly. Finally, keep in mind that wear on the inside of the tyre can be for incorrect toe, not just camber
    • I know I have to get a wheel alignment but until then I just need to bring the rear tyres in a bit they're wearing to the belt on the inside and brand new on the outside edge. I did shorten the arms a bit but got it wrong now after a few klms the Slip and VDC lights come on. I'd just like to get it to a point where I can drive for another week or two before getting an alignment. I've had to pay a lot of other stuff recently so doing it myself is my only option 
×
×
  • Create New...