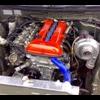
Jump to content
SAU Community

Recommended Posts

Hi,

I'll be frank and say this not for an RB series motor, but rather an SR20DET...I have gotten it tuned recently to the current power level however I have a problem with the power band dropping off too much at high RPM...

The current specs for the head are as follows:

Solid lifter conversion - so the ramp rate of the cams are different to the hydrolic type cams..

hks step 3 264 inlet cam

hks step 3 272 exhaust cam

1mm oversized exhaust valves

HKS valve springs - coil bind is not an issue - its been checked and came up good

The turbo is a modified Apexi RX6 unit with a bigger compressor wheel, .80 A/R exhaust turbine with 67mm exhaust wheel...so it should not be dopping off boost or power top end wise...

Now the cam gears are currently set on 4 deg advanced on the inlet and 3 deg retard on the exhaust, i just took pretty much a stab in the dark with these settings...

The boost controller is an AVCR and I have no idea why the boost curve looks like that... :S

With this current power i ran a 13.1@125mph recently at willowbank with a 2.5 60 foot... :S

What would you guys recommend i change the cam gears to to get my power curve to keep on keepin' on...

Here is the dyno printout:

post-5459-1162101787.jpg

Edited by TurbostyleR
Link to comment
https://www.sau.com.au/forums/topic/140888-cam-gear-problem-dyno-graph-inside/
Share on other sites

hey there mate, your boost control has too much sensitivity setting I'd say. Sort that out first as Nismoid suggested. The upper power drop off you see there seems to be fairly typical with the SR20, at least the ones I've seen/tuned on the dyno. Cam lobe center angle seems to be the key with any cam gear tuning.

The tighter the lobe center the better higher RPM flow & therfore torque will be.

Unless you time the cam gears to the crank so you know the lobe center angle to start with, any changes will be a try it and see whats happens affair.

Also can you post your dyno graph showing the torque please as this can be more helpful to see what is going on in the engine and its peak efficency point.

Hope this helps,

Mike

Edited by The Alchemist

Thanks Mike for your comment, much appreciated.

The boost controll issue is going to be taken care off with a bigger wastegate spring as the current one is too small and the avcr duty cycle is pretty much on the limit of where it should be.

I dont have any graphs showing torque unfortunately.

In regards to "tighter the lobe center the better higher RPM flow & therfore torque will be" What do you mean by tight, i dont understand all this lobe center stuff... :S

need a diagram really to properly explain, if you do a search for Cams + "lobe center" on google you will find many sites showing a couple of cams set up with a circle 360 degrees around it and a centerline drawen down the middle of each cam lobe 2 the center of the circle. The angle between the lobe centers becomes an obvious thing.

The smaller (tighter) the angle is the more the cylinder head will tend to flow better at higher RPM. Its to do with the decrease in time allowed for air to pass through the head as RPM increases you see.

This increases the overlap (the time the inlet and exh valve are open for at the same time) which allows more air at higher RPM to pass thru the head. Complicated eh :) Anyway, small changes of a degree or 2 can have a substantial effect on the way the engine produces it torque and where it produces its torque. Using factory cam settings as per the timing marks with adj wheels on zero zero, the lobe centers tend to be too wide at say 114 degrees which is why you read about everyone adv the inlet and ret the exh which tightens the lobe centers and improves turbo response and overall torque. A good thing. The problem is that the other important cam setting is the overall relationship between the cams and the crank. Once you get the best lobe center angle you can move on to the adjusting the inl & exh cam together either advancing or retarding them. This moves the torque curve up the rpm or down the rpm range. All fine tuning but all worth it in the long run. Don't get to keen on the light and mid load tuning either cos this all changes when you change the cam timing and often has to be done again

Mike

Thanks Mike for the explanation I really appreciate it!

I dont think it was losing traction on the dyno, but its a good point, I will put it on another dyno and see if it does the same thing..

On a sidenote I took it to the track tonight as is and reeled off an [email protected] think that dyno reads a little low...

dude thats an impressive mph.

isnt that good for low 10's?

nice one.

Jeremy

Thanks Mike for the explanation I really appreciate it!

I dont think it was losing traction on the dyno, but its a good point, I will put it on another dyno and see if it does the same thing..

On a sidenote I took it to the track tonight as is and reeled off an [email protected] think that dyno reads a little low...

Wheel spin usally happens at max torque point which is well before it starts to loose power, but looking at the mph and the power they deffiently dont match.

Could be a tuning issue possibly a who in the ign map?, also try bringing the intake back to 0deg and leave the ex at -3.

If none of that works then you have a restriction somwere maybe start with basics, exhaust system?

altho in saying that it does hold boost well you just need to turn the F/B Speed down or even turn it off to fix the mountain like boost curve...

By the look of that i would have said that your lobe centres are too tight. You've got to remember that in tightening your lobe centre's your reducing your power band. Also as cameron said you feedback speed is set to high - thats why your boost is oscillating.

Edited by rob82

awesome info guys thanks alot for that its really appreciated...

Im getting a bigger wastegate spring soon so the duty isnt up around the 60s for 1.3bar of boost...

the dyno does read low for my car, i dont know why but my car never reads right on it...on 300rwhp the car ran 124mph trap speeds, and now on 365rwhp im running 130mph trap speeds...

definately cant wait to fix the boost and power band up and go back to the track and crack a 10!

Create an account or sign in to comment

You need to be a member in order to leave a comment

Create an account

Sign up for a new account in our community. It's easy!

Register a new account

Sign in

Already have an account? Sign in here.

Sign In Now


  • Similar Content

  • Latest Posts

    • Any update on this one? did you manage to get it fixed?    i'm having the same issue with my r34 and i believe its to do with the smart entry (keyless) control module but cant be sure without forking out to get a replacement  
    • So this being my first contribution to the SAU forums, I'd like to present and show how I had to solve probably one of the most annoying fixes on any car I've owned: replacing a speedometer (or "speedo") sensor on my newly acquired Series 1 Stagea 260RS Autech Version. I'm simply documenting how I went about to fix this issue, and as I understand it is relatively rare to happen to this generation of cars, it is a gigantic PITA so I hope this helps serve as reference to anyone else who may encounter this issue. NOTE: Although I say this is meant for the 260RS, because the gearbox/drivetrain is shared with the R33 GTR with the 5-speed manual, the application should be exactly the same. Background So after driving my new-to-me Stagea for about 1500km, one night while driving home the speedometer and odometer suddenly stopped working. No clunking noise, no indication something was broken, the speedometer would just stop reading anything and the odometer stopped going up. This is a huge worry for me, because my car is relatively low mileage (only 45k km when purchased) so although I plan to own the car for a long time, a mismatched odometer reading would be hugely detrimental to resale should the day come to sell the car. Thankfully this only occurred a mile or two from home so it wasn't extremely significant. Also, the OCD part of me would be extremely irked if the numbers that showed on my dash doesn't match the actual ageing of the car. Diagnosing I had been in communication with the well renown GTR shop in the USA, U.P.garage up near University Point in Washington state. After some back and forth they said it could be one of two things: 1) The speedometer sensor that goes into the transfer case is broken 2) The actual cluster has a component that went kaput. They said this is common in older Nissan gauge clusters and that would indicate a rebuild is necessary. As I tried to figure out if it was problem #1, I resolved problem #2 by sending my cluster over to Relentless Motorsports in Dallas, TX, whom is local to me and does cluster and ECU rebuilds. He is a one man operation who meticulously replaces every chip, resistor, capacitor, and electronic component on the PCB's on a wide variety of classic and modern cars. His specialty is Lexus and Toyota, but he came highly recommended by Erik of U.P.garage since he does the rebuilds for them on GTR clusters.  For those that don't know, on R32 and R33 GTR gearboxes, the speedometer sensor is mounted in the transfer case and is purely an analog mini "generator" (opposite of an alternator essentially). Based on the speed the sensor spins it generates an AC sine wave voltage up to 5V, and sends that via two wires up to the cluster which then interprets it via the speedometer dial. The signal does NOT go to the ECU first, the wiring goes to the cluster first then the ECU after (or so I'm told).  Problems/Roadblocks I first removed the part from the car on the underside of the transfer case (drain your transfer case fluid/ATF first, guess who found out that the hard way?), and noted the transfer case fluid was EXTREMELY black, most likely never changed on my car. When attempting to turn the gears it felt extremely gritty, as if something was binding the shaft from rotating properly. I got absolutely no voltage reading out of the sensor no matter how fast I turned the shaft. After having to reflow the solder on my AFM sensors based on another SAU guide here, I attempted to disassemble the silicone seal on the back of the sensor to see what happened inside the sensor; turns out, it basically disintegrated itself. Wonderful. Not only had the electrical components destroyed themselves, the magnetic portion on what I thought was on the shaft also chipped and was broken. Solution So solution: find a spare part right? Wrong. Nissan has long discontinued the proper sensor part number 32702-21U19, and it is no longer obtainable either through Nissan NSA or Nissan Japan. I was SOL without proper speed or mileage readings unless I figured out a way to replace this sensor. After tons of Googling and searching on SAU, I found that there IS however a sensor that looks almost exactly like the R33/260RS one: a sensor meant for the R33/R34 GTT and GTS-T with the 5 speed manual. The part number was 25010-21U00, and the body, plug, and shaft all looked exactly the same. The gear was different at the end, but knowing the sensor's gear is held on with a circlip, I figured I could just order the part and swap the gears. Cue me ordering a new part from JustJap down in Kirrawee, NSW, then waiting almost 3 weeks for shipping and customs clearing. The part finally arrives and what did I find? The freaking shaft lengths don't match. $&%* I discussed with Erik how to proceed, and figuring that I basically destroyed the sensor trying to get the shaft out of the damaged sensor from my car. we deemed it too dangerous to try and attempt to swap shafts to the correct length. I had to find a local CNC machinist to help me cut and notch down the shaft. After tons of frantic calling on a Friday afternoon, I managed to get hold of someone and he said he'd be able to do it over half a week. I sent him photos and had him take measurements to match not only the correct length and notch fitment, but also a groove to machine out to hold the retentive circlip. And the end result? *chef's kiss* Perfect. Since I didn't have pliers with me when I picked up the items, I tested the old gear and circlip on. Perfect fit. After that it was simply swapping out the plug bracket to the new sensor, mount it on the transfer case, refill with ATF/Nissan Matic Fluid D, then test out function. Thankfully with the rebuilt cluster and the new sensor, both the speedometer and odometer and now working properly!   And there you have it. About 5-6 weeks of headaches wrapped up in a 15 minute photo essay. As I was told it is rare for sensors of this generation to die so dramatically, but you never know what could go wrong with a 25+ year old car. I HOPE that no one else has to go through this problem like I did, so with my take on a solution I hope it helps others who may encounter this issue in the future. For the TL;DR: 1) Sensor breaks. 2) Find a replacement GTT/GTS-T sensor. 3) Find a CNC machinist to have you cut it down to proper specs. 4) Reinstall then pray to the JDM gods.   Hope this guide/story helps anyone else encountering this problem!
    • So this being my first contribution to the SAU forums, I'd like to present and show how I had to solve probably one of the most annoying fixes on any car I've owned: replacing a speedometer (or "speedo") sensor on my newly acquired Series 1 Stagea 260RS Autech Version. I'm simply documenting how I went about to fix this issue, and as I understand it is relatively rare to happen to this generation of cars, it is a gigantic PITA so I hope this helps serve as reference to anyone else who may encounter this issue. NOTE: Although I say this is meant for the 260RS, because the gearbox/drivetrain is shared with the R33 GTR with the 5-speed manual, the application should be exactly the same. Background So after driving my new-to-me Stagea for about 1500km, one night while driving home the speedometer and odometer suddenly stopped working. No clunking noise, no indication something was broken, the speedometer would just stop reading anything and the odometer stopped going up. This is a huge worry for me, because my car is relatively low mileage (only 45k km when purchased) so although I plan to own the car for a long time, a mismatched odometer reading would be hugely detrimental to resale should the day come to sell the car. Thankfully this only occurred a mile or two from home so it wasn't extremely significant. Also, the OCD part of me would be extremely irked if the numbers that showed on my dash doesn't match the actual ageing of the car. Diagnosing I had been in communication with the well renown GTR shop in the USA, U.P.garage up near University Point in Washington state. After some back and forth they said it could be one of two things: 1) The speedometer sensor that goes into the transfer case is broken 2) The actual cluster has a component that went kaput. They said this is common in older Nissan gauge clusters and that would indicate a rebuild is necessary. As I tried to figure out if it was problem #1, I resolved problem #2 by sending my cluster over to Relentless Motorsports in Dallas, TX, whom is local to me and does cluster and ECU rebuilds. He is a one man operation who meticulously replaces every chip, resistor, capacitor, and electronic component on the PCB's on a wide variety of classic and modern cars. His specialty is Lexus and Toyota, but he came highly recommended by Erik of U.P.garage since he does the rebuilds for them on GTR clusters.  For those that don't know, on R32 and R33 GTR gearboxes, the speedometer sensor is mounted in the transfer case and is purely an analog mini "generator" (opposite of an alternator essentially). Based on the speed the sensor spins it generates an AC sine wave voltage up to 5V, and sends that via two wires up to the cluster which then interprets it via the speedometer dial. The signal does NOT go to the ECU first, the wiring goes to the cluster first then the ECU after (or so I'm told).  Problems/Roadblocks I first removed the part from the car on the underside of the transfer case (drain your transfer case fluid/ATF first, guess who found out that the hard way?), and noted the transfer case fluid was EXTREMELY black, most likely never changed on my car. When attempting to turn the gears it felt extremely gritty, as if shttps://imgur.com/6TQCG3xomething was binding the shaft from rotating properly. After having to reflow the solder on my AFM sensors based on another SAU guide here, I attempted to disassemble the silicone seal on the back of the sensor to see what happened inside the sensor; turns out, it basically disintegrated itself. Wonderful. Not only had the electrical components destroyed themselves, the magnetic portion on what I thought was on the shaft also chipped and was broken. Solution So solution: find a spare part right? Wrong. Nissan has long discontinued the proper sensor part number 32702-21U19, and it is no longer obtainable either through Nissan NSA or Nissan Japan. I was SOL without proper speed or mileage readings unless I figured out a way to replace this sensor. After tons of Googling and searching on SAU, I found that there IS however a sensor that looks almost exactly like the R33/260RS one: a sensor meant for the R33/R34 GTT and GTS-T with the 5 speed manual. The part number was 25010-21U00, and the body, plug, and shaft all looked exactly the same. The gear was different at the end, but knowing the sensor's gear is held on with a circlip, I figured I could just order the part and swap the gears. Cue me ordering a new part from JustJap down in Kirrawee, NSW, then waiting almost 3 weeks for shipping and customs clearing. The part finally arrives and what did I find? The freaking shaft lengths don't match. $&%* I discussed with Erik how to proceed, and figuring that I basically destroyed the sensor trying to get the shaft out of the damaged sensor from my car. we deemed it too dangerous to try and attempt to swap shafts to the correct length. I had to find a local CNC machinist to help me cut and notch down the shaft. After tons of frantic calling on a Friday afternoon, I managed to get hold of someone and he said he'd be able to do it over half a week. I sent him photos and had him take measurements to match not only the correct length and notch fitment, but also a groove to machine out to hold the retentive circlip. And the end result? *chef's kiss* Perfect. Since I didn't have pliers with me when I picked up the items, I tested the old gear and circlip on. Perfect fit. After that it was simply swapping out the plug bracket to the new sensor, mount it on the transfer case, refill with ATF/Nissan Matic Fluid D, then test out function. Thankfully with the rebuilt cluster and the new sensor, both the speedometer and odometer and now working properly!   And there you have it. About 5-6 weeks of headaches wrapped up in a 15 minute photo essay. As I was told it is rare for sensors of this generation to die so dramatically, but you never know what could go wrong with a 25+ year old car. I HOPE that no one else has to go through this problem like I did, so with my take on a solution I hope it helps others who may encounter this issue in the future. For the TL;DR: 1) Sensor breaks. 2) Find a replacement GTT/GTS-T sensor. 3) Find a CNC machinist to have you cut it down to proper specs. 4) Reinstall then pray to the JDM gods.   Hope this guide/story helps anyone else encountering this problem!
    • perhaps i should have mentioned, I plugged the unit in before i handed over to the electronics repair shop to see what damaged had been caused and the unit worked (ac controls, rear demister etc) bar the lights behind the lcd. i would assume that the diode was only to control lighting and didnt harm anything else i got the unit back from the electronics repair shop and all is well (to a point). The lights are back on and ac controls are working. im still paranoid as i beleive the repairer just put in any zener diode he could find and admitted asking chatgpt if its compatible   i do however have another issue... sometimes when i turn the ignition on, the climate control unit now goes through a diagnostics procedure which normally occurs when you disconnect and reconnect but this may be due to the below   to top everything off, and feel free to shoot me as im just about to do it myself anyway, while i was checking the newly repaired board by plugging in the climate control unit bare without the housing, i believe i may have shorted it on the headunit surround. Climate control unit still works but now the keyless entry doesnt work along with the dome light not turning on when you open the door. to add to this tricky situation, when you start the car and remove the key ( i have a turbo timer so car remains on) the keyless entry works. the dome light also works when you switch to the on position. fuses were checked and all ok ive deduced that the short somehow has messed with the smart entry control module as that is what controls the keyless entry and dome light on door opening   you guys wouldnt happen to have any experience with that topic lmao... im only laughing as its all i can do right now my self diagnosed adhd always gets me in a situation as i have no patience and want to get everything done in shortest amount of time as possible often ignoring crucial steps such as disconnecting battery when stuffing around with electronics or even placing a simple rag over the metallic headunit surround when placing a live pcb board on top of it   FML
    • Bit of a pity we don't have good images of the back/front of the PCB ~ that said, I found a YT vid of a teardown to replace dicky clock switches, and got enough of a glimpse to realize this PCB is the front-end to a connected to what I'll call PCBA, and as such this is all digital on this PCB..ergo, battery voltage probably doesn't make an appearance here ; that is, I'd expect them to do something on PCBA wrt power conditioning for the adjustment/display/switch PCB.... ....given what's transpired..ie; some permutation of 12vdc on a 5vdc with or without correct polarity...would explain why the zener said "no" and exploded. The transistor Q5 (M33) is likely to be a digital switching transistor...that is, package has builtin bias resistors to ensure it saturates as soon as base threshold voltage is reached (minimal rise/fall time)....and wrt the question 'what else could've fried?' ....well, I know there's an MCU on this board (display, I/O at a guess), and you hope they isolated it from this scenario...I got my crayons out, it looks a bit like this...   ...not a lot to see, or rather, everything you'd like to see disappears down a via to the other side...base drive for the transistor comes from somewhere else, what this transistor is switching is somewhere else...but the zener circuit is exclusive to all this ~ it's providing a set voltage (current limited by the 1K3 resistor R19)...and disappears somewhere else down the via I marked V out ; if the errant voltage 'jumped' the diode in the millisecond before it exploded, whatever that V out via feeds may have seen a spike... ....I'll just imagine that Q5 was switched off at the time, thus no damage should've been done....but whatever that zener feeds has to be checked... HTH
×
×
  • Create New...