Jump to content
SAU Community

Recommended Posts

Ok.

The turbo is now in and running. Getting the stock turbo off took me 50min and was an easy task. When looking at the oil feed line I decided it was best left to a hose doctor So off to pirtek and I had this made up.

100_1185.jpg

100_1184.jpg

Speedflow fittings and braided stainless was used and all up coost less than $80. The internal diameter of the line and fittings are 6mm! perfect ;) Also had to drill out the restrictor in the bolt from the block to the oil line.

With the new line made up, a handfull of new copper washers, 6 hi tensile new turbo to dump bolts, an oil filter and motul turbo light 4100 I headded home.

First issue I expected and that was the RB25 turbo does not have a nipple for boost pressure so I tapped one into the piping.

Test fitted the turbo to find the compressor housing needed to be rotated about 1cm as it was fowling on the exhaust manifold heat shield. once that was sorted it was a bolt on operation as you'd expect once all back together and oil and water changed, I started the car and let it idle for 10 min as per Aarons instructions.

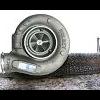
Here are some comparison photos showing a stock RB20 turbo compared to the hiflow. Do you like the nice caked on oil? mmm dirty turbo

100_1188.jpg

100_1187.jpg

100_1186.jpg

I warmed the car up and drove for 20km with no boost and with the actuator set to 7psi and haven't driven it hard yet as it needs the injectors put in and the tune done. Injectors will go in tomorrow and tune on wednesday.

So far happy with the results. it is quite laggy at the moment. starts boosting at 2400 rpm and 7psi at 3800. keep in mind this is without tune. I am hoping to run 17psi and have full boost by around 4000rpm.

Will keep you all updated :rofl:

Edited by CEF11E
  • Replies 231
  • Created
  • Last Reply

Top Posters In This Topic

i went out to mallala last night for drift prac with the new turbo on my 32 4 door. I have to say its pretty bloody good, its got a fair wack of power in 3rd gear right where i want it. However i was experiencing some lag issues.

All in all im pretty impressed with the turbo, with a propper tune on the dyno, i reckon i can get some more responce, earlier spooling and even more power.

Few questions for you simon.

Where is your usable power band in 2nd and 3rd Simon?. Also what is your "seat of the pants dyno" tell you.

Did you have any problem getting a seal on the oil supply to the turbo. You know how the surface of the carteridge has been machined and has slight striations on the surface? The copper washers I am using are sealing but these is a really tiny leak of about 3 drops of oil beading around the edge of the washer.

Took the car out thus morning but it was wet so couldnt give it any stick.

I was going to put the gtr injectors in and road tune it today but I don't have a wideband here and its too wet for road tune :)

Do you have a copy of the map you are currently using? can I have a look at it :/. What are your supporting mods?

Cheers :P

Hey mate!

powerband is from 4000 rpm til limiter, turbo takes a little while to spool but once its up to around 4000 it hammers from then on. Seat of the pants tells me around 190-200 rwkw's using my ceffy as a comparison, that had 200 rwkw and feels the same.

Copper washer's were hard to seal yes, i should have got some new ones from my work but the didnt have any that size. so i reused the old ones and did the bolt up tight, ran the car and it started leaking so while it was idling i tightened it up until it stopped leaking (this was 1/4 of a turn more thenw hat i had)

Jeff from the speed lab did my tune and he has my map as a copy, however this is my cefiro remap and is not suited to this turbo, it was mapped for my KKR. they are not the same really. Im getting a full tune sometime soon!

I have exhaust, cooler, and.. thats it :) 210-220 rwkw is my aim.

Thanks Simon.

Yep same for me with the oil line, just tightened it and its now fine. just tighter than usual.

boost seems to be starting around 2400rpm and possibly full noise at 4000rpm butI am not keen to give it a boot yet.

Also, Cefiro's use 27C128 eproms and Skylines use 27C256. did you just put the cefiro eprom in the skyline ecu or did you stack it and write it to a 27C256? or are you using the crff ecu in the R32?

Carefull.. there are some differences between R32's and cefiros :) AFM's are different and the temp sender is in a different location in the eprom :/

Edited by CEF11E

And both of you are using the RB25 highflow?

I noticed in the pics your running the r33 comp cover not the smaller 16v rb20 comp cover. The same goes for the turbine housing I'd imagine?

i am using the cefiro map burnt onto a R32 ecu eprom.

Cubes: yeah i ordered tghe rb25 highflow with the stage 3 wheel. My understanding is that the smaller comp cover wont fit the larger wheels used hence the need for the 25 covers, even then they are machined out.

less resonsive then the KKR atm, thats because mines not yet tuned for it. So once its properly tuned we'll see how it goes.however it makes a stack more top end!

Yep I am using the RB25 hiflow too. The only thing retained are the housings. the rest is all new.

The rb20 hiflow would be a bit quicker to spool but my logic was I can get 190rwkw from a stock rb25 turbo and that is close to what the rb20 hiflow would put out so I didn't really see it as much of an upgrade.

so I decided to go for the RB25 hiflow. driving normally is fine. It does not feel completly dead like a rb20 usually does with a huge turbo as these it posative manifold pressure from 2400rpm so most of the time boost is just a tap away.

Looking forward to getting the car to the drags as soon as its all tuned.

I took the original oil line and banjo bolts and asked them to modify the line. The guy told me that it wouldn't cost that much to make up a stainless one with the same banjos.

They are speedflow fittings and can be found everywhere that stocks speedflow. there are 2 parts to each end. A hose tail with female threadded insert and a banjo with male threadded insert.

The hose it braided stainless and comes on a roll and is just cut to size. then you slide the collett and olive over the braid and then push the tail of the fitting between the stainless braid and the inner line. then screw it all together. It took the guy about 5 min to match all the fittings and about 5 to screw it all together. no brazing or anything involved and it is rated to over 1000psi and hundreds of degrees

If you get all the bits from pirtek you don't get charged labour. so it will only cost you about $80. plus they have all different types of tail ends to suit any turbo.

that braided oil line... how much exactly and what would i needa say to get one for a rb25det? id like to get one of these instead of drilling things out.

So far happy with the results. it is quite laggy at the moment. starts boosting at 2400 rpm and 7psi at 3800. keep in mind this is without tune. I am hoping to run 17psi and have full boost by around 4000rpm.

I dont think you will be able to pick up an extra 10psi in a 200rpm jump even with a really good tune.

Anway good luck with it looks very nice.

Create an account or sign in to comment

You need to be a member in order to leave a comment

Create an account

Sign up for a new account in our community. It's easy!

Register a new account

Sign in

Already have an account? Sign in here.

Sign In Now


  • Similar Content

  • Latest Posts

    • From there, it is really just test and assemble. Plug the adapter cables from the unit into the back of the screen, then the other side to the car harness. Don't forget all the other plugs too! Run the cables behind the unit and screw it back into place (4 screws) and you should now have 3 cables to run from the top screen to the android unit. I ran them along the DS of the other AV units in the gap between their backets and the console, and used some corrugated tubing on the sharp edges of the bracket so the wires were safe. Plug the centre console and lower screen in temporarily and turn the car to ACC, the AV should fire up as normal. Hold the back button for 3 sec and Android should appear on the top screen. You need to set the input to Aux for audio (more on that later). I put the unit under the AC duct in the centre console, with the wifi antenna on top of the AC duct near the shifter, the bluetooth antenna on the AC duct under the centre console The GPS unit on top of the DS to AC duct; they all seem to work OK there are are out of the way. Neat cable routing is a pain. For the drive recorder I mounted it near the rear view mirror and run the cable in the headlining, across the a pillar and then down the inside of the a pillar seal to the DS lower dash. From there it goes across and to one USB input for the unit. The second USB input is attached to the ECUtec OBD dongle and the 3rd goes to the USB bulkhead connected I added in the centre console. This is how the centre console looks "tidied" up Note I didn't install the provided speaker, didn't use the 2.5mm IPod in line or the piggyback loom for the Ipod or change any DIP switches; they seem to only be required if you need to use the Ipod input rather than the AUX input. That's it, install done, I'll follow up with a separate post on how the unit works, but in summary it retains all factory functions and inputs (so I still use my phone to the car for calls), reverse still works like factory etc.
    • Place the new daughterboard in the case and mount it using the 3 small black rivets provided, and reconnect the 3 factory ribbon cables to the new board Then, use the 3 piggyback cables from the daughterboard into the factory board on top (there are stand offs in the case to keep them apart. and remember to reconnect the antenna and rear cover fan wires. 1 screw to hold the motherboard in place. Before closing the case, make a hole in the sticker covering a hole in the case and run the cable for the android unit into the plug there. The video forgot this step, so did I, so will you probably. Then redo the 4 screws on back, 2 each top and bottom, 3 each side and put the 2 brackets back on.....all ready to go and not that tricky really.      
    • Onto the android unit. You need to remove the top screen because there is a daughterboard to put inside the case. Each side vent pops out from clips; start at the bottom and carefully remove upwards (use a trim remover tool to avoid breaking anything). Then the lower screen and controls come out, 4 screws, a couple of clips (including 3 flimsy ones at the top) and 3 plugs on the rear. Then the upper screen, 4 screws and a bunch of plugs and she is out. From there, remove the mounting brackets (2 screws each), 4 screws on the rear, 2 screws top and bottom and 3 screws holding in the small plates on each side. When you remove the back cover (tight fit), watch out for the power cable for the fan, I removed it so I could put the back aside. The mainboard is held in by 1 screw in the middle, 1 aerial at the top and 3 ribbon cables. If you've ever done any laptop stuff the ribbon cables are OK to work with, just pop up the retainer and they slide out. If you are not familiar just grab a 12 year old from an iphone factory, they will know how it works The case should now look like this:
    • Switching the console was tricky. First there were 6 screws to remove, and also the little adapter loom and its screws had to come out. Also don't forget to remove the 2 screws holding the central locking receiver. Then there are 4 clips on either side....these were very tight in this case and needed careful persuading with a long flat screw driver....some force required but not enough to break them...this was probably the fiddliest part of the whole job. In my case I needed both the wiring loom and the central locking receiver module to swap across to the new one. That was it for the console, so "assembly is the reverse of disassembly"
    • But first....while I was there, I also swapped across the centre console box for the other style where the AV inputs don't intrude into the (very limited !) space.  Part# was 96926-4GA0A, 284H3-4GA0B, 284H3-4GA0A. (I've already swapped the top 12v socket for a USB bulkhead in this pic, it fit the hole without modification:) Comparison of the 2: Basically to do the console you need to remove the DS and PS side console trim (they slide up and back, held in by clips only) Then remove the back half of the console top trim with the cupholders, pops up, all clips again but be careful at the front as it is pretty flimsy. Then slide the shifter boot down, remove the spring clip, loose it forever somewhere in the car the pull the shift knob off. Remove the tiny plastic piece on DS near "P" and use something thin and long (most screwdrivers won't fit) to push down the interlock and put the shifter down in D for space. There is one screw at the front, then the shifter surround and ashtray lift up. There are 3 or 4 plugs underneath and it is off. Next is the rear cover of the centre console; you need to open the console lid, pop off the trim covering the lid hinge and undo the 2rd screw from the driver's side (the rest all need to come out later so you can do them all now and remove the lid) Then the rear cover unclips (6 clips), start at the top with a trim tool pulling backwards. Once it is off there are 2 screws facing rearwards to remove (need a short phillips for these) and you are done with the rear of the console. There are 4 plugs at the A/V box to unclip Then there are 2 screws at the front of the console, and 2 clips (pull up and back) and the console will come out.
×
×
  • Create New...