Jump to content
SAU Community

Recommended Posts

Watup g dogs,

had a set of d2 s13 coilies on my ceffy now for yonks.

had them installed by pedders, no bull! and they said they wound them up as high as they can go and the car was only cms from the ground.

anyway, iv put up with it for months and months now and iv decided to ask the question:

if you have d2 s13 coilovers on your taxi, can they be wound up any further or do u have the same problems?

Cal.

(Grove St. 4 Lyfe!)

Link to comment
https://www.sau.com.au/forums/topic/145426-lowness/
Share on other sites

The problem (more of an advantage IMO :D ) is stock S13 struts are shorter than C33/A31 to begin with, wich in turn means your ceff will be lower than a s13 when the coilovers are set at any given height.. I wouldn't trust pedders word btw, they specialize in putting king springs in VL commo's.

Link to comment
https://www.sau.com.au/forums/topic/145426-lowness/#findComment-2718365
Share on other sites

whats the problem? front or rear?

IF they are base adjustable?

for front

jack car up

wheel off

crack the locking ring

undo 2 bolts at bottom of strut

and wind the base to make the strut longer

for rear

almost exactly the same, except there is only one bolt at base of strut

(there is another way to do it by simply cracking the base of the locking rings, and using a c-spanner to adjust, but unsure of your knowledge and how good my explanation would be; so this way (above) may be easiest to do.)

IF they are not base adjustable, and height is adjusted by changing the preload of the spring simply use the C-spanner on the locking rings to adjust (lengthen/shorten) the coilover rideheight. You do not need to undo any bolts, just remove the wheel.

good luck :D

Link to comment
https://www.sau.com.au/forums/topic/145426-lowness/#findComment-2718589
Share on other sites

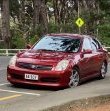
yeah - that sounds similar to mine at the back-end of the car... the locking rings are as high as they will go at the moment, and my car is sitting really really low!

I reckon that being so low looks good, but I do have problems since I can't get over the speed-bump into my apartment complex without the car bottoming-out, and the last time I went to the drive-through carwash I got stuck! :D

Edited by AlcoholicA
Link to comment
https://www.sau.com.au/forums/topic/145426-lowness/#findComment-2718715
Share on other sites

Yonks? Peddlers? what?

if there as high as they will go and for some odd reason you want them higher you might want to try to locate a set of helper-springs.

Eibach%20helper.jpg

stick a set of these in there i had the same problem... good to go now... running 12k and 10k shorties on S13 JIC's incase your wondering...

Edited by 4DoorWhore
Link to comment
https://www.sau.com.au/forums/topic/145426-lowness/#findComment-2719292
Share on other sites

my ISC's and my old HSD's were both S13 type and the car was low, but never had the problems you guys are talking about, so maybe just suss the adjustment.

if its base adjustable

set your preloads as much as you can by hand then use the C spanner to tighten it up a little more. this way the spring wont be loose over bumps etc. you dont wont it too tight, otherwise it would not be serving the purpose at the actual spring rate. (eg 8kg spring overtightened 'may' be more like 12k etc...).

then measure up make sure other 3 are the same preload, and then adjust the base for the height.

simplest way is to start from scratch with all 4 of them out. that way you can measure each one has the same preload and the height adjustments are the same.

if you want me to talk more just ask :)

Link to comment
https://www.sau.com.au/forums/topic/145426-lowness/#findComment-2721009
Share on other sites

hey huddy, common misconception about the preload there. an 8kg spring wound up 1mm or 100mm on preload is still an 8kg spring, as it takes the same amount og force to move it 1mm or 100 mm. the rate of the spring does not change.

All its for is as you said, keeping it captive.

Link to comment
https://www.sau.com.au/forums/topic/145426-lowness/#findComment-2721580
Share on other sites

yeah but if you wind the f**k out of it, (as i had to do with some tanabe coilovers which weren't base adjustable in the sil80) the spring isnt slightly compressed, but instead its hugely compressed; giving it less room to expand and close... therefore it isnt working how it is intended (for that rate) as it is in a smaller area.

just what i'm thinking in my head anyway :S

edit*** - yep simon knows what i mean so i'll add this if anyone gets confused

i didnt mean you can adjust spring rates by more preload.

Edited by huddy
Link to comment
https://www.sau.com.au/forums/topic/145426-lowness/#findComment-2721941
Share on other sites

Create an account or sign in to comment

You need to be a member in order to leave a comment

Create an account

Sign up for a new account in our community. It's easy!

Register a new account

Sign in

Already have an account? Sign in here.

Sign In Now


  • Similar Content

  • Latest Posts

    • Can I suggest you try EBC directly again and link them to as many competitor catalogues as you can to show their listing is incorrect, eg https://dba.com.au/product/front-4000-series-hd-brake-rotor-dba42304/ If you have access to an R33 GTST VIN and your VIN, you could also use a Nissan Parts lookup like Amayama to show them the part number is different between 33 GTST and 34 GTT which may get their attention
    • So i got reply from EBC and they just this site where you can clearly see those 296mm fronts on R34 GTT. I send them photos and "quotes" that 296mm are not for 34 GTT and they are too small. But it will be very hard to return them cuz nobody here knows 100% and they just copy those EBC catalogue :-D https://ebcbrakesdirect.com/automotive/nissan/skyline-r34
    • Hi, is the HKS  Tower Bar still available ? negotiable ? 🤔
    • From there, it is really just test and assemble. Plug the adapter cables from the unit into the back of the screen, then the other side to the car harness. Don't forget all the other plugs too! Run the cables behind the unit and screw it back into place (4 screws) and you should now have 3 cables to run from the top screen to the android unit. I ran them along the DS of the other AV units in the gap between their backets and the console, and used some corrugated tubing on the sharp edges of the bracket so the wires were safe. Plug the centre console and lower screen in temporarily and turn the car to ACC, the AV should fire up as normal. Hold the back button for 3 sec and Android should appear on the top screen. You need to set the input to Aux for audio (more on that later). I put the unit under the AC duct in the centre console, with the wifi antenna on top of the AC duct near the shifter, the bluetooth antenna on the AC duct under the centre console The GPS unit on top of the DS to AC duct; they all seem to work OK there are are out of the way. Neat cable routing is a pain. For the drive recorder I mounted it near the rear view mirror and run the cable in the headlining, across the a pillar and then down the inside of the a pillar seal to the DS lower dash. From there it goes across and to one USB input for the unit. The second USB input is attached to the ECUtec OBD dongle and the 3rd goes to the USB bulkhead connected I added in the centre console. This is how the centre console looks "tidied" up Note I didn't install the provided speaker, didn't use the 2.5mm IPod in line or the piggyback loom for the Ipod or change any DIP switches; they seem to only be required if you need to use the Ipod input rather than the AUX input. That's it, install done, I'll follow up with a separate post on how the unit works, but in summary it retains all factory functions and inputs (so I still use my phone to the car for calls), reverse still works like factory etc.
    • Place the new daughterboard in the case and mount it using the 3 small black rivets provided, and reconnect the 3 factory ribbon cables to the new board Then, use the 3 piggyback cables from the daughterboard into the factory board on top (there are stand offs in the case to keep them apart. and remember to reconnect the antenna and rear cover fan wires. 1 screw to hold the motherboard in place. Before closing the case, make a hole in the sticker covering a hole in the case and run the cable for the android unit into the plug there. The video forgot this step, so did I, so will you probably. Then redo the 4 screws on back, 2 each top and bottom, 3 each side and put the 2 brackets back on.....all ready to go and not that tricky really.      
×
×
  • Create New...