
Announcements
-
Similar Content
-
-
Latest Posts
-
 Someone already beat them to it and made a billet rb26 head and had it on display at gtr fest
 -
 These are those $13,990 Excels from 1997 right? They were flimsy when they were brand new 🙂..... The work those guys did on that car to make it as safe as it was in that incident is phenomenal.
 -

By funkymonkey · Posted
I frikkin love that Hyundai Excel racing class. So much fun. Thank god for the roll cage. That could’ve ended very differently. -
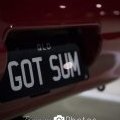
 If you have the factory number plate frames front and rear, the JDM plates will bolt straight on
 -
 Wiring is finally nearing completion! Gotta feed the wideband and boost soli into the cab and pin it up inside then i can start on the incab i/o wiring which just needs to be crimped into a deutsch. Tidy up and start putting the interior back together, get a new battery and plumb the surge tank back up then I can fill fluids and start testing all my I/O and can setup between the Link and TCU.
-


Recommended Posts
Create an account or sign in to comment
You need to be a member in order to leave a comment
Create an account
Sign up for a new account in our community. It's easy!
Register a new accountSign in
Already have an account? Sign in here.
Sign In Now