Jump to content
SAU Community

Recommended Posts

  • Replies 199
  • Created
  • Last Reply

Top Posters In This Topic

Top Posters In This Topic

Posted Images

posted in the deca thread - reprinted for your enjoyment here :stupid:

-----------------

DECA ftw

Team Budget Hatch gearbox ftl!!!

Made it home with 1st, 3rd and 5th though :laughing-smiley-014:

thanks for a top day and huge thanks to the lads who let me drive their cars when my g/box lunched itself (with the Taco King himself in the car!)

Link to comment
https://www.sau.com.au/forums/topic/168413-deca-review/#findComment-3113069
Share on other sites

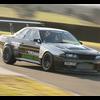
pushing justins car....

justin.jpg

Pushing Dezz's car....

dezz.jpg

It's funny cos their both going to cry when they see this post :stupid:

Good day though as always! Hopefully i'll have my car ready for the next one!

Poor bastards, both dont have much luck with their cars.

Link to comment
https://www.sau.com.au/forums/topic/168413-deca-review/#findComment-3113075
Share on other sites

Firstly, thank you to everyone who participated and spectated. These event are organised for everyone to enjoy and to give their cars an absolute caning under a controlled environment without the fear of causing any serious damage to themselves or others.

Secondly, special thanks must go to Snowy and Chris for planning such a great event! Thanks also to everyone who helped out on the day including all the marshals, Team BBQ (not Ash) and everyone else who took time out of their schedules to come up and assist in making the day run so smoothly.

Thirdly, thanks to Team NSW for making the long haul down to Vic to join in the fun! We hope you had a ball and enjoy the Sat festivities which is Taco Baz and anything which happened afterwards. Just remember kids, GPS doesn't know everything... :pwned::nyaanyaa: Have a safe trip home!

I have to give personal thanks to Snowy for giving me the trademark "Snowy 2 min lesson in handbraking" as this helped immensely in making my day so much more enjoyable! I think I've almost got it right now and the understeering pig which is my car has transformed itself into an awesome machine! It's amazing how much a couple minutes of tuition from someone who knows what they're doing can do to make you a better driver!

All I need to do is make the car more responsive down low (without spending heaps of $$$ on a new turbo).

Aaron, good to see you made it home ok. 3 out of 5 forward gears is plenty ;)

Can't wait to see some pics, vids and results!!

Link to comment
https://www.sau.com.au/forums/topic/168413-deca-review/#findComment-3113144
Share on other sites

posted in the deca thread - reprinted for your enjoyment here :pwned:

-----------------

DECA ftw

Team Budget Hatch gearbox ftl!!!

Made it home with 1st, 3rd and 5th though :laughing-smiley-014:

thanks for a top day and huge thanks to the lads who let me drive their cars when my g/box lunched itself (with the Taco King himself in the car!)

Ouch Az! What happened and where??

Time for a DCCD in teh SuperFunHappyRacingHatch! :nyaanyaa:

Link to comment
https://www.sau.com.au/forums/topic/168413-deca-review/#findComment-3113213
Share on other sites

Big thanks to everyone that came and made the day so enjoyable for all. It was in my opinion one of the best DECA's we've had.

The new format worked great and meant we were never rushed for time but I don't think anyone feels they missed out with the missing practise run. The afternoon battle format was definitely great.

A big thanks of course go to everyone that helped out on the day. It really is appreciated that we have more and more of our regulars putting up their hands and helping out for parts of the day.

I must also thank everyone that looked after our special guests from NSW and the staff from Taco Bill's that came down during the day. I've said it before but it's the friendly accommodating nature that makes these days so great. The other thing that was really great yesterday was the number of people having drives in others cars. This is an experience I'm sure everyone who was involved in appreciates and it's just great that as a club we are so prepared and trusting to allow this kind of thing to happen.

I must say I was probably the biggest example of this yesterday and other than my WRX which I brought up I also had the pleasure of having a run in Jame's EVO, Leewah's GT-R, Fooboy's EVO, Scotsman's GT-R and Ryan's 180. And I had offers from plenty of other for drives in their cars too. So big thanks to everyone that either let me drive or offered their cars - it was great fun.

I can also tell you all on Friday I had the chance to test out some new designs for our August DECA in both full skidpan and battle runs and I think the next DECA may have the best events ever. So we can look forwards to that already.

Cheers

Snowy

Link to comment
https://www.sau.com.au/forums/topic/168413-deca-review/#findComment-3113498
Share on other sites

Create an account or sign in to comment

You need to be a member in order to leave a comment

Create an account

Sign up for a new account in our community. It's easy!

Register a new account

Sign in

Already have an account? Sign in here.

Sign In Now


  • Similar Content

  • Latest Posts

    • Hi, is the HKS  Tower Bar still available ? negotiable ? 🤔
    • From there, it is really just test and assemble. Plug the adapter cables from the unit into the back of the screen, then the other side to the car harness. Don't forget all the other plugs too! Run the cables behind the unit and screw it back into place (4 screws) and you should now have 3 cables to run from the top screen to the android unit. I ran them along the DS of the other AV units in the gap between their backets and the console, and used some corrugated tubing on the sharp edges of the bracket so the wires were safe. Plug the centre console and lower screen in temporarily and turn the car to ACC, the AV should fire up as normal. Hold the back button for 3 sec and Android should appear on the top screen. You need to set the input to Aux for audio (more on that later). I put the unit under the AC duct in the centre console, with the wifi antenna on top of the AC duct near the shifter, the bluetooth antenna on the AC duct under the centre console The GPS unit on top of the DS to AC duct; they all seem to work OK there are are out of the way. Neat cable routing is a pain. For the drive recorder I mounted it near the rear view mirror and run the cable in the headlining, across the a pillar and then down the inside of the a pillar seal to the DS lower dash. From there it goes across and to one USB input for the unit. The second USB input is attached to the ECUtec OBD dongle and the 3rd goes to the USB bulkhead connected I added in the centre console. This is how the centre console looks "tidied" up Note I didn't install the provided speaker, didn't use the 2.5mm IPod in line or the piggyback loom for the Ipod or change any DIP switches; they seem to only be required if you need to use the Ipod input rather than the AUX input. That's it, install done, I'll follow up with a separate post on how the unit works, but in summary it retains all factory functions and inputs (so I still use my phone to the car for calls), reverse still works like factory etc.
    • Place the new daughterboard in the case and mount it using the 3 small black rivets provided, and reconnect the 3 factory ribbon cables to the new board Then, use the 3 piggyback cables from the daughterboard into the factory board on top (there are stand offs in the case to keep them apart. and remember to reconnect the antenna and rear cover fan wires. 1 screw to hold the motherboard in place. Before closing the case, make a hole in the sticker covering a hole in the case and run the cable for the android unit into the plug there. The video forgot this step, so did I, so will you probably. Then redo the 4 screws on back, 2 each top and bottom, 3 each side and put the 2 brackets back on.....all ready to go and not that tricky really.      
    • Onto the android unit. You need to remove the top screen because there is a daughterboard to put inside the case. Each side vent pops out from clips; start at the bottom and carefully remove upwards (use a trim remover tool to avoid breaking anything). Then the lower screen and controls come out, 4 screws, a couple of clips (including 3 flimsy ones at the top) and 3 plugs on the rear. Then the upper screen, 4 screws and a bunch of plugs and she is out. From there, remove the mounting brackets (2 screws each), 4 screws on the rear, 2 screws top and bottom and 3 screws holding in the small plates on each side. When you remove the back cover (tight fit), watch out for the power cable for the fan, I removed it so I could put the back aside. The mainboard is held in by 1 screw in the middle, 1 aerial at the top and 3 ribbon cables. If you've ever done any laptop stuff the ribbon cables are OK to work with, just pop up the retainer and they slide out. If you are not familiar just grab a 12 year old from an iphone factory, they will know how it works The case should now look like this:
    • Switching the console was tricky. First there were 6 screws to remove, and also the little adapter loom and its screws had to come out. Also don't forget to remove the 2 screws holding the central locking receiver. Then there are 4 clips on either side....these were very tight in this case and needed careful persuading with a long flat screw driver....some force required but not enough to break them...this was probably the fiddliest part of the whole job. In my case I needed both the wiring loom and the central locking receiver module to swap across to the new one. That was it for the console, so "assembly is the reverse of disassembly"
×
×
  • Create New...