Jump to content
SAU Community

Recommended Posts

the plenums are very well made, just need a little refining.

i like to retain the metal gasket with the rubber orings. this gasket only came out in series 1s, and you cant get them any more. they hold their shape and seal well. the all rubber gasket moves and gets squeazed out the side. have removed these seals when the metal one was not available and just used a paper gasket with sealer also. this works, but have to discard the studs supplied also.

Too bad about the Plazmaman plenum Stuart, I made a thicker gasket for my plenum (I think it mentioned that in the instructions that came with it?)

Looks like the build is going on very nicely though.

Keep up the good work and look fwd to see how it goes on the black stuff. :laugh:

  • Replies 843
  • Created
  • Last Reply

Top Posters In This Topic

Top Posters In This Topic

Posted Images

I picked up the correct throttle body from Plazmaman last night after Compak Attak and saw that their new plenums have a revised throttle mounting setup that allows enough room for the retaining nuts on either side. They also allow room for the fitting at the back that runs to the brake booster.

if you had of put both his balls in your mouth at the same time he might have given you the better one.......

A bit unprofesional to sell the plenum knowing that there was issues with it, unless it was cheeeeeeep.

Nevertheless, plenum is sorted, sump is also well underway so our work will be done very soon......hope to be finished this week.

sorry, i have broken the one beer rule again..

I picked up the correct throttle body from Plazmaman last night after Compak Attak and saw that their new plenums have a revised throttle mounting setup that allows enough room for the retaining nuts on either side. They also allow room for the fitting at the back that runs to the brake booster.
Edited by BezerkR32

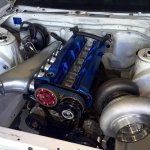
engine assy is in and bolted up. Nothing major to modify, just have to relocate a few minor things, and mount some of the new additions but otherwise all good. Aftermarket balancer is incorrect however and will need to be replaced.

Shoud complete the majority of these things today with exception to the balancer. Thermo fan & shroud will also require fitting as engine fan and factory shtoud no-longer fit.

If more people knew the grief involved before they started there would by way less modified cars out there. Its been almost 12 months of modifing the modifications, hacking, cutting changing, discarding, reaarranging components to get it all to work as a unit. I thought I did my homework but there are so many hidden perils just waiting to bite you on the arse.

The next person that tries to sell me a part and insists it simply "bolts straight on" will have said part rammed up their coit.

THERE IS NO SUCH THING AS A BOLT ON MOD?

Good luck with this build 2rismo and i hope your pain is way less than mine has been. There are quite a few up here keen to see your car run at jambo.

Every single part (or most) on our car has been Jap off the shelf stuff...why?...not because im rich...its because it fits and works everytime.

To Alex's defence...he once sold me a plenum that wasn't right...so the next day drove 6 hrs (3 hrs each way) to fix it.

Every single part (or most) on our car has been Jap off the shelf stuff...why?..

Because it's an RB26.

To Alex's defence...he once sold me a plenum that wasn't right...so the next day drove 6 hrs (3 hrs each way) to fix it.

The backup from the guys at Plazmaman has been great and they've been proactive about quizzing me on what should be improved.

the driveability of the 30/40 is excellent, have fitted this turbo to half a dozen r33s, two auto, the majority of these with standard internalls. adrians with the bigger exhaust housing due to the engine mods and use of gas. you be silly to upgrade to anything smaller. I would seriously consider gt42 if it is a auto race car.

Man my turbo is going to look tiny as a highmount compared to that.Maybe a GT3082 is on the cards :P

all-so finished the pressure side of the oil system, ran hose around radiator and through inline filter on driver-side chassis rail. there is a good 2 meters of -12 hose which eliminates the need for an oil cooler. mounted filter in a bosch fuel pump bracket.

my work is almost done.

Edited by BezerkR32

I opted for the GT3076 .82 as the car will be used mostly for club sprints and motokhana type stuff. Anything bigger and lag would be so annoying in the really tight and twisty sections.

Good to see that motor in though, im dying to get mine in and running.

definately the right choice for your application...

I opted for the GT3076 .82 as the car will be used mostly for club sprints and motokhana type stuff. Anything bigger and lag would be so annoying in the really tight and twisty sections.

Good to see that motor in though, im dying to get mine in and running.

Create an account or sign in to comment

You need to be a member in order to leave a comment

Create an account

Sign up for a new account in our community. It's easy!

Register a new account

Sign in

Already have an account? Sign in here.

Sign In Now


  • Similar Content

  • Latest Posts

    • Even with the piston at TDC there was room for it to drop, but I don't think it can drop fully into the cylinder, the problem you have is that you need something pushing against the valve to hold it up so you have enough room to put the new stem seal on and the spring etc.  I used compressed air only because putting rope in the cylinder seemed a bit risky to me, I know people have done it countless times before like this. Overall it's a pain in the ass job. Honestly you'd probably be better off taking the head off because the risk of dropping something in the engine and the finicky-ness of it all is very stressful. If you are going to attempt it though i 10000% recommend a 36050 valve spring/keeper tool. I had both the traditional lever type and after doing 1 cylinder it was absolute pain to get those valve keepers in place, even with 2 people. That 36050 is amazing, you do have to push hard to get them in place but it works perfectly almost every time. Back to my actual issue I think my engine is just tired and old and the rings have gone bad. The comp numbers (cold, no oil) were: Cyl 1 -129psi Cyl 2 - 133psi Cyl 3 - 138psi Cyl 4 - 137psi Cyl 5 - 157psi Cyl 6 - 142psi   Cylinder 5 and 6 having the most carbon on them.
    • Who did you have do the installation? I actually know someone who is VERY familiar with the AVS gear. The main point of contact though would be your installer.   Where are you based in NZ?
    • Look, realistically, those are some fairly chunky connectors and wires so it is a reasonably fair bet that that loom was involved in the redirection of the fuel pump and/or ECU/ignition power for the immobiliser. It's also fair to be that the new immobiliser is essentially the same thing as the old one, and so it probably needs the same stuff done to make it do what it has to do. Given that you are talking about a car that no-one else here is familiar with (I mean your exact car) and an alarm that I've never heard of before and so probably not many others are familiar with, and that some wire monkey has been messing with it out of our sight, it seems reasonable that the wire monkey should be fixing this.
    • Wheel alignment immediately. Not "when I get around to it". And further to what Duncan said - you cannot just put camber arms on and shorten them. You will introduce bump steer far in excess of what the car had with stock arms. You need adjustable tension arms and they need to be shortened also. The simplest approach is to shorten them the same % as the stock ones. This will not be correct or optimal, but it will be better than any other guess. The correct way to set the lengths of both arms is to use a properly built/set up bump steer gauge and trial and error the adjustments until you hit the camber you need and want and have minimum bump steer in the range of motion that the wheel is expected to travel. And what Duncan said about toe is also very true. And you cannot change the camber arm without also affecting toe. So when you have adjustable arms on the back of a Skyline, the car either needs to go to a talented wheel aligner (not your local tyre shop dropout), or you need to be able to do this stuff yourself at home. Guess which approach I have taken? I have built my own gear for camber, toe and bump steer measurement and I do all this on the flattest bit of concrete I have, with some shims under the tyres on one side to level the car.
    • Thought I would get some advice from others on this situation.    Relevant info: R33 GTS25t Link G4x ECU Walbro 255LPH w/ OEM FP Relay (No relay mod) Scenario: I accidentally messed up my old AVS S5 (rev.1) at the start of the year and the cars been immobilised. Also the siren BBU has completely failed; so I decided to upgrade it.  I got a newer AVS S5 (rev.2?) installed on Friday. The guy removed the old one and its immobilisers. Tried to start it; the car cranks but doesnt start.  The new one was installed and all the alarm functions seem to be working as they should; still wouldn't start Went to bed; got up on Friday morning and decided to have a look into the no start problem. Found the car completely dead.  Charged the battery; plugged it back in and found the brake lights were stuck on.  Unplugging the brake pedal switch the lights turn off. Plug it back in and theyre stuck on again. I tested the switch (continuity test and resistance); all looks good (0-1kohm).  On talking to AVS; found its because of the rubber stopper on the brake pedal; sure enough the middle of it is missing so have ordered a new one. One of those wear items; which was confusing what was going on However when I try unplugging the STOP Light fuses (under the dash and under the hood) the brake light still stays on. Should those fuses not cut the brake light circuit?  I then checked the ECU; FP Speed Error.  Testing the pump again; I can hear the relay clicking every time I switch it to ON. I unplugged the pump and put the multimeter across the plug. No continuity; im seeing 0.6V (ECU signal?) and when it switches the relay I think its like 20mA or 200mA). Not seeing 12.4V / 7-9A. As far as I know; the Fuel Pump was wired through one of the immobiliser relays on the old alarm.  He pulled some thick gauged harness out with the old alarm wiring; which looks to me like it was to bridge connections into the immobilisers? Before it got immobilised it was running just fine.  Im at a loss to why the FP is getting no voltage; I thought maybe the FP was faulty (even though I havent even done 50km on the new pump) but no voltage at the harness plug.  Questions: Could it be he didnt reconnect the fuel pump when testing it after the old alarm removal (before installing the new alarm)?  Is this a case of bridging to the brake lights instead of the fuel pump circuit? It's a bit beyond me as I dont do a lot with electrical; so have tried my best to diagnose what I think seems to make sense.  Seeking advice if theres for sure an issue with the alarm install to get him back here; or if I do infact, need an auto electrician to diagnose it. 
×
×
  • Create New...