Jump to content
SAU Community

Recommended Posts

How exactly is the grunt the problem? Are you sure its not just crap drivers and poorly set up cars?

George isn't that bad of a slider and Im sure the setup of the car has had more work than yours or mine

why is the sr20 most suited motor for drifting ? = torquey midrange good "ark up'd ness" abiltiy when capped at power levels under 300rwkw

(lol i.e the way it ramps up onto boost hard)

check out Trent's SR20 for sale thread speaking about Cat's rb26 you'll see that linear power delivery and lots of downlow torque do not automatically make a D1 car

if slamming a ls1 into a shell made a awesome drift car everyone would be doing it hell the Japanese already would have already been doing it

balance and speed make a good skidder

ps can anyone point me in the direction of some credable ls1 engine and box weight specs?

  • Replies 812
  • Created
  • Last Reply

Top Posters In This Topic

I figured as much funny how ls1's wicked cause its lighter than a rb but when you take the box into account I doubt there's much if any difference between the two engine and gearbox packages

sites Ive found quoting around 200kg for a ls1 complete minus box

err box who knows?

anyway goodluck with it just don't expect it to own all first time out

Edited by 1400r

Box is out so ill weigh it tomorro. PS Whats a R33 5 speed weigh?

I cant remember saying i was building a drift car, the car was originally going to be a drag car, i said i would like to drift in it, as well as do some circuit work

and some skids and drags etc. But in saying that i have been carefull in how the engine was mounted, getting it as low and rearward as posible without sump mods, and have had some help from the Sureflow drift team on basic suspension setup for the amatuer, seeind thats what i am. not looking to win any trophies, just have some fun. I have a go kart 4 winning trophies. Believe it or not, the Japanese are not the be all and end all of motorsport.

Anyway, this is the project i have commited too and the engine is now at the machine shop.

Piston to valve clearance was 65thou with no head gasket, so arount 105thou. this gives us the oportunity to deck around twentyfive thou off to bring the comp up so the small cube V8 will develope more low down torque. Piston to bore clearance was a little excessive at 3 thou but good enough for a race car. Just waiting for a hone then ill slap it together. need all i can find to compete with these SR20s.

George isn't that bad of a slider and Im sure the setup of the car has had more work than yours or mine

why is the sr20 most suited motor for drifting ? = torquey midrange good "ark up'd ness" abiltiy when capped at power levels under 300rwkw

(lol i.e the way it ramps up onto boost hard)

check out Trent's SR20 for sale thread speaking about Cat's rb26 you'll see that linear power delivery and lots of downlow torque do not automatically make a D1 car

if slamming a ls1 into a shell made a awesome drift car everyone would be doing it hell the Japanese already would have already been doing it

balance and speed make a good skidder

ps can anyone point me in the direction of some credable ls1 engine and box weight specs?

Edited by BezerkR32
  • 1 month later...
  • 2 weeks later...

no, only a custom crossmember to suit the box, it is tight though. about 15mm around the top. even the shifter hole is very close. just have to extend it rearwould 20mm.

Car is at my brother in laws getting some minor fab work. mounting the seat, window net, a second side intrusion bar on the drivers side etc. should be finished in a couple of days. The bottom end of the engine is also ready to go, still waiting for the heads though. booked in to get wired in a couple of weeks. clutch should arrive this week.

just from looking at the pics the enigine seems to sit lower than the RB?

also nice work, i would be very interesting in doing this when my little RB goes bang. so there was no changes to the trans tunnel?

i believe the ls1 motor is 50 kilos lighter that the rb... have a dvd at home where there is a twin turbo ls1 in a 34... they call the thing Frankenstein's drifter. it also has the tremec box.... although these days the car actually has a stroked 6.6 litre ls2 with a masive twin turbo set up... but its making boost from 2500 rpm. Good luck with the whole project mate

Rings and bearings, clutch, flywheel and balancer have all arrived. Have taken them all to the machine shop to balance the rotating assy. Once done i can build the bottom end and give Machine shop the deck hight as to machine the heads. Seat is mounted. just on the CAMS website to research the fitment of second side intrusion bar. Once the bar is in we can complete the window net mounting. Also going to recess the floor for the exhaust to run in. All these little bits and pieces are more time consuming than first thought, but getting there. Also have to indent D/S chassis rail for extractor clearance. Have made solid aluminium engine mounts to eliminate engine movement as the drivers side is tight. Trying to organise a painter, have a friend coming to look at it on Friday, so might give the engine bay a lick first, then fit everything so it can go to the electrician. Pretty excited know as i haven't built an engine for myself in over 12 years, its always been for someone else or a customer. just cant wait to hear it. Post some pics soon.

  • 2 weeks later...

Required removal of power steer rack and installation of manual steer rack on my car.

how tight is tight on the drivers side, my car decided to stop on the side of the road, cock it's leg and take a leak, so i might be looking at doing this sooner than i thought

post-20078-1201555861_thumb.jpg

Thats the idea Jas, once this things finished its gone.

Stuart, Stuart, Stuart.................... :ermm:

See what happens when you hang around these drag racing louts.

Get back into circuit racing mate, or at least your go kart.

  • 4 weeks later...
  • 1 month later...

As you can see Adrian has beaten me to the punch but thats his job as a mag editor.

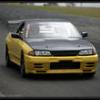
car has had its first cote of paint, should be finished this week. painter is choosing a black for the turret, bonnet and boot. the yellow is vivid yellow off a hyundai of all things.

Thinking of coca cola for the top. still have to get bonnet and boot made. At the end of the day its all money. Picked up some Rays Engineering 17" wheels. Have split them as to have the centres painted and the dish polished. Alot of bolts in those buggers.

After dummying up the bottom end a few weeks ago only to find the main bearings clearances were tight, so sent the block away to have main bearing tunnel honed and crank re-ground. On re-measuring we have found that all is perfect and ready for assembily.

start pushing for my heads now. so all happening. Like to thank Nick from NM Autobody for the quick and thorough paint job.

Edited by BezerkR32

Was lucky enough to come across a gtr alluminium bonnet for a good price from SSS.

Happy as i know it will fit perfect, and know it is a shit load lighter than the GTST unit. So know its just the boot lid which JS Auto Imports is supplying and said to be ready this week. This will be the first time this car has had all the panels fitted sinse i have owned it. Pretty excited know as things are taking shape.

Create an account or sign in to comment

You need to be a member in order to leave a comment

Create an account

Sign up for a new account in our community. It's easy!

Register a new account

Sign in

Already have an account? Sign in here.

Sign In Now


  • Similar Content

  • Latest Posts

    • Hi, is the HKS  Tower Bar still available ? negotiable ? 🤔
    • From there, it is really just test and assemble. Plug the adapter cables from the unit into the back of the screen, then the other side to the car harness. Don't forget all the other plugs too! Run the cables behind the unit and screw it back into place (4 screws) and you should now have 3 cables to run from the top screen to the android unit. I ran them along the DS of the other AV units in the gap between their backets and the console, and used some corrugated tubing on the sharp edges of the bracket so the wires were safe. Plug the centre console and lower screen in temporarily and turn the car to ACC, the AV should fire up as normal. Hold the back button for 3 sec and Android should appear on the top screen. You need to set the input to Aux for audio (more on that later). I put the unit under the AC duct in the centre console, with the wifi antenna on top of the AC duct near the shifter, the bluetooth antenna on the AC duct under the centre console The GPS unit on top of the DS to AC duct; they all seem to work OK there are are out of the way. Neat cable routing is a pain. For the drive recorder I mounted it near the rear view mirror and run the cable in the headlining, across the a pillar and then down the inside of the a pillar seal to the DS lower dash. From there it goes across and to one USB input for the unit. The second USB input is attached to the ECUtec OBD dongle and the 3rd goes to the USB bulkhead connected I added in the centre console. This is how the centre console looks "tidied" up Note I didn't install the provided speaker, didn't use the 2.5mm IPod in line or the piggyback loom for the Ipod or change any DIP switches; they seem to only be required if you need to use the Ipod input rather than the AUX input. That's it, install done, I'll follow up with a separate post on how the unit works, but in summary it retains all factory functions and inputs (so I still use my phone to the car for calls), reverse still works like factory etc.
    • Place the new daughterboard in the case and mount it using the 3 small black rivets provided, and reconnect the 3 factory ribbon cables to the new board Then, use the 3 piggyback cables from the daughterboard into the factory board on top (there are stand offs in the case to keep them apart. and remember to reconnect the antenna and rear cover fan wires. 1 screw to hold the motherboard in place. Before closing the case, make a hole in the sticker covering a hole in the case and run the cable for the android unit into the plug there. The video forgot this step, so did I, so will you probably. Then redo the 4 screws on back, 2 each top and bottom, 3 each side and put the 2 brackets back on.....all ready to go and not that tricky really.      
    • Onto the android unit. You need to remove the top screen because there is a daughterboard to put inside the case. Each side vent pops out from clips; start at the bottom and carefully remove upwards (use a trim remover tool to avoid breaking anything). Then the lower screen and controls come out, 4 screws, a couple of clips (including 3 flimsy ones at the top) and 3 plugs on the rear. Then the upper screen, 4 screws and a bunch of plugs and she is out. From there, remove the mounting brackets (2 screws each), 4 screws on the rear, 2 screws top and bottom and 3 screws holding in the small plates on each side. When you remove the back cover (tight fit), watch out for the power cable for the fan, I removed it so I could put the back aside. The mainboard is held in by 1 screw in the middle, 1 aerial at the top and 3 ribbon cables. If you've ever done any laptop stuff the ribbon cables are OK to work with, just pop up the retainer and they slide out. If you are not familiar just grab a 12 year old from an iphone factory, they will know how it works The case should now look like this:
    • Switching the console was tricky. First there were 6 screws to remove, and also the little adapter loom and its screws had to come out. Also don't forget to remove the 2 screws holding the central locking receiver. Then there are 4 clips on either side....these were very tight in this case and needed careful persuading with a long flat screw driver....some force required but not enough to break them...this was probably the fiddliest part of the whole job. In my case I needed both the wiring loom and the central locking receiver module to swap across to the new one. That was it for the console, so "assembly is the reverse of disassembly"
×
×
  • Create New...