Jump to content
SAU Community

Recommended Posts

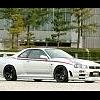
i love the result

the only thing thats been bugging me was the blending of teh side skirt into the rear quarter - it doesnt have the stock look to it, and will make it alot of work if the skirt gets damaged

  • 3 weeks later...
  • Replies 241
  • Created
  • Last Reply

Top Posters In This Topic

Top Posters In This Topic

Posted Images

Great job! Havn't seen any R32.4s with this much time, effort and craftsmanship gone into them.

Only thing I could recommend is trying to pickup a keylock for the boot off eBay?

Doesn't even need to do anything, just fill the hole and make it look complete from the back...

Edited by Pandoraa

"dont forget.. in canada we have the 15 year import rule... so R33's still arnt legal.. we have 5-6 more years before R34's can enter the country"

Jim bob here's why ^^^^

mate i honestly started reading thinking this guys a fool, then when i realised why you couldnt just buy a r34 i was like WOW this guys crazy!!!!! in a good way....

Top conversion man, full props and respect for awesomeness! I bet your lovin it long time :/

  • 2 weeks later...
  • 2 weeks later...

looks great! must admit just read all the pages was amazing

sucks about the 15yr rule but hey, your dedication to skylines is awesome :D

next year when i come to canada im soooo tracking you down to check this car out :)

Edited by Neuroglider
  • 2 weeks later...
  • 5 months later...
  • 4 months later...

Well I see you've already sold it, but I just wanted to say this thread has been a real inspiration for my own 32. I was going to just do the R34 front using the OEM style Bee*R conversion fenders, but after seeing you do the rear too, I'm going to follow in your footsteps. Mine will be pearl white though on white 19" TE37's. I also won't mold in the side skirt the way you did, I like the stock look better. Luckily I am in Japan, so over the next year I am going to be buying up all the used OEM parts I can find from Yahoo Auctions Japan, should be able to save a significant amount from what you sent just by not using brand new stuff, and not the Z-Tune stuff either.

This was an amazing build, sorry it got sold. :whistling:

  • 1 year later...

Well I see you've already sold it, but I just wanted to say this thread has been a real inspiration for my own 32. I was going to just do the R34 front using the OEM style Bee*R conversion fenders, but after seeing you do the rear too, I'm going to follow in your footsteps. Mine will be pearl white though on white 19" TE37's. I also won't mold in the side skirt the way you did, I like the stock look better. Luckily I am in Japan, so over the next year I am going to be buying up all the used OEM parts I can find from Yahoo Auctions Japan, should be able to save a significant amount from what you sent just by not using brand new stuff, and not the Z-Tune stuff either.

This was an amazing build, sorry it got sold. :whistling:

You still in Japan. How goes your search for OEM parts? Did you get your '90 GTR from an auction as well?

I'm thinking about buying a 1989 R32 and doing the MWR34 conversion. Wish me luck. :)

Create an account or sign in to comment

You need to be a member in order to leave a comment

Create an account

Sign up for a new account in our community. It's easy!

Register a new account

Sign in

Already have an account? Sign in here.

Sign In Now


  • Similar Content

  • Latest Posts

    • Then, shorten them by 1cm, drop the car back down and have a visual look (or even better, use a spirit level across the wheel to see if you have less camber than before. You still want something like 1.5 for road use. Alternatively, if you have adjustable rear ride height (I assume you do if you have extreme camber wear), raise the suspension back to standard height until you can get it all aligned properly. Finally, keep in mind that wear on the inside of the tyre can be for incorrect toe, not just camber
    • I know I have to get a wheel alignment but until then I just need to bring the rear tyres in a bit they're wearing to the belt on the inside and brand new on the outside edge. I did shorten the arms a bit but got it wrong now after a few klms the Slip and VDC lights come on. I'd just like to get it to a point where I can drive for another week or two before getting an alignment. I've had to pay a lot of other stuff recently so doing it myself is my only option 
    • You just need a wheel alignment after, so just set them to the same as current and drive to the shop. As there are 2 upper links it may also be worth adding adjustable upper front links at the same time; these reduce bump steer when you move the camber (note that setting those correctly takes a lot longer as you have to recheck the camber at each length of the toe arm, through a range of movement, so you could just ignore that unless the handling becomes unpredictable)
    • I got adjustable after market rear camber arm to replace the stock one's because got sick of having to buy new rear tyres every few months. Can anyone please let me know what the best adjustment length would be. I don't have the old ones anymore to get measurements. I'm guessing the stock measurement minus a few mm would do it. Please any help on replacing them would be fantastic I've watched the YouTube clips but no-one talks about how long to set the camber arm to.
    • Heh. I copied the link to the video direct, instead of the thread I mentioned. But the video is the main value content anyway. Otherwise, yes, in Europe, surely you'd be expected to buy local. Being whichever flavour of Michelin, Continental or Pirelli suits your usage model.
×
×
  • Create New...