Jump to content
SAU Community

HP KW and everything in between  

54 members have voted

You do not have permission to vote in this poll, or see the poll results. Please sign in or register to vote in this poll.

Recommended Posts

Ok, so you have a Stagea wagon.. (mmmm stagggeeaaa 'drools') you rip the front shaft off and take a lap around the block expecting it to atleast give a little screech into 2nd but to no avail. You instantly start planning your mods before you've even lifted off the pshhh pedal. You read the forums hearing people talk of 200kw atw and 250kwatw and more and start to wonder, how much do I need to be happy with my car. All I want to do is light the tyres when I feel the need and get the so longed for turbo surge as it comes onto boost. Not the feather tickling your stag receives at present. So all in all, how much is enough and how do you compare without driving cars at certain power levels. So the all elusive hunt for the mystic Kw's begins searching the far reaches of the petrol sniffing regions to maybe one day cook lunch on your new hankooks.

Edited by Stagstock
Link to comment
https://www.sau.com.au/forums/topic/242214-how-much-power-is-power/
Share on other sites

i have a bit of experience with different power levels in stageas, i've had a setup with stock power, 350rwhp, and 560rwhp and 600rwhp.

The more power the more compromises unfortunately, my new setup is aiming for a max of 400rwhp, this will mean alot of factory parts can still be used, the clutch is nice to drive around with and reliability is still pretty good. I run a rb26 setup though so rb25s are abit different. 350rwhp was abit slow, but i did have that engine in a 1300kg car before so i noticed the weight difference more than anything. 560hp is great, except the laggy turbo, noisy heavy clutch, big cams, and stock gearboxes dont last one drag run lol (or the rear axles), so the dogbox upgrade was another pain in the arse for any daily driver duties, it definately was fun if some pesky commodores wanted a run off the lights though :P

In rwd im sure around 350rwhp wouldnt have any trouble smokin the tyres at ease if thats all u want :D

Well all in all it will be a daily driver with a Vapour injection lpg kit but needs to be fun to drive not just a wagon that makes a cool noise. Can't beat that stag shape though

I'm hoping I can overcome alot of the fueling issues using the lpg computer and fuel mapping inbuilt. Fuel cut may be an issue though as it cuts the injectors.

Well, I've currently got 156kW at all 4 wheels, and when I took my cousin for a drive last weekend he mentioned how much better it was accelerating compared to when I first got it. He's got an R33 GTSt (he bought it well before I bought my car), and has previously had a few well-worked Commodores and had the opportunity to drive quite a few quick cars in his time (Porsche 928, genuine Alpina E30 BMW 3-series, etc.).

You can never have too much power. It's pretty much how much your wallet, credit card, bank loan, drug money you have to do your upgrades but you got to also think "is it drivable?" There's no point of have 800kw when you can't drive it down the street (unless its a track car)

For me i'm going to be happy with 200 - 230 at all wheels. It's still streetable but with the power at the ready if I need it

RB26 R34 N1, HKS_GT_SS, Tomie head gasket 1.2mm, tomei dumps, hi-flo cat, D-jetro, twin plate super coppermix, 15psi boost. Some odds & sods & $$$$$$$$$$$. 224awkw. = sticky Maxxis's, dunno if there's any smoke......to busy going/looking forward. :P

Cheers GW

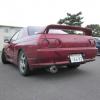
post-34341-1225326949_thumb.jpg

I run 297awkw, using R33 N1 turbos.... It's ok, but like the rest have said, not exactly ideal: wee bit laggy/noisy etc... I had been using mine as a daily for the last 24 months with this setup, and was living quite happily with it until we discovered a crack in the block (normal place: water jacket under the turbo manifolds - cause for concern, but not terminal...yet), so I am about to undertake a fresh build with stronger parts, aiming at 400-420awkw, but this will most definitely make it a weekend-only proposition.

Having recently bought a bog stocko Legnum as a daily, and sampled how smooth, quiet and responsive it is, I don't know if I'd be happy with my Stagea as a daily again, even with the current setup...

Well to be honest getting it to walk around in second is all I'm aiming for at the moment. Now all I have to do is tell the boss I bought a stag and get some afterwork hoist time in. :laugh:

Well to be honest getting it to walk around in second is all I'm aiming for at the moment. Now all I have to do is tell the boss I bought a stag and get some afterwork hoist time in. :(

You will need $15k+

You will need $15k+

Why would he need 15k... i didn't even spend that on mine, and i don't think he wants that much power... you should be able to get away with it pretty cheap if you do your research and work yourself...

RB26 R34 N1, HKS_GT_SS, Tomie head gasket 1.2mm, tomei dumps, hi-flo cat, D-jetro, twin plate super coppermix, 15psi boost. Some odds & sods & $$$$$$$$$$$. 224awkw. = sticky Maxxis's, dunno if there's any smoke......to busy going/looking forward. :(

Cheers GW

A lot of RB25s make that power fairly easily. I would have thought your set up would be capable of a lot more ( more boost, better tune?) or is that a deliberately conservative figure?

Why would he need 15k... i didn't even spend that on mine, and i don't think he wants that much power... you should be able to get away with it pretty cheap if you do your research and work yourself...

You need around 380RWKW to get a 20 to get scrappy in second. I know as I have one. Now getting a 1.8tonne wagon to dothat take money, I know Ive done it. I did teh research. I built a motor that will take the punishment.

You will need:

Turbos, N1, GrpA or better

Big afms

Big cooler

Oil cooler

Big radiator

N1 oil and water pumps

Forged pistons

Forged rods

Cams

Cam gears

Injectors (i did the rail too)

Big pumps

Computer

Then you have the labour.

Oh, and the big clutch.

I did the exhaust manifolds whicle I was at it, and the head, because I wanted it done right.

There you go, add that up.

that's easy to add up :( .

$29k

my R33 has 280rwkw and we stopped there out of sympathy to the motor (standard) and out of common sense since there is progressively less grip and it is pretty useless for driving on the street.

Edited by wolverine
You need around 380RWKW to get a 20 to get scrappy in second. I know as I have one. Now getting a 1.8tonne wagon to dothat take money, I know Ive done it. I did teh research. I built a motor that will take the punishment.

You will need:

Turbos, N1, GrpA or better

Big afms

Big cooler

Oil cooler

Big radiator

N1 oil and water pumps

Forged pistons

Forged rods

Cams

Cam gears

Injectors (i did the rail too)

Big pumps

Computer

Then you have the labour.

Oh, and the big clutch.

I did the exhaust manifolds whicle I was at it, and the head, because I wanted it done right.

There you go, add that up.

Sorry i thought we were talking RB25... Didn't know stag's came in RB20....

for that sorta money i would have thought putting a 26 in would be a better option, for the long run anyway....

Create an account or sign in to comment

You need to be a member in order to leave a comment

Create an account

Sign up for a new account in our community. It's easy!

Register a new account

Sign in

Already have an account? Sign in here.

Sign In Now


  • Similar Content

  • Latest Posts

    • From there, it is really just test and assemble. Plug the adapter cables from the unit into the back of the screen, then the other side to the car harness. Don't forget all the other plugs too! Run the cables behind the unit and screw it back into place (4 screws) and you should now have 3 cables to run from the top screen to the android unit. I ran them along the DS of the other AV units in the gap between their backets and the console, and used some corrugated tubing on the sharp edges of the bracket so the wires were safe. Plug the centre console and lower screen in temporarily and turn the car to ACC, the AV should fire up as normal. Hold the back button for 3 sec and Android should appear on the top screen. You need to set the input to Aux for audio (more on that later). I put the unit under the AC duct in the centre console, with the wifi antenna on top of the AC duct near the shifter, the bluetooth antenna on the AC duct under the centre console The GPS unit on top of the DS to AC duct; they all seem to work OK there are are out of the way. Neat cable routing is a pain. For the drive recorder I mounted it near the rear view mirror and run the cable in the headlining, across the a pillar and then down the inside of the a pillar seal to the DS lower dash. From there it goes across and to one USB input for the unit. The second USB input is attached to the ECUtec OBD dongle and the 3rd goes to the USB bulkhead connected I added in the centre console. This is how the centre console looks "tidied" up Note I didn't install the provided speaker, didn't use the 2.5mm IPod in line or the piggyback loom for the Ipod or change any DIP switches; they seem to only be required if you need to use the Ipod input rather than the AUX input. That's it, install done, I'll follow up with a separate post on how the unit works, but in summary it retains all factory functions and inputs (so I still use my phone to the car for calls), reverse still works like factory etc.
    • Place the new daughterboard in the case and mount it using the 3 small black rivets provided, and reconnect the 3 factory ribbon cables to the new board Then, use the 3 piggyback cables from the daughterboard into the factory board on top (there are stand offs in the case to keep them apart. and remember to reconnect the antenna and rear cover fan wires. 1 screw to hold the motherboard in place. Before closing the case, make a hole in the sticker covering a hole in the case and run the cable for the android unit into the plug there. The video forgot this step, so did I, so will you probably. Then redo the 4 screws on back, 2 each top and bottom, 3 each side and put the 2 brackets back on.....all ready to go and not that tricky really.      
    • Onto the android unit. You need to remove the top screen because there is a daughterboard to put inside the case. Each side vent pops out from clips; start at the bottom and carefully remove upwards (use a trim remover tool to avoid breaking anything). Then the lower screen and controls come out, 4 screws, a couple of clips (including 3 flimsy ones at the top) and 3 plugs on the rear. Then the upper screen, 4 screws and a bunch of plugs and she is out. From there, remove the mounting brackets (2 screws each), 4 screws on the rear, 2 screws top and bottom and 3 screws holding in the small plates on each side. When you remove the back cover (tight fit), watch out for the power cable for the fan, I removed it so I could put the back aside. The mainboard is held in by 1 screw in the middle, 1 aerial at the top and 3 ribbon cables. If you've ever done any laptop stuff the ribbon cables are OK to work with, just pop up the retainer and they slide out. If you are not familiar just grab a 12 year old from an iphone factory, they will know how it works The case should now look like this:
    • Switching the console was tricky. First there were 6 screws to remove, and also the little adapter loom and its screws had to come out. Also don't forget to remove the 2 screws holding the central locking receiver. Then there are 4 clips on either side....these were very tight in this case and needed careful persuading with a long flat screw driver....some force required but not enough to break them...this was probably the fiddliest part of the whole job. In my case I needed both the wiring loom and the central locking receiver module to swap across to the new one. That was it for the console, so "assembly is the reverse of disassembly"
    • But first....while I was there, I also swapped across the centre console box for the other style where the AV inputs don't intrude into the (very limited !) space.  Part# was 96926-4GA0A, 284H3-4GA0B, 284H3-4GA0A. (I've already swapped the top 12v socket for a USB bulkhead in this pic, it fit the hole without modification:) Comparison of the 2: Basically to do the console you need to remove the DS and PS side console trim (they slide up and back, held in by clips only) Then remove the back half of the console top trim with the cupholders, pops up, all clips again but be careful at the front as it is pretty flimsy. Then slide the shifter boot down, remove the spring clip, loose it forever somewhere in the car the pull the shift knob off. Remove the tiny plastic piece on DS near "P" and use something thin and long (most screwdrivers won't fit) to push down the interlock and put the shifter down in D for space. There is one screw at the front, then the shifter surround and ashtray lift up. There are 3 or 4 plugs underneath and it is off. Next is the rear cover of the centre console; you need to open the console lid, pop off the trim covering the lid hinge and undo the 2rd screw from the driver's side (the rest all need to come out later so you can do them all now and remove the lid) Then the rear cover unclips (6 clips), start at the top with a trim tool pulling backwards. Once it is off there are 2 screws facing rearwards to remove (need a short phillips for these) and you are done with the rear of the console. There are 4 plugs at the A/V box to unclip Then there are 2 screws at the front of the console, and 2 clips (pull up and back) and the console will come out.
×
×
  • Create New...