Jump to content
SAU Community

Recommended Posts

Thats a truly amazing effort from Scotsman and Adz on the win! Well done you guys!

You guys' driving was very impressive from what I saw yesterday! Results show it! Good stuff!

Amazing effort from Ryan as well setting the fastest time! When you consider everything else you were up against thats really well done!

RMODE looked strong and very fast as well. Slides into the second corner were great!

Seeing a couple of the cars overshoot the first corner was exciting but very breathtaking! Especially the R35 GTR skidding onto the grass toward the hill!

  • Replies 141
  • Created
  • Last Reply

Top Posters In This Topic

Congrats guys top effort all round.

We've clearly got some highly skilled drivers among us.

If I'm lucky some of it might rub off on me :woot:

yeah its not so bad getting thrashed at Deca when you realise how quick some of the guys are... dunno about it rubbing off though, I've been in the club for years and I still suck :wub:

Well done to everyone, awesome results... especially Chris who I'm now dubbing Iceman (super cool under pressure and all that)... well deserved mate, you have been close a few times great to see you and Adz win it :)

Hah, don't tell me that Nick, I need all the help I can get!

Also big thumbsup to Ryan mixing it up and pulling off some awesome times.

You'll have to PM me and tell me what's done to that SilEighty, she must be a bit of a weapon (or maybe you're The Stig?)

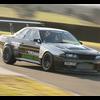
What a great weekend! Big thanks to all the guys and girls who came down to support us and thanks for all the kind words. Another thanks to Mick from Micolour who co drived with me, we had a fantastic set up which landed us 2nd in club class.

Congrats to Chris and Norton on their big win, the pressure was too much for some and it showed when their machines couldnt take it anymore and had to go home early on trailers. those whos stayed got yet another whooping from the GTR!

As for our weekend, we can hardly say we had no problems, however, there was no stage that we didnt go 100% on. Friday night saw us replacing the diff in the Hotel Basement carpark because it was causing big viabrations over 200clicks. A couple of hours and a few cans later and it was ready to go again. Thanks to Shane for the Diff, being another 2way it was like we never changed it.

29052009755.jpg

After Day 2 at Lang Lang we had a couple of little problems to fix. The short shifter was held together with 1 out of 4 bolts which was also loose. if it had also come out it would have been back to melb to fix which would have been extremely shit, thankfully we caught that in time. Day 3 was relatively flawless. Nothing broke and we managed to climb back into second place behind vins factory built STI weapon.

As for the car dan, hsd coilovers, 2860rs turbo, pfc, a few suspension arms and a 324mm brake upgrade and a 2way. plus coolers, a race seat and a half cage. The tyres are also a biggie. AO50s are incredible.

Well done to the young guns - you too can now have a cool little note in your forum signature :P

Impressive stuff from Frisey too.

Was a fun weekend - I've discovered the R35 is far to big for anything but circuit work but it was good fun playing around in anyway since we destroyed the rubber on SMAUG in 5mins at PI. It's a good little toy.

The headbutt machine was tops too! :P

What a weekend! It was great!

Congrats to Chris and Adz for taking it all out!

And Adz... What happened to 'No I don't have a speech prepared' haha.

Ryan and Mick well done boys. Frieken awesome work. 2nd in club class is crazy.

Bris. Wicked fun with ya mate. 1st and second in our class! Even if there were only 3 in it! haha.

Car was so solid all weekend. Thanks Mat and ace workshop.

Snowy and Blaise. You're car is too fat haha.

This event really wouldn't be as much fun without the awesome crew that we had there. You're all legends!

Oh yeah... RB20 POWAH!!! Gotta love those crate engines.

Thanks guys.

Was good to get the win under the belt.

Now I need to figure out, what next?

Great job by Ryan at haunted hills, it must have been a smoking lap to be quickest out there.

My car is a little worse for wear and in need of a clutch and probably a diff amungst other little things. But she hung in there right till the end and was fast even when we were driving conservativly.

I didn't think the coverage would be of interest to the average Today audience... housewives, the elderly and people who have absolutely nothing to do so end up watching tv at 9am

Agreed but its the Karl factor :D

Now I need to figure out, what next?

Unless you want to take on the tarmac rallies which involves big $$ in terms of setting your beast up for it I'm not sure there is too much else in that segment.....maybe think of doing Duttons in other states?

Create an account or sign in to comment

You need to be a member in order to leave a comment

Create an account

Sign up for a new account in our community. It's easy!

Register a new account

Sign in

Already have an account? Sign in here.

Sign In Now


  • Latest Posts

    • Did this end up working? Did you take some pictures?
    • And finally, the front lower mount. It was doubly weird. Firstly, the lower mount is held in with a bracket that has 3 bolts (it also acts as the steering lock stop), and then a nut on the shock lower mount itself. So, remove the 3x 14mm head bolts , then the 17mm nut that holds the shock in. From there, you can't actually remove the shock from the lower mount bolt (took me a while to work that out....) Sadly I don't have a pic of the other side, but the swaybar mounts to the same bolt that holds the shock in. You need to push that swaybar mount/bolt back so the shock can be pulled out past the lower control arm.  In this pic you can see the bolt partly pushed back, but it had to go further than that to release the shock. Once the shock is out, putting the new one in is "reverse of disassembly". Put the top of the shock through at least one hole and put a nut on loosely to hold it in place. Put the lower end in place and push the swaybar mount / shock bolt back in place, then loosely attach the other 2 top nuts. Bolt the bracket back in place with the 14mm head bolts and finally put the nut onto the lower bolt. Done....you have new suspension on your v37!
    • And now to the front.  No pics of the 3 nuts holding the front struts on, they are easy to spot. Undo 2 and leave the closest one on loosely. Underneath we have to deal with the wiring again, but this time its worse because the plug is behind the guard liner. You'll have to decide how much of the guard liner to remove, I undid the lower liner's top, inside and lower clips, but didn't pull it full off the guard. Same issue undoing the plug as at the rear, you need to firmly push the release clip from below while equally firmly gripping the plug body and pulling it out of  the socket. I used my fancy electrical disconnect pliers to get in there There is also one clip for the wiring, unlike at the rear I could not get behind it so just had to lever it up and out.....not in great condition to re-use in future.
    • Onto the rear lower shock mount. It's worth starting with a decent degrease to remove 10+ years of road grime, and perhaps also spray a penetrating oil on the shock lower nut. Don't forget to include the shock wiring and plug in the clean.... Deal with the wiring first; you need to release 2 clips where the wiring goes into the bracket (use long nose pliers behind the bracket to compress the clip so you can reuse it), and the rubber mount slides out, then release the plug.  I found it very hard to unplug, from underneath you can compress the tab with a screwdriver or similar, and gently but firmly pull the plug out of the socket (regular pliers may help but don't put too much pressure on the plastic. The lower mount is straightforward, 17mm nut and you can pull the shock out. As I wasn't putting a standard shock back in, I gave the car side wiring socket a generous gob of dialectric grease to keep crap out in the future. Putting the new shock in is straightforward, feed it into at least 1 of the bolt holes at the top and reach around to put a nut on it to hold it up. Then put on the other 2 top nuts loosely and put the shock onto the lower mounting bolt (you may need to lift the hub a little if the new shock is shorter). Tighten the lower nut and 3 upper nuts and you are done. In my case the BC Racing shocks came assembled for the fronts, but the rears needed to re-use the factory strut tops. For that you need spring compressors to take the pressure off the top nut (they are compressed enough when the spring can move between the top and bottom spring seats. Then a 17mm ring spanner to undo the nut while using an 8mm open spanner to stop the shaft turning (or, if you are really lucky you might get it off with a rattle gun).
    • You will now be able to lift the parcel shelf trim enough to get to the shock cover bolts; if you need to full remove the parcel shelf trim for some reason you also remove the escutcheons around the rear seat release and you will have to unplug the high stop light wiring from the boot. Next up is removal of the bracket; 6 nuts and a bolt Good news, you've finally got to the strut top! Remove the dust cover and the 3 shock mount nuts (perhaps leave 1 on lightly for now....) Same on the other side, but easier now you've done it all before
×
×
  • Create New...