Jump to content
SAU Community

Recommended Posts

so far the results look great so the dyno results will be interesting to see but the seat of pants feedback after tuning will be the big seller to me.

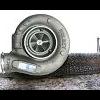
such a large turbo intuitively looks like it would be really laggy with pathetic transient response however it is making power much earlier than i would have credited.

it is great to see such positive feedback so far with this install.

remember this is on a 30DET :( i imagine the spool wioll also get better with a decent tune, but may well be lower on the 25det.

the seat of the pants feel is much better than the hifolw i had on the car before much more progressive and controllable transient boost comes on hard and fast.

I have run into a bit of a problem i have not sorted yet.

it took me ages to diagnose but bacically the turbo CHRA is filling up with oil under pressure and pushing oil past the rear seal at idle when the car is cold...

i thought the seals in the turbo were gone (still could be i am not sure yet) but the signs point to an over supply issue.

I took the dump pipe off and there was oil in the rear housing. so i thought it was the seals but there was no problem under boost.

I then took off the banjo bolt and fed the oil line into a bottle and started the car for 15 seconds and it dumped 800ml of oil into the jar in 15 seconds!

The oil drain is the same as the standard nissan turbo and the same as the bush bearing hiflow i had on the car for 12 months and never had a problem with. the bush bearing hiflow also used the same oil line and never had a problem.

just with the holset it appears to not be able to remove all the oil i feed into it. its fine under boost as there is back pressure in the rear housing pushing against the rear oiil seal but under no load the pressure inside the chra is to great.

the banjo bolt has no restrictor and an ID of 4mm, being a bush bearing turbo i did not want to restrict oil flow but i may have to or it will blow out the seals.

How much oil should flow thru the oil supply line (volume)

I have fitted a 2mm restrictor i made from a tig tip. I spun down and press fitted in the banjo. I have started and run the car and now 15 seconds gives about 620ml of oil. is this to much at idle? is my oil pressure too high?

Do you have a high volume oil pump? Most of the DSM guys in the states run restrictors on them depending on where they get the oil feed from and whether or not they have the "balance shafts" installed.

thanks for the info :P

I jsut swapped the oil line round and measured the flow and its now flowing 1.2 litre/min and took it for a drive around the block without boosting it but it still smokes so i have ordered a rebuild kit for it from the US. the great part is the kit only cost $50!

I will drill out the restrictor further till i get the right amount of flow and then rebuild the turbo. it will be a while till i get it tuned but i am still sure its going to work out good :)

I am going to take off the return and have a look at it. if its too small i will increase it yep :P

looking at it from memory the return was about 15mm? so yep it might be to small.

thanks for the props!!

I have ordered a rebuild kit for the turbo and at only $80 its a pretty good value proposition

I have got the oiling sorted out now and got the turbo seeing 2.3 lt per min using a 3mm restrictor i made from an old tig tip. this is spot on as per the holset guide. the turbo sounds good and the oil drain is still doing ita job. I have installed the new injectors and given it a basic tune. it is now running 21psi and pulls so hard it feels like it is twisting the chassis.

the car flicks the car HARD to the left under boost even in 4th at 110kmph. i think i have to replace my engine mounts. also think i need an engine damper.

full boost is reached by 3500 and it pulls hard from 2700 :)

guessing power is around 350rwkw,,, trust me this is WAY to much for a RWD r32. a 280rwkw r32 wiht good suspension and good power delivery would be much faster. i am going to turn down the boost and tune it properly once the new seal kit arrivers.

cheers!!

Nice results.

How is part throttle boost around 2500-3000rpm?

Given the power you estimate if it shows true on the dyno its a damn good alternative to the gt30 and 35. :)

I presume you have a little cradle angle pushed in? If found this to soften the blow of a hard boost transition giving the tyres the best change to hook up.

I presume you have a little cradle angle pushed in? If found this to soften the blow of a hard boost transition giving the tyres the best change to hook up.

couldnt say it better myself... run some whiteline (or whatever) cradle bushes set to traction and not much rear camber and you will have tons of grip

i could load up my gtr with 575rwhp in second gear with 235 nangkangs and it would only wheel spin a little, but it squatted and gets the fcuk outta there

Edited by Cerbera

yep cradle rake is set to max squat. using solid aloy cradle C inserts.

transient response is honestly not fantastic. a tune will make it better but it is a bloody big bush bearing turbo. it generates posative boost instantly between 2500 and 3000 but you have to leave your foot in it for a good 1/2 a second before it really builds boost.

coming from my hiflow that was way too small but would loose traction at 3000 at jsut a stab of the throttle its a big difference.

i probably need to run less rear camber, i have 255 semis on the back and they get fried with ease in a straight line

Sounds like a lot of fun! Though definitely sounds like its in between the GT30R and GT35R in terms of spool, won't comment on power until you get it on a dyno - is this due to happen anytime soon?

dyno will take a while, i want to pull off the turbo nad replace the seals and i will do the bearings at the same time as they come in the kit. the kit will take a week to arrive from the us and i have a busy month on. but it should be done in about a month.

so you will have to wait a while

Create an account or sign in to comment

You need to be a member in order to leave a comment

Create an account

Sign up for a new account in our community. It's easy!

Register a new account

Sign in

Already have an account? Sign in here.

Sign In Now


  • Latest Posts

    • Hi, is the HKS  Tower Bar still available ? negotiable ? 🤔
    • From there, it is really just test and assemble. Plug the adapter cables from the unit into the back of the screen, then the other side to the car harness. Don't forget all the other plugs too! Run the cables behind the unit and screw it back into place (4 screws) and you should now have 3 cables to run from the top screen to the android unit. I ran them along the DS of the other AV units in the gap between their backets and the console, and used some corrugated tubing on the sharp edges of the bracket so the wires were safe. Plug the centre console and lower screen in temporarily and turn the car to ACC, the AV should fire up as normal. Hold the back button for 3 sec and Android should appear on the top screen. You need to set the input to Aux for audio (more on that later). I put the unit under the AC duct in the centre console, with the wifi antenna on top of the AC duct near the shifter, the bluetooth antenna on the AC duct under the centre console The GPS unit on top of the DS to AC duct; they all seem to work OK there are are out of the way. Neat cable routing is a pain. For the drive recorder I mounted it near the rear view mirror and run the cable in the headlining, across the a pillar and then down the inside of the a pillar seal to the DS lower dash. From there it goes across and to one USB input for the unit. The second USB input is attached to the ECUtec OBD dongle and the 3rd goes to the USB bulkhead connected I added in the centre console. This is how the centre console looks "tidied" up Note I didn't install the provided speaker, didn't use the 2.5mm IPod in line or the piggyback loom for the Ipod or change any DIP switches; they seem to only be required if you need to use the Ipod input rather than the AUX input. That's it, install done, I'll follow up with a separate post on how the unit works, but in summary it retains all factory functions and inputs (so I still use my phone to the car for calls), reverse still works like factory etc.
    • Place the new daughterboard in the case and mount it using the 3 small black rivets provided, and reconnect the 3 factory ribbon cables to the new board Then, use the 3 piggyback cables from the daughterboard into the factory board on top (there are stand offs in the case to keep them apart. and remember to reconnect the antenna and rear cover fan wires. 1 screw to hold the motherboard in place. Before closing the case, make a hole in the sticker covering a hole in the case and run the cable for the android unit into the plug there. The video forgot this step, so did I, so will you probably. Then redo the 4 screws on back, 2 each top and bottom, 3 each side and put the 2 brackets back on.....all ready to go and not that tricky really.      
    • Onto the android unit. You need to remove the top screen because there is a daughterboard to put inside the case. Each side vent pops out from clips; start at the bottom and carefully remove upwards (use a trim remover tool to avoid breaking anything). Then the lower screen and controls come out, 4 screws, a couple of clips (including 3 flimsy ones at the top) and 3 plugs on the rear. Then the upper screen, 4 screws and a bunch of plugs and she is out. From there, remove the mounting brackets (2 screws each), 4 screws on the rear, 2 screws top and bottom and 3 screws holding in the small plates on each side. When you remove the back cover (tight fit), watch out for the power cable for the fan, I removed it so I could put the back aside. The mainboard is held in by 1 screw in the middle, 1 aerial at the top and 3 ribbon cables. If you've ever done any laptop stuff the ribbon cables are OK to work with, just pop up the retainer and they slide out. If you are not familiar just grab a 12 year old from an iphone factory, they will know how it works The case should now look like this:
    • Switching the console was tricky. First there were 6 screws to remove, and also the little adapter loom and its screws had to come out. Also don't forget to remove the 2 screws holding the central locking receiver. Then there are 4 clips on either side....these were very tight in this case and needed careful persuading with a long flat screw driver....some force required but not enough to break them...this was probably the fiddliest part of the whole job. In my case I needed both the wiring loom and the central locking receiver module to swap across to the new one. That was it for the console, so "assembly is the reverse of disassembly"
×
×
  • Create New...