Jump to content
SAU Community

Recommended Posts

I will admit i have never been a great skyline fan as i used to comment at one stage skylines are like taxis every man and his dog had one at the time,And as you can guess at the time i had a rather punchy well modified Nissan GTI-R that was almost unbeatable on the street over short distances claiming many scalps in the process.

With the price of second hand jap import cars taking a massive nose dive over the last few years i sold my pride and joys and accumilated a very healthy bank account.

But after being ridiculed by my fellow jap import drivers it took a massive month befor i got my self back into a new ride.

Personaly a 33 GTR would have been the last GTR i would have ever bought i love 34s for the pure agressive look they put out from factory but the price tag was out of my budget, I love a clean 32 GTR as they are very gritty looking and tuff,I went to look at a 32 GTR on the day and spent about 30 seconds looking at it when i spotted the 33 GTR out the corner of my eye and that was all she wrote i just had to have it.

I have been told this car is not common and in some cases does not even exsist but well i have one.

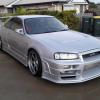
Normaly you see Bee R converted 32 GTRs out of japan with 34 front ends on,Well i have a 33 GTR that has a genuine Bee R widebody 34 GTR kit on it.

I have emailed Bee R in japan trying to find out some infomation on this car and how it came about because to be honest i am intrested to know how it came about.

I have tried to get in contact with Hosaka Tunning Factory as they built the motor that was in the car when it entered the country but no luck as they did not list a email on there website,The motor that was in this car was a 2.8 hks stroker V-cam rb26 motor t51r spl 6 speed sq gearbox,The motor box titanium exaust alcon brake system was removed from the car to be used on a 32 GTR race car and put back in its place was a 33 GTR stock motor 5 speed GTR box and brembro brake system.

Well here it is.

33 Gtr Vspec 95 skyline active lsd

Exterior

Genuine Bee R widebody kit r34gtr front end conversion

19x10 volk racing rims LE-37s?

Carbon fiber wing

Led tail lights

Ganador genuine mirrors

34 GTR headlights

Interior

Full black leather retrim with red stitching

Black leather red stitch gear boot/Handbrake

34 gtr vspec II front drivers bride seat

Nismo dash 320km / center cluster

short shift kit

grex gear knob

Momo steering wheel

Full carbon overlay over genuine 33 gtr dash and center console

Hks turbo timer

Hks electronic boost controler

Bee R shift light box

Greddy push to pass infared scramble boost on steering wheel

Greddy 2 bar boost guadge

Kenwood headunit

kenwood factory uprated mid split amp from factory

Modifications

Hks coil overs

Brembro brakes dba slotted rotas

Bendex street strip drag front pads

Bendex cts rear pads

Engine

HKS 25'30s twin turbos

Apexi power fc

Splitfire coil packs

HKS oil cooler kit with braided lines

040 bosch intank pump

Denzo power enterprise 700cc injectors

NGK Ire top 8 spark plugs

rb25 S1 green lable afm x2

Apexi power intake kit

Stainless steel custom dump pipes

Veilside SS duel 2.5 inch front pipes

Balistic Cat 5 inch body 706.2cfm

HKS duel 2.5 inch SS exaust

2x Magnaflow resonators

HKS twin 5 body inch canon mufflers

HKS tripple plate carbon clutch

I know alot of this was already done but here is a list of the things i have bought for the car since purchase

Not are all on the car as of yet im working on it.

Balistic Cat 5 inch body 706.2cfm

HKS duel 2.5 inch SS exaust

2x Magnaflow resonators

HKS twin 5 body inch canon mufflers

Bosch 040 intank fuel pump

Power ent denzo 700 injectors

2x Rb25 green lable AFM

Splitfire coil packs

Iriduim top 8's

DBA 4000 rotas all round direct replacement for the brembro disc's

Pads Front Street Strip Drag Back Cts

Apexi power intake kit

(33 WTF) person number plates,The plates explain them self i feel

Viper car alarm

I have proberly forgot a few things as just about every thing on this car has been uprated,Some one in japan loved this car it was purchased as a HKS customers car direct from japan and i am the first owner in australia.

I have no idea how much this car is worth but at a tally the replacement of this car runs between 50 plus grand and some of this stuff you just can not get any more.

Things i am in the process of doing are alot of painting of parts in the engine bay/ brakes all in 2 pac as i own a spray booth that is currently not errected.

The car needs to be retuned with the mods that are going onto it but est power was between 350-400 hp atw but im going to be hunting for around 450hp daily atw.

I also pulled out a array of guages from the car a box full of apexi greddy stuff as im not a big fan of crap all over my dash,Also pulled out a Carmate sc5000 security system with remote start and so on.

Here are a few camra phone pictures i hope you enjoy the look of the car as much as i do,May not be every bodys cup of tea but i just love it and its a neck snapper for sure and im pretty sure its the only one of its type in the country.

Dash its now minus all the guages but boost that has been relocated

dasha.jpg

Retrimed seats black with red stitching in perfect condition.Just need a nice clean as they were a bit dirty in these photos

seatsti.jpgbackseat.jpg

Front

rightsidex.jpgfrontright.jpg

Back

rearleft.jpgbackright.jpg

Link to comment
https://www.sau.com.au/forums/topic/282550-keirons-33-34-vspec-gtr-widebody/
Share on other sites

  • Replies 114
  • Created
  • Last Reply

Top Posters In This Topic

just started pulling down the brakes for the dba rota upgrade to find that the wheels are 19x10.5 wide and the brakes look to have green stuff pads all round in good condition.Pity i can t use them with the new rotas.

The coil overs are hks hyper-max performers :rofl: and rose joint adjusted front camber arms.

Pictures to come

Edited by Gtir-keiron

brakes are off and ill fast forward past the ugly buts.

Took me about 5 hours to rub them down correctly to get them ready for painting.

it was 17 degrees in the shed so we busted out the hairdryer to keep the heat on the pain while we sprayed,Worked a treat i personaly would only do this for little things guys,Only reason we did this is because we ran out of sunlight but they are base coated now and im awaying new brembro stickers so i can put them on and clear coat the brakes.

Pictures will follow once the finished product is complete.

Some pictures of the brakes unfitted.

Disc's and calipers in original form

originalsetup.jpg

Stickers cost me 15 bucks to have made up and easy to install just goto get them strait.

brembrostickers.jpg

Finish product 2 pac gold and 2 pac clear,My advice with this is to put light coats on till you get a solid color you do not want to change the way the brakes might radiate/trap heat.

brembroback.jpgfrontbrembro.jpg

Ill take some pictures fitted with the new dba 4000's as soon as they are fitted.

What a mission that was but worth it in the end.

Heres the final installment of my brake upgrade with new dba4000 rotas new pads and some 2 pac paint.

oldbrakee.jpg

newbrake1.jpg

newbrake.jpg

Thank you ant for your help with this mate!

  • 1 month later...

Latest addition to the car

M800 motec with wideband lamba and datalogging enabled AME cdi bosch coils and sensors ,Yet to go in the car as im waiting for a mates dyno to be back up and running.

But i did do a power run at powercruise this year and the dyno was down for sure judging the other cars that went on befor and after mine.

She ran on the dyno 370hp at all 4 but we think the way the car is set up atm is more like 400 to 420hp atws.

Tossing up doing a single conversion hksto4z single turbo or sticking with the twin hks 2530s

yea i know mate.

Not worth putting in the rb25 ones any more ill wait for the motec to go in with map sensor soon as brad gets his dyno.

See you this week end ant,i dunno about you but i was ruined for 2 days after power cruise bro.

Create an account or sign in to comment

You need to be a member in order to leave a comment

Create an account

Sign up for a new account in our community. It's easy!

Register a new account

Sign in

Already have an account? Sign in here.

Sign In Now


  • Similar Content

  • Latest Posts

    • Good luck on the weekend mate
    • Must have been an absolute nightmare to drive when the power steer was out, the rack ratio/wheel size/caster is all set up for power assistance
    • Welcome to SAU, what are you looking at buying?
    • I checked the injectors again (1 and 2, since they’re easiest to access) to make sure they weren’t clogged. Even though the entire fuel system had been cleaned, I wanted to be certain. Everything looked clean, so I reinstalled and connected everything. When I started the car to confirm everything was okay, it immediately revved up high, so I shut it off straight away. I checked to see if I’d missed a vacuum hose or something, but everything was connected. On the second attempt, the car ran without the high idle, but I noticed a distinct “compressed air” sound coming from the engine bay. Tracing the sound, I pushed injector #6 forward slightly and the noise stopped — it turned out it wasn’t seated properly, despite the fuel rail being bolted down. While holding it in place, the car idled steadily without stalling and ran for over 5 minutes. At this point, I pulled all six injectors out just in case I hadn’t seated them correctly or dirt had gotten onto the O-rings. Unfortunately, I discovered that I had damaged 3 out of 6 injectors (the OEM 270cc ones) during installation. So yes, this was my fault. Since only the pintle caps were damaged, I’ve ordered a Fuel Injector Service Kit from NZEFI to refurbish them. In the meantime, I reinstalled my new injectors – the car now idles fine for over 15 minutes without stalling. I have not attempted to drive it so far. It’s not perfect yet, as it hesitates when the throttle is pressed, but it’s a big improvement. Unplugging the IACV with the new injectors idles at around 800rpm, even with the IACV screw tightened fully. But this is probably due to tune.
    • I wanted to try and preserve the front bumper as long as possible, they're not cheap and are made to order in Japan. Taking inspiration from my previous K11 Micra build where I made an undertray for the Impul bumper, I did the same for this BN Sports bumper but a little slimmed down.  This time round I only made a 'skid plate' (if that's the correct wording/term) for just the bumper surface area, the Micra version covered the gap like an undertray. Starting off with a sheet of mild steel approx. 0.9mm thick 4ft x 2ft in size. I traced around the bumper, cut it out and cleaned the edges. Luckily I was able to get two halves from one piece of metal In the video I installed it as is, but I've since then I've removed it to spray and add a rubber edging trim. The rubber trim is suitable for 1-2mm and it's a really nice tight fit. The bolts had to be loosened due to the plates being too tight against the bumper, the trim wouldn't push on I used some stainless M6 flat headed bolts for a flusher finish (rather than hex heads poking down), I believe this style fastener is used for furniture too incase you struggle to source some. The corner's are a little wider, but this may be an advantage incase I get close to bumping it  The front grill got some attention, finally getting round to repairing it. Upon removal one fixing pulled itself out of the plastic frame, one side is M8 that fixes inside of the frame, where as the other side is M5. Not knowing I could get replacements, I cut down an M8 bolt, threaded it inside the frame along with a decent amount of JB Weld.  The mesh was replaced to match the bumper. One hole on the bonnet/hood had to be drilled out to 8mm to accommodate the new stud, once the glue had set it could be refitted. I think the reason the grill was double meshed was to hide the horn/bonnet latch (which makes sense) but I much prefer it matching the bumper Bumper refitted and it's looking much better IMO The Youtube video can be seen here: https://www.youtube.com/watch?v=bVZP35io9MA
×
×
  • Create New...