Jump to content
SAU Community

Recommended Posts

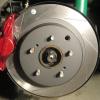
G`day Lad`s & Lasses,i did brake upgrade on REAR`S with Braided line`s & Really couldn`t tell the Difference ,now i know that rear`s don`t do that much but iam not sure the Braided are worth the Money,Now really we should REPLACE front LINE`S as they are now some 10 year`s old ,so may be i will look but may be not Braided,& having done New sotted rotor`s & EBC pad`s & brake stopper i fell that there much better may be 35% better then stock setup sure FEEL much better,cheer`s chuckie.

How to tell the difference:

Replace your brake fluid with quality new stuff and bleed the brakes. Find a quiet street and pick a lamp-post or other landmark. As near as possible hit the picks as hard as at as high a speed as you can safely (say 100). If you're keen measure the distance with a tape measure ...otherwise just make a mark on the kerb.

When you have fitted your braided brake lines and brake stopper repeat the test. If you are one or two meters earlier in stopping that is what you have paid for. It may not seem much but it may save a life or your car.

Other improvements such as bigger heat treated rotors etc are more geared towards sustained heavy use (although of course bigger brakes may improve your stopping distance a bit more) such as track work or if you tow a car and stand on the brakes a lot.

Short of the above I think the stock brakes with better pads, new and better brake fluid and maybe braided lines and a MC stopper are adequate for street use.

Also it is worth pointing out that actually stopping a car has alot to do with tyres not just the brakes. I do tend to agree with Chuckie I have done a R33 caliper swap F & R, new seals all around, EBC redstuff pads, Slotted rotors, UAS Brake stopper. When I stomp on the brakes the car pulls up bloody quick, I couldn't see you would want much more for street use. (Remember the street isn't a race track so unless you are doing considerable track work a track style setup is a waste of money, it does look nice though :))

FYI, I have noticed that since changing wheels and tyres that it seems to pull up even quicker. My std rims were stock RS4S 17 x 7 with 215/50/17 tyres, I have changed to 19 x 8.5 rims with 235/35/19 tyres. The rims are an open 5 spoke style so they let alot more air in and around the brakes than the std rims did also the larger surface area on the road helps also I think.

A good tyre and Pad is the best place too start in the quest for good stopping on a street car!!!

My Stagea with RE001's and RB74 front, Endless SSS rear easily stops better and with better feel than my 32 with KU36 and EBC Green Stuff - Front EBC Black Stuff - Rear, I wouldnt='t wish any EBC or Bendix pads on my worst enemy, next mod for the 32 is QFM A1RM which is meant to be the new version of the RB74 compound and available cheaply through the SAU sponser... Braided lines and MC stopper will be done further down the track on the 32, but seem pointless on the stagea as wouldnt we need to brace the ABS assembly?

i think the point of the brake MC stopper is to help stop firewall flex from when you push the brake pedal hard, so no need to brace the ABS.

i think the point of the brake MC stopper is to help stop firewall flex from when you push the brake pedal hard, so no need to brace the ABS.

True, was just thinking it might move a little, not sure exactly how much it might move though.

Edited by RB_Ryan

yeah i wasn't really worried about the performance increase although it would be nice. just i'm doing the r33 calipers on it and don't want to mod the caliper to take the standard line, but after taking a set of standard from lines to my local brake specialist he has had them for about 2 weeks trying to work something out and can't. aparently one of the blocks he can't get.

so i was just looking to see what other people setups were and how they got around this problem.

just replacing the lines with bright shiny new ones would look nice with a great big brake upgrade :D

Thanks

Curt

You can get ADR-approved ones too, by the way.

Braided lines are far from an essential upgrade, but they would provide an extra level of reassurance, just like the master cylinder stopper would.

i didnt have ADR compliant braided lines, the police didnt even notice them!

slotted rotors, master cylinder brace, braided lines, motul brake fluid and VERY good pads makes for an awesome stopping S15 :D

eugene can confirm this :D

Maltech is the go.

Remember, if you have a stack and have non-ADR lines, you can probably kiss your insurance goodbye. Things like brakes tend to be inspected and taken into consideration more than an FMIC in a serious crash...

I bought ADR-approved braided lines for my Z from my local ABS - $75 per line. I simply took the old ones in & 3 hours later, the new ones were ready.

The Stagea is a bit more complicated than that if you wish to maintain the factory assembly design. But I'm sure you could simplify the factory setup & use a more generic line.

well thats the problem according to main roads you have to replace it as it came from factory.ie using all the same blocks and design. this is why my local brake guys couldn't do it as it would have been illegal.

i know there are guys on here running braided lines all i want is some pics to see how you have got around the problem.

THanks

Curt

I get so f*ing fed up with the australian ADR rules they are almost nonsensical to the point of being dangerous. You should be able to go into any brake specialist and get custom hoses made up and they should be able to certify that they are safe for use. That is what you go to a brake specialist for in the first place isn't it?

Create an account or sign in to comment

You need to be a member in order to leave a comment

Create an account

Sign up for a new account in our community. It's easy!

Register a new account

Sign in

Already have an account? Sign in here.

Sign In Now


  • Similar Content

  • Latest Posts

    • Yeah well per the video it took 15s for the stock unit to start up....even if I give it a few seconds discount for starting that is at least 12 sec before you get a reverse camera if you are trying to leave a park.  The android unit is way faster, but 2016 for the stock unit is a long time ago in consumer electronics
    • Yea that’s why I said ima test them with multimeter and see the reads.
    • Only at idle. Isn’t a problem when rev it seems.
    • @Haggerty This seems silly to ask, but are you confident in your ability to tune the Haltech?  
    • Next on the to-do list was an oil and filter change. Nothing exciting to add here except the oil filter is in a really stupid place (facing the engine mount/subframe/steering rack). GReddy do a relocation kit which puts it towards the gearbox, I would have preferred towards the front but there's obviously a lot more stuff there. Something I'll have to look at for the next service perhaps. First time using Valvoline oil, although I can't see it being any different to most other brands Nice... The oil filter location... At least the subframe wont rust any time soon I picked up a genuine fuel filter, this is part of the fuel pump assembly inside the fuel tank. Access can be found underneath the rear seat, you'll see this triangular cover Remove the 3x plastic 10mm nuts and lift the cover up, pushing the rubber grommet through The yellow fuel line clips push out in opposite directions, remove these completely. The two moulded fuel lines can now pull upwards to disconnect, along with the wire electrical plug. There's 8x 8mm bolts that secure the black retaining ring. The fuel pump assembly is now ready to lift out. Be mindful of the fuel hose on the side, the hose clamp on mine was catching the hose preventing it from lifting up The fuel pump/filter has an upper and lower section held on by 4 pressure clips. These did take a little bit of force, it sounded like the plastic tabs were going to break but they didn't (don't worry!) The lower section helps mount the fuel pump, there's a circular rubber gasket/grommet/seal thing on the bottom where the sock is. Undo the hose clip on the short fuel hose on the side to disconnect it from the 3 way distribution pipe to be able to lift the upper half away. Don't forget to unplug the fuel pump too! There's a few rubber O rings that will need transferring to the new filter housing, I show these in the video at the bottom of this write up. Reassembly is the reverse Here's a photo of the new filter installed, you'll be able to see where the tabs are more clearing against the yellow OEM plastic Once the assembly is re-installed, I turned the engine over a few times to help build up fuel pressure. I did panic when the car stopped turning over but I could hear the fuel pump making a noise. It eventually started and has been fine since. Found my 'lucky' coin underneath the rear seat too The Youtube video can be seen here: https://www.youtube.com/watch?v=uLJ65pmQt44&t=6s
×
×
  • Create New...